Planon Connect For Aespect
Introduction
This document outlines the functionality of the ‘Connect for Aespect’ app. The app allows to embed the Aespect viewer in the Planon assets TSI. This way building elements can be visualized.
Prerequisites
Environment
This app is designed to work with Planon L94 and above.
Constraints
- When opening the viewer a manual login is required
- The data between Planon and Aespect should be in sync (for example because it has been added by a Planon maintenance inspection or by using the Aespect import worker)
Required (free)fields
- N/A
Assumptions
- N/A
Features
This chapter describes the features of the Connect For Aespect app.
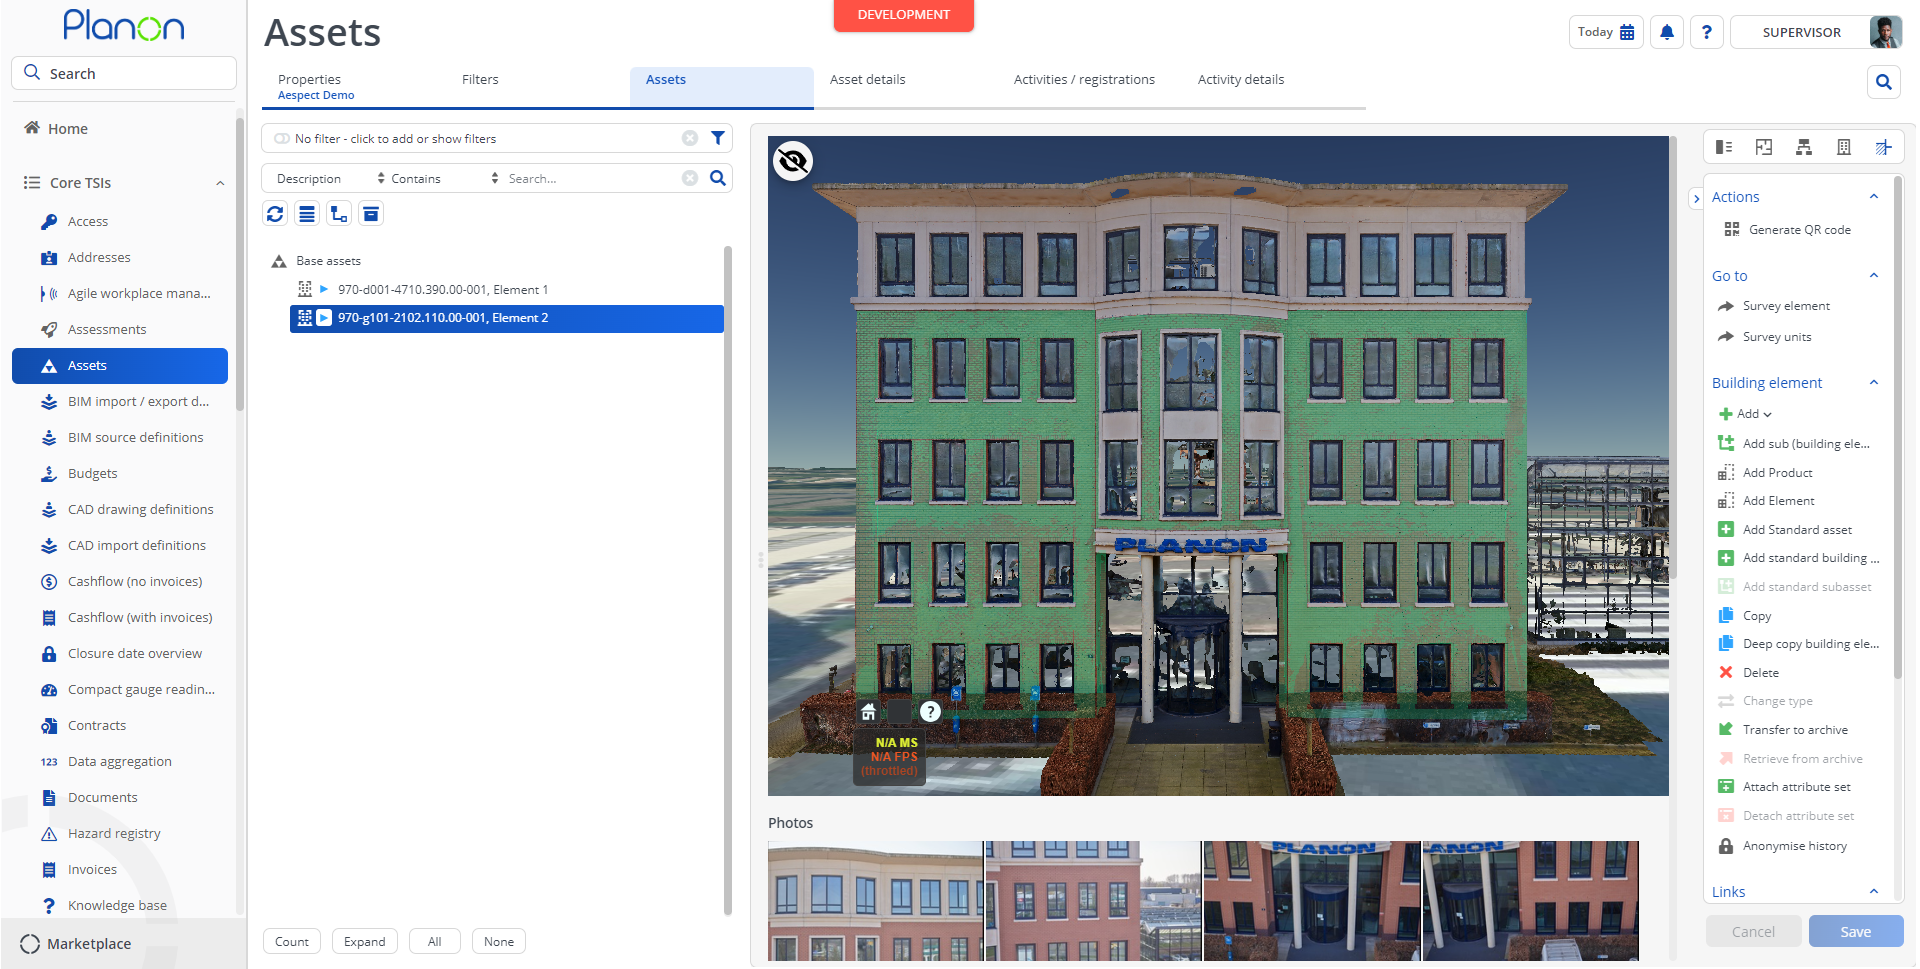
Display Aespect view in Planon
The app allows to display the Aespect viewer in Planon. When clicking an element in Planon this will be highlighted in the Aespect viewer (if available). The other way around, clicking an element in Aespect, will highlight the element in Planon.
View inspection photos
When navigating through the Aespect model Planon will load related photos from Aespect. These photos can be enlarged in Planon by clicking on the thumbnail. To show full quality photo another click can be done, this will open a new tab with the highest quality picture.
Import components from Aespect
The app contains a enterprise talk worker that utilizes the Aespect API to import Aespect components as Assets in Planon. In order to do so the endpoint Aespect endpoint ‘/api/embedded_view/units/{unit_id}/components’ is used.
How does it work?
This chapter contains the functional and technical description of the features.
Mapping between Planon and Aespect
The viewer works by mapping the Planon Asset ‘Code’ field to the Aespect ‘identifier’ field or by using the external bo link (if available). The Planon property code is mapped to the Aespect ‘unit_id’ field in order to retrieve the correct building. Alternatively, when importing components from Aespect the component id can be stored in Planon. In this case the viewer directly maps to the component id in Aespect.
The mapping has to be done manually or could work by semi-default if the assets / building elements in Planon have been onboarded using the Planon Condition Assessor software with the Mask Inventory set to #ObjCode#-#UntCode#-#AssCode#-#COUNT# in the Survey Model. For automatic mapping the Aespect import worker has to be used.
Planon Asset BO
| Planon Field | Aespect Field |
|---|---|
| Code | Planon entity |
| External BO Link | Component id |
| Name | description |
| Quantity | quantity |
| surveySiteRef field from app configuration | part_name |
| Asset condition detail and/or topic score based on app configuration | condition_score |
Planon Property BO
| Planon Field | Aespect Field |
|---|---|
| Code | unit_id |
Deployment
Once the app is installed and activated, a step view must be configured through the Planon TSI Manager. This in order to be able to switch to the Aespect view.
Installation
This chapter describes the steps required to install this app on your Planon environment.
Installation Process
There are two ways to install the app:
- Using the Marketplace
- Manual installation
Install the app by using the marketplace
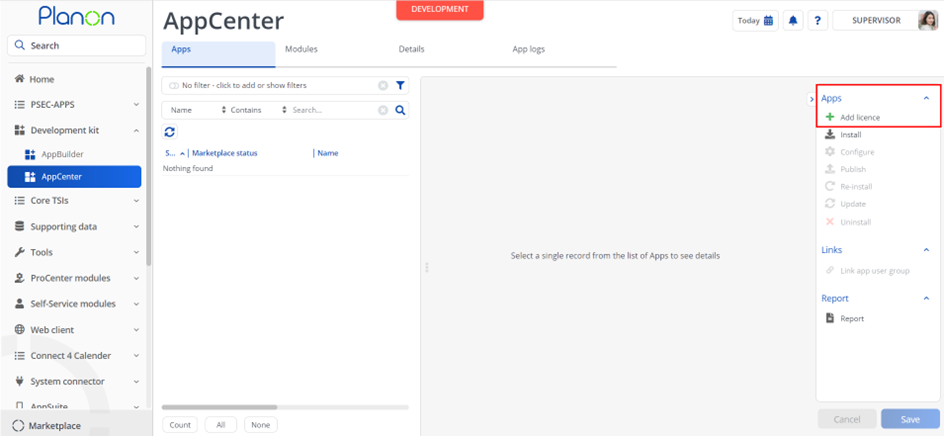
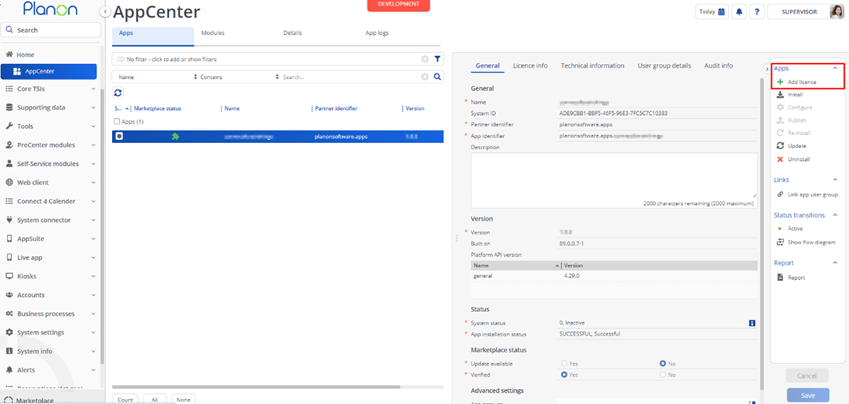
In case your environment is configured to use the Planon app store the only thing required to install the app is to add the app license in the AppCenter TSI. Planon will automatically download and install the app.
Manual installation
In case you want to perform a manual installation follow the steps below.
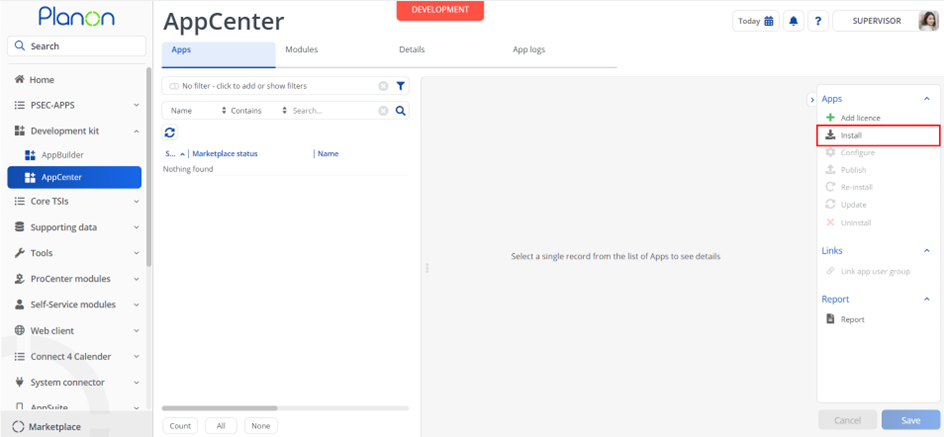
- Open AppCenter TSI from Planon webclient and click on install from action menu
- Browse to the .ppk file
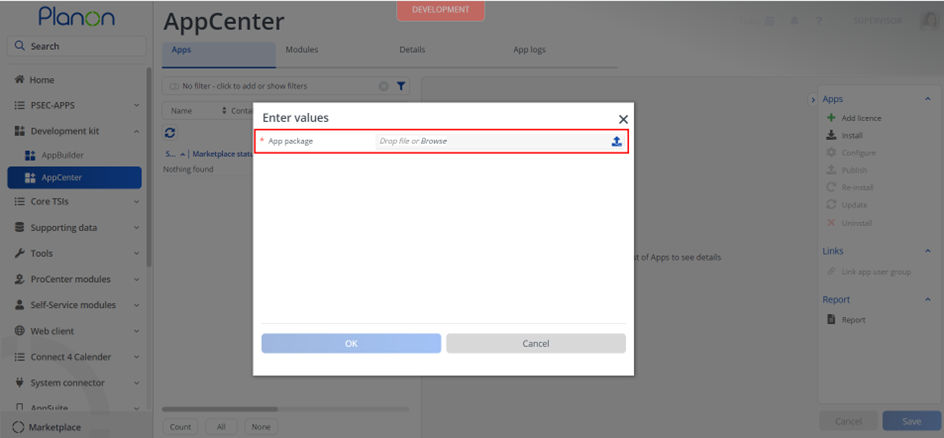
- Click OK to install the app and follow the installation process
- When the app is successfully installed, the app will appear in the AppCenter
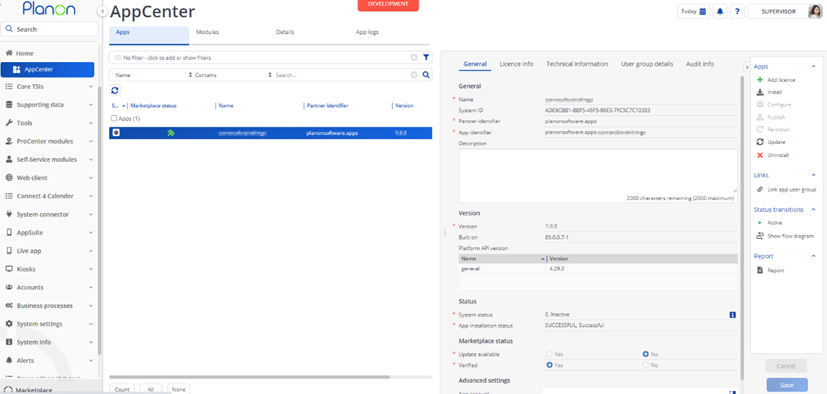
- Add the app license in Apps TSI
App settings
This chapter describes and explains the settings that are available for this app.
- Now that the app is installed, please provide the app settings (the app configuration) for each module in the Details level > Module settings selection step. Provide the module settings.
- For more details regarding the settings see the next chapter.
- Click Save button after providing the module settings.
| Setting | Description |
|---|---|
| useBetaViewer | Set to yes to use the Aespect beta viewer. This has more features but might be unstable. Set to no to use the production viewer. |
| unitOrganization | The Aespect unit organization |
| apiToken | The Aespect API token. Only needed when importing components from Aespect. |
| aespectAPIBaseURL | The Aespect API Base URL. Only needed when importing components from Aespect. |
| importConditionScoreAsAssetCondition | Set this setting to yes in order to import condition scores as asset condition details |
| importConditionScoreAsTopicScore | Set this setting to yes in order to import condition scores as asset topic score |
| surveySiteRefField | A freestring on the Asset to store the Aespect ‘part_name’ value. |
| unitIdField | A freestring on the Property BO to store the Aespect unit id. |
Activation
Once the app has been configured, you can activate the app by pressing the Active status transition from the action panel. Always make sure that the required User groups are linked correctly and the Configure action is executed before activating the App.
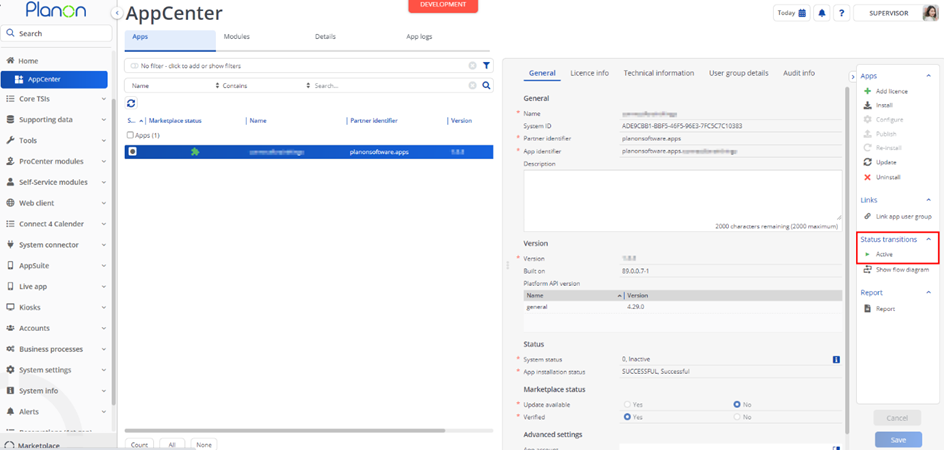
Stepview Configuration
In order the make the Aespect step available in the Assets TSI is must be added. This can be done by following the steps below.
Navigate to the ‘TSI’s’ TSI
Search for the Assets TSI in which you want to add the stepview
Set the TSI under construction
Select the ‘Assets’ selection level
Open the ‘linked step actions’
Set ‘Aespect Viewer’ to in use
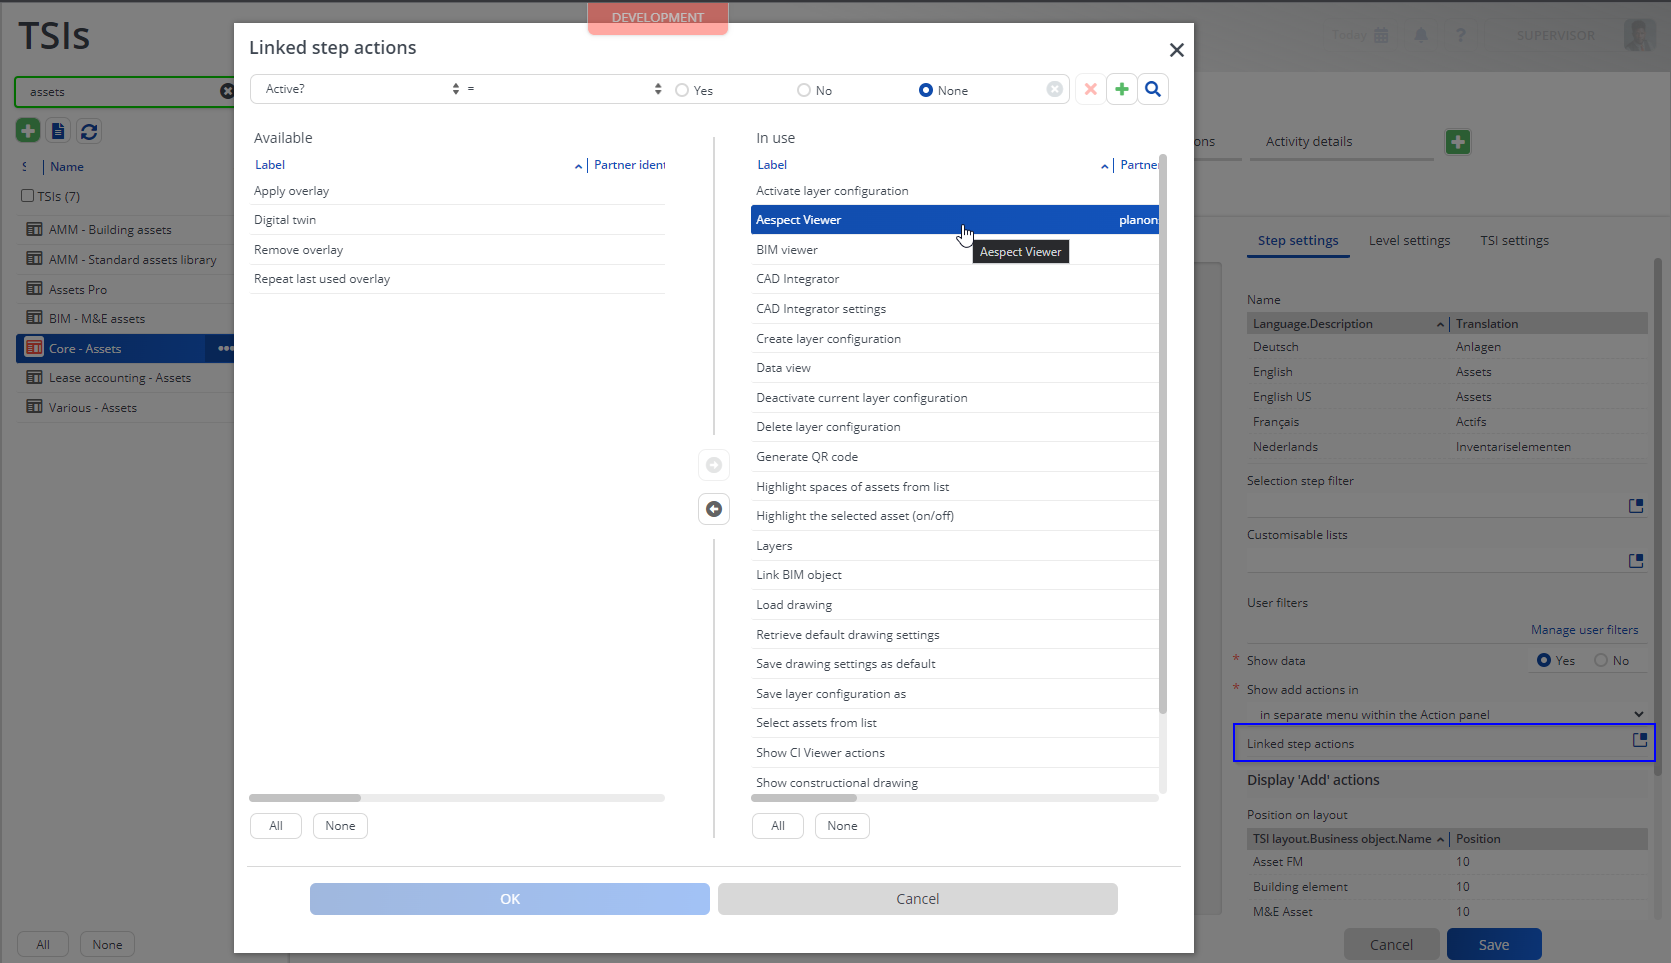
Import Worker configuration (optional)
If you want to automatically onboard Aespect components as Assets in Planon a Enterprise Talk worker can be used.
Go to the TSI ‘external system configuration’ and create a new external system with the Code ‘Aespect’.
Create a new Enterprise Talk definition. Make sure the field ‘use platform workers’ is set to yes.
Drill down to ‘Documents’ and add a new export document
Drill down to ‘Business object definitions’, step ‘import-export workers’
Add a new worker, use the class ‘planonsoftware.apps.aespect.worker.ImportComponentsFromAespect’.
Provide the settings needed for the worker
Go back to the Enterprise Talk definition and execute it. If all is well the Aespect components will be added as Assets in Planon.
External system (optional)
In case you want to use the Aespect import worker an external system must be configured.
Go to the TSI ‘External BO Links’
Create a new external system with the code ‘Aespect’
Third party system configuration
This app does not require any third party system configuration.
Aespect import worker settings
The table below lists the available import worker settings.
| Setting | Description |
|---|---|
| componentCodesBasedOnPlanonLibrary | Set this to yes in order to import the Aespect components based on the Planon library. |
| importQuantity | Set this to yes in order import quantity from Aespect |
| property | The Planon property to import the Assets on |
| standardAsset | The standard asset used to import the components |
| topicScoreTopic | Use this setting to select the topic that will be used for scoring (when enabled in app settings). |
Troubleshooting
Error handling
- Errors are recorded in the server logs:
- Tomcat log for web components
- Webpages
- PSS modules
- Stepview
- TSI Action
- JAX-RS webservices
- Wildfly log for server-side components
- Business rules
- Scheduled tasks
- Workers
- Event Connector
- Tomcat log for web components
- UI components (TSI Actions) also display errors in the interface