Planon Connect For BCI
Introduction
This document describes the features and installation steps for the Planon Connect for BCI App. This app allows to interface data between Planon and BCI and use this data to perform basic environmental calculations.
Prerequisites
Environment
This solution is designed to work with Planon Live L109 and above.
Constraints
There are no constraints for the use of this App.
Required (free)fields
- N/A
Assumptions
- To use this app you need to be in possession of a BCI API key.
Features
This chapter describes the features that this app contains.
Feature 1 – Synchronize / onboard data from BCI environment
The app contains a Enterprise Talk worker which can be used to synchronize base data such as product classes, standard building parts and default mappings between standard assets and building parts. This data is retrieved from the BCI environment. Data can also be updated. The update will happen based on the last synchronization date.
Feature 2 – Add building parts to Assets
The app contains a TSI Action to manully link building parts to assets. Using the action the user can search in the available building parts and when adding these will be linked to the selected asset.
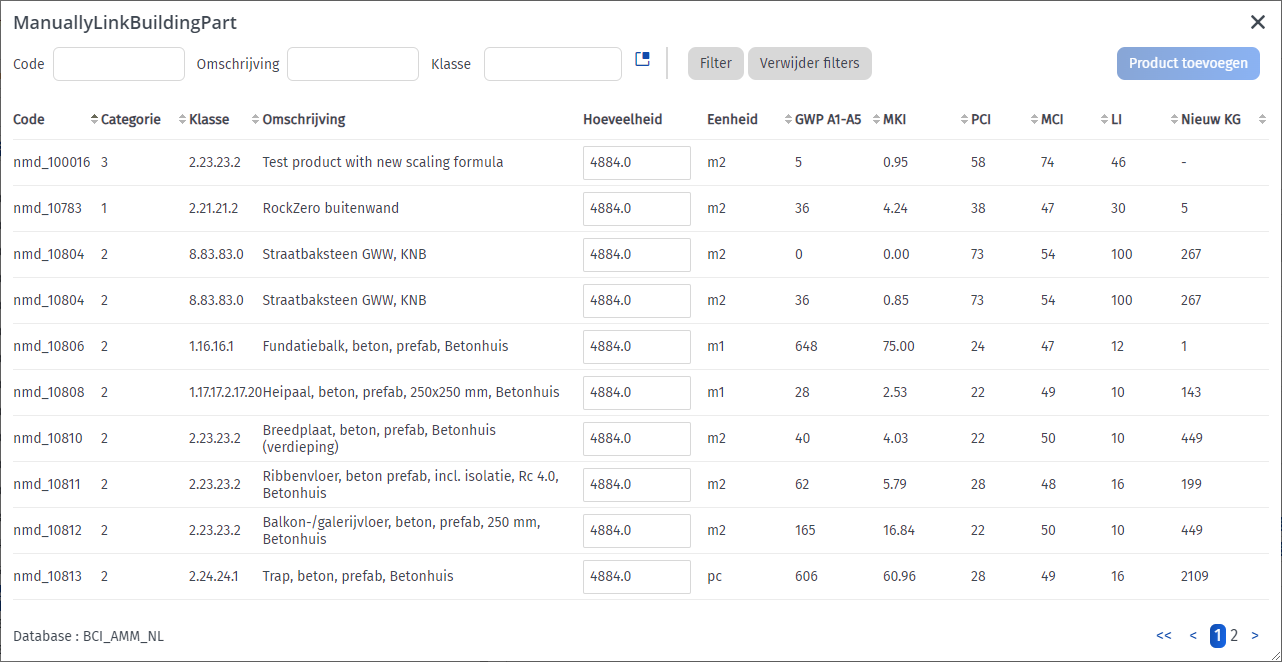
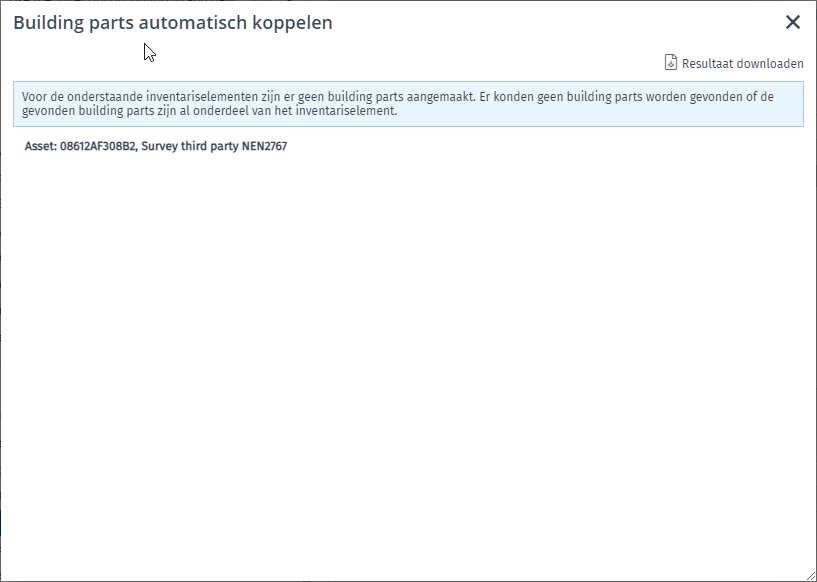
Additionally it is also possible to automatically add relevant building parts to an asset. This feature only works if your assets are based on the standard Planon Building Management asset library.
Feature 3 – Calculate Asset environmental impact
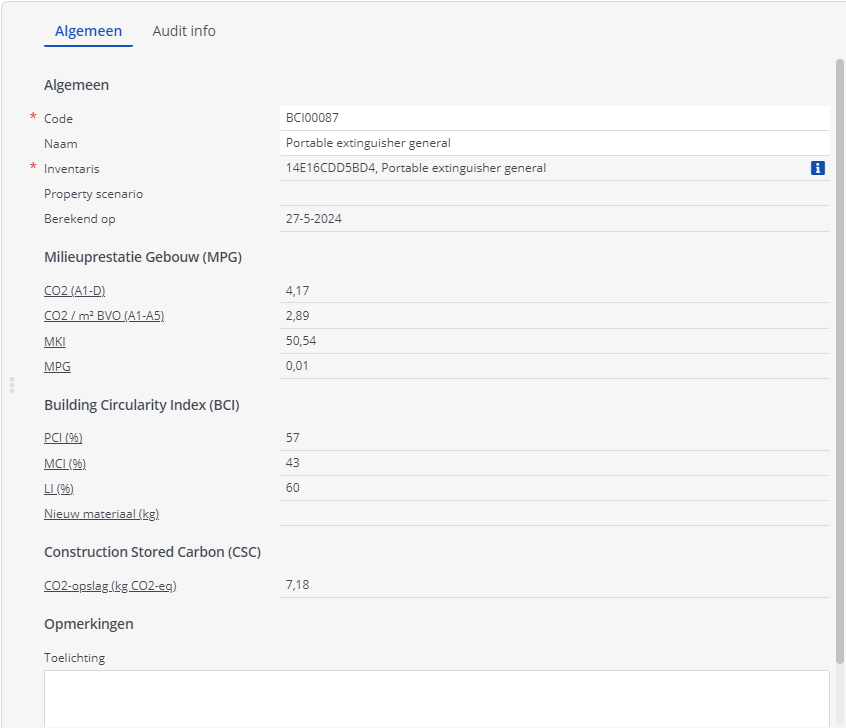
The app contains a TSI Action which an be used to calculate the environment impact of an asset based on the building parts linked to the asset.
Feature 4 – Calculate building environmental impact
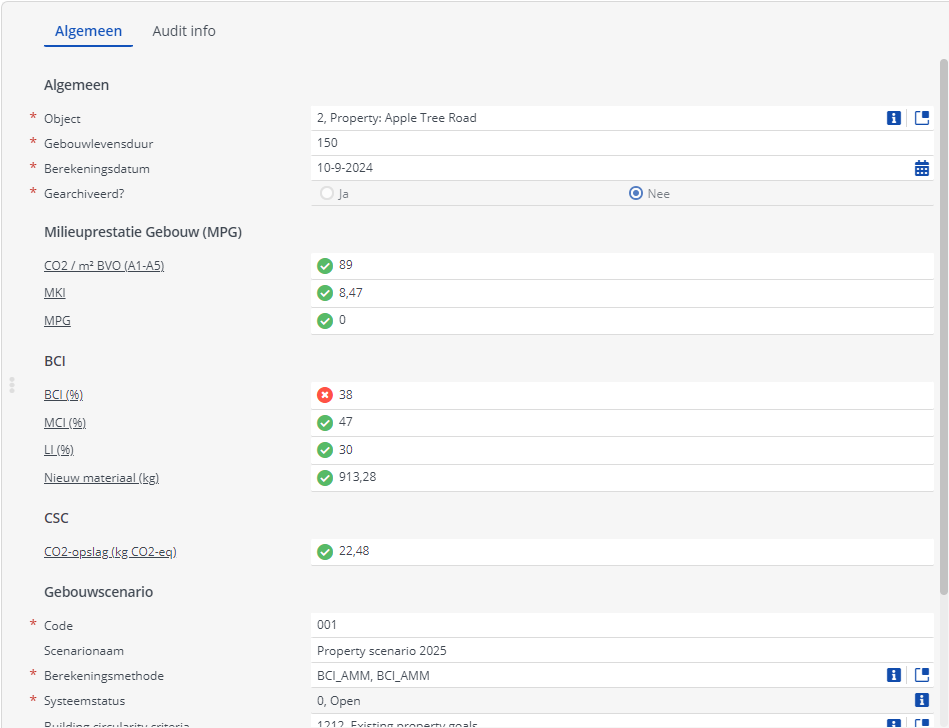
The app contains a TSI Action which can be used to calculate the environmental impact on an building based on the building parts / asset results related to this building.
How does it work
This chapter contains the functional and technical description (if applicable) of the features as described in chapter 3.
Onboarding / data synchronization
The onboarding works by consuming several services which are available on the BCI environment. The onboarding is able to synchronize the following data.
Product classes
The product class have to be synchronized at least once for the app to work. These are stored in the Planon BO ‘ProductClass’.
Standard Mapping
It is possible to synchronize standard suggested mappings between assets and buildings parts from the BCI environment.This is not mandatory. Using standard mappings only works when your assets are based on the standard assets from the Planon Building Management library.
Standard building parts
The building parts are stored in the BO ‘StandardBuildingPart’ and used as a template for adding building parts to assets. Only the building parts which are marked as active in the BCI environment are interfaced.
Country mapping
The BCI database is linked to a country in Planon. The worker used for synchronizing the data contains a setting which is used to map the country codes in BCI and your own environment. It is important to verify the mapping in the worker.
| Code | Description |
|---|---|
| NL | The Netherlands |
Unit of measurement mapping
The worker used for synchronizing the data contains a setting which is used to map the unit of measures used in BCI and your own environment. For example, ‘p’ might be ‘piece’ in BCI but ‘pascal’ in your environment. It is important to verify the mapping in the worker. Any units of measure that cannot be found in your environment will be created. A more detailed explanation about the units of measure used can be found in the table below.
| Code | Description |
|---|---|
| b | Bar |
| Dimensieloos | No dimension |
| GBO | Usable surface area |
| kBq U235-eq. | EF-Ionising radiation, human health |
| Kg | Kilogram |
| Kw | Kilowatt |
| Kwh | Kilowatt hour |
| li | Liter |
| M1 | M1 |
| M1*jaar | M1*jaar |
| M2 | M2 |
| M2BVO | M2 total surface area |
| M2GBO | M2 usable surface area |
| m2K/W | Isolation value |
| M3 | M3 |
| M3*jaar | M3*jaar |
| M3/jaar | M3/jaar |
| Mj | Megajoule |
| mm | Milimeter |
| P | Piece |
| STK | Piece |
| Stuk | Piece |
| tkm | Tonkilometer |
| Ton | Ton |
| Uur | Hour |
| x | Unknown |
Adding building parts to Assets
In order to add buildings parts to assets the TSI action can be used. For the action to work the following prerequisites are required.
Onboarding executed at least once
A property scenario should be available
The property should have a gross floor surface
When the TSI Action is executed it will query the standard building parts available in your environment. Based on the date provided on the property scenario these are already pre-filtered to only show building parts that are valid during this date.
Calculating asset results
The asset result is calculated based on the building parts linked to the asset. The asset result is the combined score of all these building parts.
Calculating property results
Property results are calculated based on all the asset results in the property scenario. The property result is the combined result of the asset results.
Additionally property results are also split into Layer of Brand. To calculate the results per layer of brand the individual building parts in the property scenario are used.
Installation
This chapter describes the steps required to install this app on your Planon environment.
Installation Process
There are two ways to install the app:
- Using the Marketplace
- Manual installation
Install the app by using the marketplace
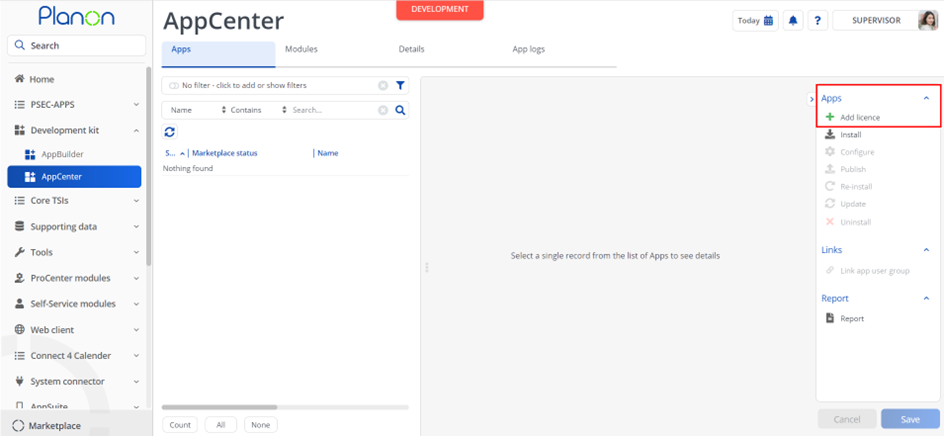
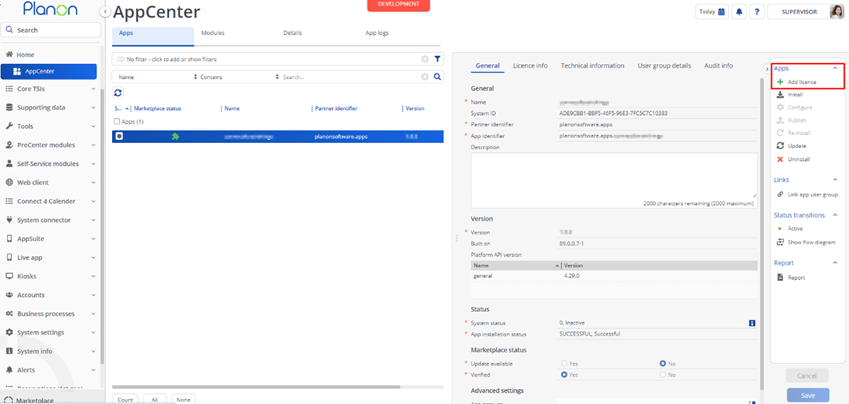
In case your environment is configured to use the Planon app store the only thing required to install the app is to add the app license in the AppCenter TSI. Planon will automatically download and install the app.
Manual installation
In case you want to perform a manual installation follow the steps below.
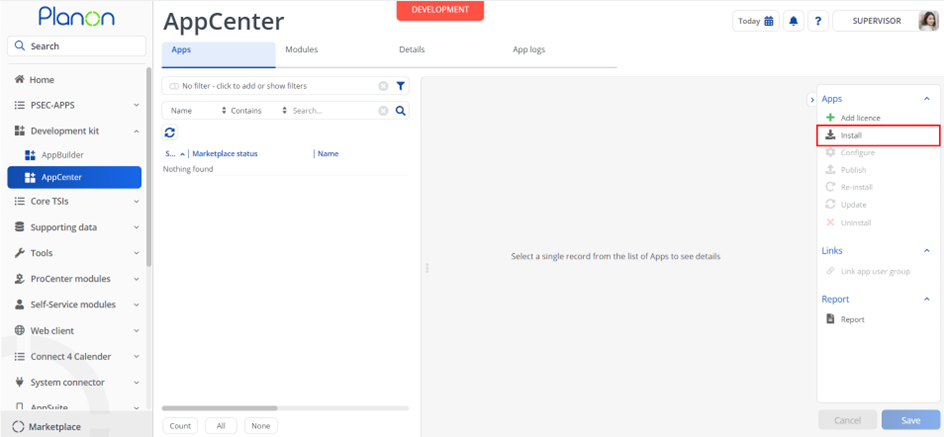
- Open AppCenter TSI from Planon webclient and click on install from action menu
- Browse to the .ppk file
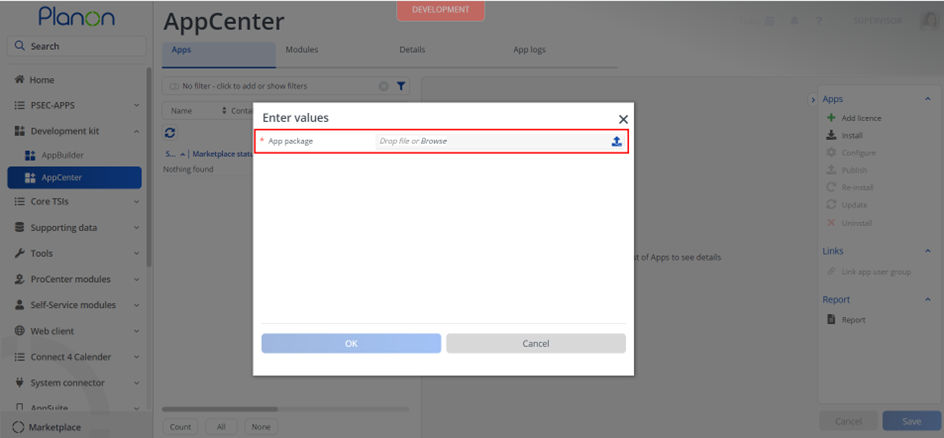
- Click OK to install the app and follow the installation process
- When the app is successfully installed, the app will appear in the AppCenter
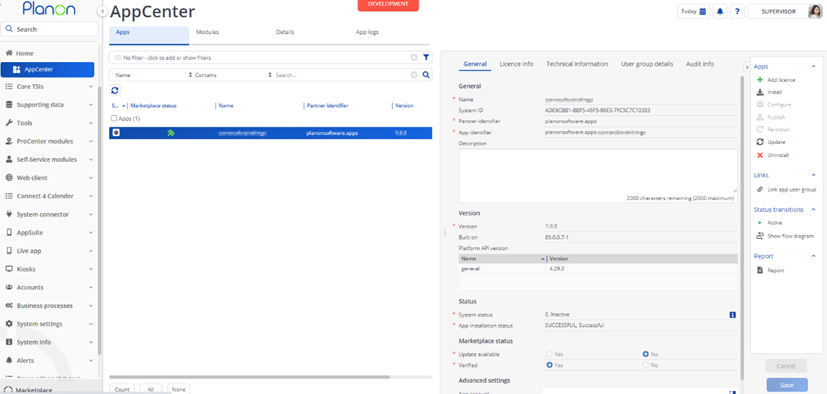
- Add the app license in Apps TSI
App settings
This chapter describes and explains the settings that are available for this app.
Now that the app is installed, please provide the app settings (the app configuration)for each module in the Details level > Module settings selection step. Provide the module settings.
For more details regarding the settings see the next chapter.
Click Save button after providing the module settings.
Description of module settings
This chapter describes the module settings available in the connect for BCI app.
| Name | Default value | Description |
|---|---|---|
| bciAccessKey | - | The BCI access key to be used. |
| bciEnvironmentURL | https://bcigebouw-dev.planoncloud.com | The BCI environment used to retrieve base data |
Activation
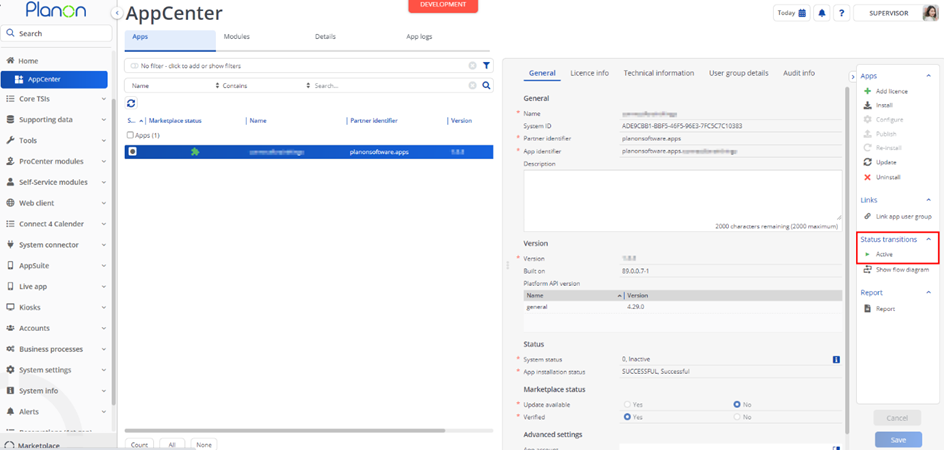
Once the app has been configured, you can activate the app by pressing the Active status transition from the action panel. Always make sure that the required User groups are linked correctly and the Configure action is executed before activating the App.
Planon Configuration
This chapter describes the Planon configuration needed.
Onboarding using Enterprise Talk
In order to automatically download standard building parts etcetera an Enterprise Talk worker can be used.
Create a new Enterprise Talk definition. Make sure the field ‘use platform workers’ is set to yes.
Drill down to ‘Documents’ and add a new export document
Drill down to ‘Business object definitions’, step ‘import-export workers’
Add a new worker, use the class ‘planonsoftware.apps.connectforbci.worker.SynchronizeStandardBuildingParts’.
Provide the settings needed for the worker
databasesToSynchronize
- This setting can be used to configure which databases should be synchronized. Currently only NMD is available.
countryMapping
- This setting contains the mapping between country codes used in BCI and your own environment. A default configuration is already provided. It is highly recommended to verify this setting!
synchronizeProductClasses
- Set to yes to synchronize product classes. Needs to be done at least once.
synchronizeStandardAssetsStandardBuildingParts
- Set to yes to synchronize the default mapping. Not mandatory. This can only be used if your assets are based on standard assets from the Planon Building management library.
unitOfMeasurementMapping
- This setting contains the mapping between unit of measurement used in BCI and your own environment. A default configuration is already provided. It is highly recommended to verify this setting!
classificationStandardsToSynchronize
- The classification standards to synchronize (for example nlsfb).
apiVersion
- The BCI API version to use
Go back to the Enterprise Talk definition and execute it. If all is well, based on the selected options, the data should be synchronized.
Registering the TSI Actions
Follow the steps below in order to register the TSI Actions on the appropriate BO’s.
Go to the TSI ‘Field Definer’
Find the assets BO to which you want to add the TSI Action
Set the BO under construction
Go the ‘Details’ selection level
Go to step ‘extended actions’ and add the following actions
planonsoftware.apps.connectforbci.tsiaction.AutoLinkBuildingParts
planonsoftware.apps.connectforbci.tsiaction.CalculateAssetBCIResult
planonsoftware.apps.connectforbci.tsiaction.ManuallyLinkBuildingPart
Return to business objects and set the BO in completed state
Go to the layout of the BO used in step 2 and add the TSI Actions to the layout
The same steps can be used to add the TSI Action ‘planonsoftware.apps.connectforbci.tsiaction.CalculatePropertyScenario’ on BO ‘CircularPropertyScenario’.
Troubleshooting
Error handling
- Errors are recorded in the server logs:
- Tomcat log for web components
- Webpages
- PSS modules
- Stepview
- TSI Action
- JAX-RS webservices
- Wildfly log for server-side components
- Business rules
- Scheduled tasks
- Workers
- Event Connector
- Tomcat log for web components
- UI components (TSI Actions) also display errors in the interface