Planon Connect for Disruptive Technologies - IoT
Introduction
Planon Connect for Disruptive Technologies will greatly simplify the onboarding process for Disruptive Technologies sensors. The app automates numerous mandatory steps within the onboarding process, resulting in time savings and a decrease in errors.
Prerequisites
Environment
This solution is designed to work with Planon Live L99 and later.
Constraints
There are no constraints for the use of this App.
Required (free) fields
No free fields are required for this App.
Assumptions
The design and functionality of the solution is based on the following assumptions.
Activate IoT is enabled – Planon has a connection with Planon IoT
Planon Event connector is configured (required) – to be able to send and receive messages
The AuthKey provided within the TSI IoT Gateway is provided to the Disruptive Technologies studio.
IoT user must be linked to App in order to be accessible by Planon IoT
IoT user linked to Planon IoT admin user group must be the same user as configured in field ‘IoT user’ in IoT system settings TSI.
You must press configure BOM before you can enable the App.
When the above conditions are not met, the App will not work.
Errors will be displayed in the log files - please refer to the Troubleshooting chapter.
Features
This chapter describes the features that this app contains.
Creating products, gateways and schema’s
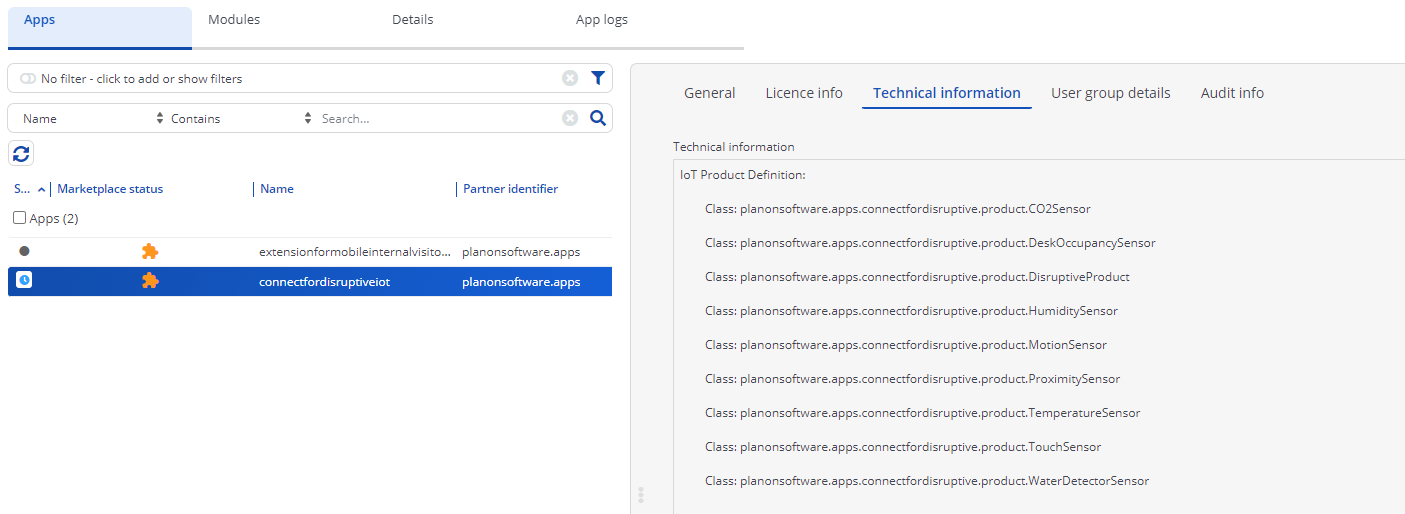
The app contains various definitions that are responsible for creating 9 different Products. Among these, one serves as the default product.
The ‘DisruptiveProduct’ is the default product where all sensors are initially onboarded on. The system then checks the type and correctly moves the sensor to the right product.
We will not further specify each different product. They are self-evident for each type of disruptive sensors.
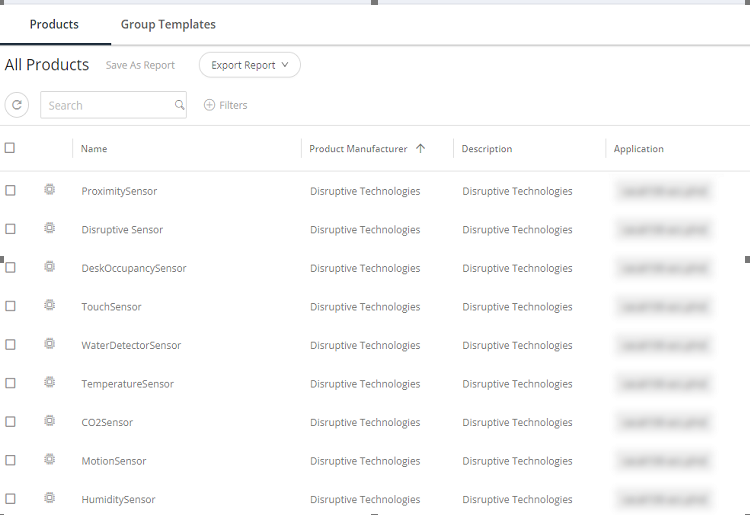
After enabling the App, the corresponding products will be created on the Planon IoT platform automatically.
Disruptive Technologies use the HTTPS protocol.
Onboarding
Planon IoT will be used to support thousands of devices. Manually onboarding each device and linking them to digital twins is a cumbersome and error prone process. This App will provide ways to automatically onboard new devices and link them to the correct Disruptive product. Eventually create Digital Twins if the sharedId of Planon BO is part of the incoming message
How it works
This chapter contains the functional and technical description (if applicable) of the features as described in chapter Features. Generally speaking, all data received from Disruptive is pushed to a Planon webservice using webhooks.
Creating products, gateways and schema’s
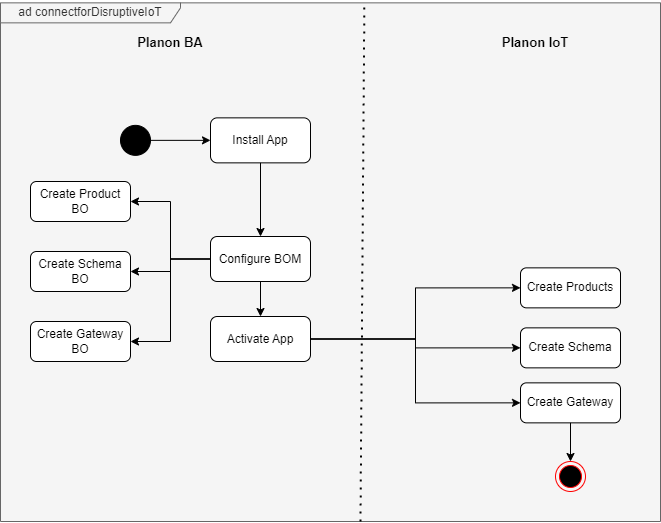
Creating the default product
Once the App is activated and the Gateway is created, the default product on the IoT platform will be created.
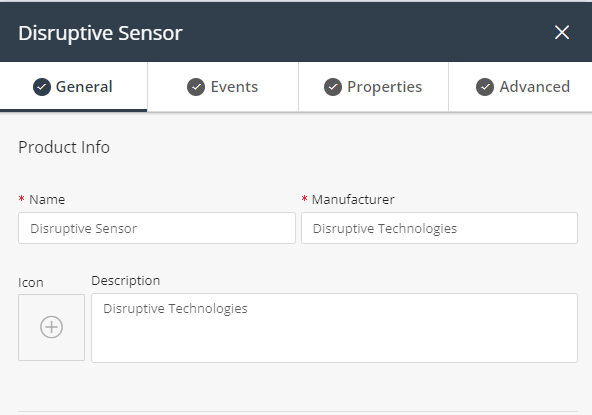
The default product will contain all datapoints a Disruptive Technology device might have.
The default product contains the gateway, required to onboard devices. The default product will be created on the ‘customer tenant’.
All onboarded devices will initially be connected to this default product. From here, the sensors need to be moved to the correct products and applications.
Devices are not meant to stay assigned to the default product long.
Tip: Since the default product and initially onboarded, devices are created on the ‘customer tenant’, they may not be immediately visible to the user. Please refer to the webhelp to learn more about the tenant structure. You need to use ‘Jump to Environment’ BOM to correctly move the devices to its applications https://webhelp.planoncloud.com/en/index.html#page/Planon%20IoT/c_iot_settings-1.html
Creating multiple Disruptive Technologies products
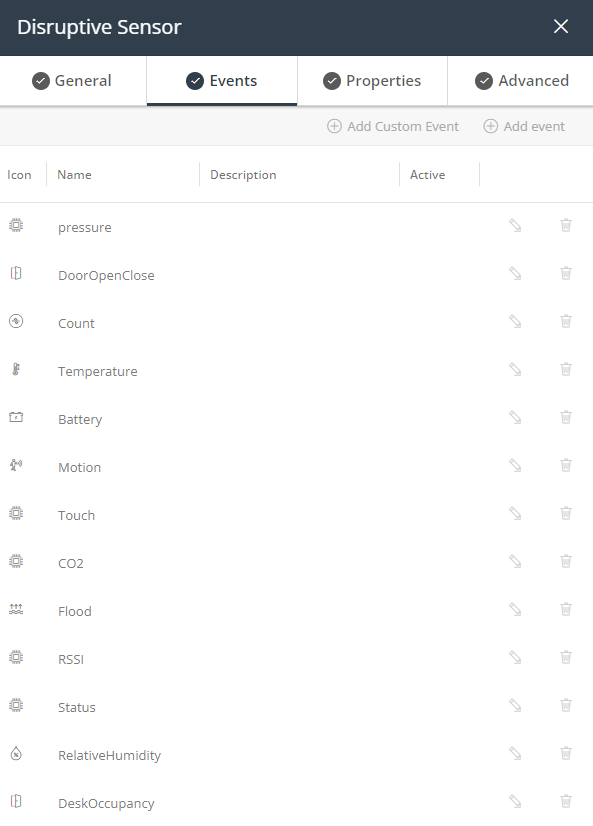
Besidethe default products, nine additional products will be created in the IoT platform. These products contain the specific events for that specific type of product and they include the schema.
Datapoints
Each product will have its own specific datapoints matching the Disruptive Technologies product.
All datapoints are automatically configured and filled with the correct data: such as type, name, aggregation methods and unit of measurements.
Creating the schema
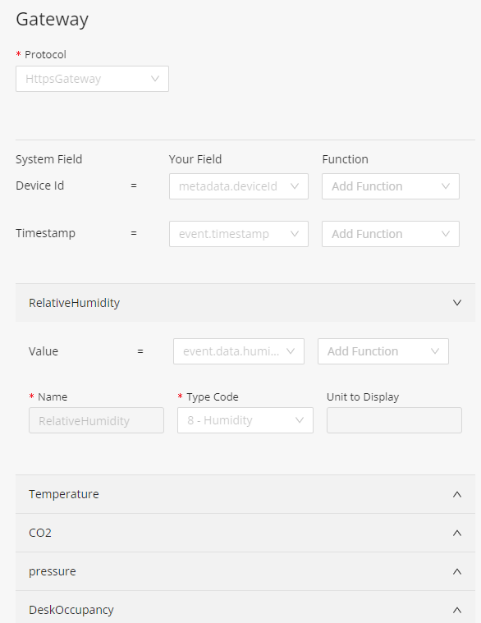
The schema makes sure that the incoming data from devices are matched to the correct fields and types on the IoT platform.
The schema will be automatically created and managed by the App. For some users, the schema may not be visible due to authorization.
Onboarding
Moving devices to the correct product
The message each Disruptive Technologies (DT) sends contains the device type.
Looking at the device type, Planon knows to which product the DT sensor belongs to. Using the device type, the sensor will be linked to the corresponding product.
Creation of Digital Twins
The message each Disruptive Technologies (DT) sends sharedID of Planon object under the labels section as sharedId
We use this sharedId to find Planon Business Object and then create a Digital Twin if the BO is found, else we skip the creation of Digital Twin.
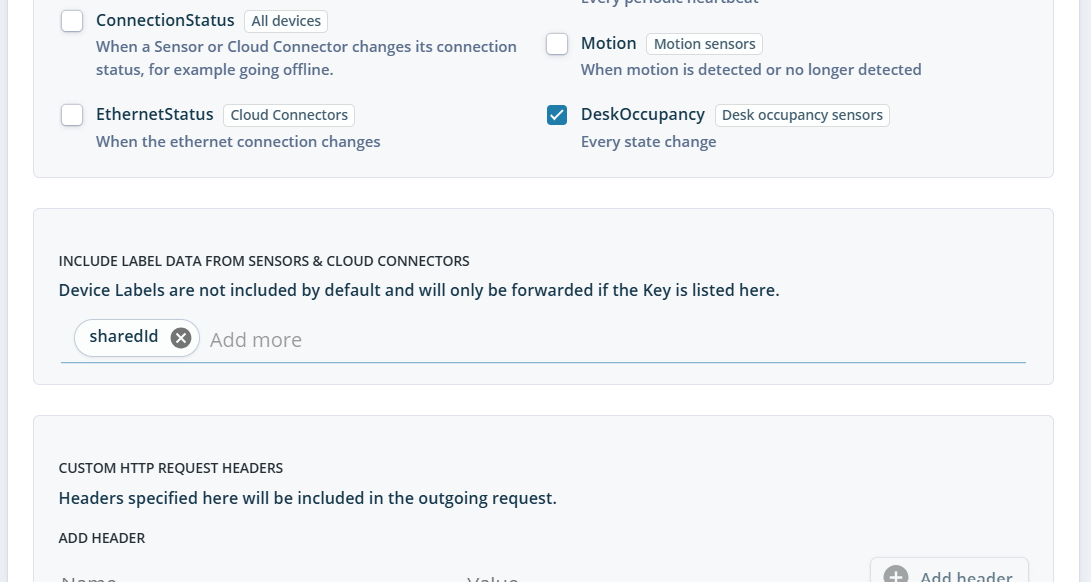
This label needs to be included as part of data connector in DT Studio
Example message showing sharedID lable and device type:
{
    "event": {
        "eventId": "caso2j8t10jao56pk22033295",
        "targetName": "projects/cg7hsee3r2vq0mvm6pjg/devices/c3rbcucq88bg00f11fl0",
        "eventType": "humidity",
        "data": {
            "humidity": {
                "temperature": 26.45,
                "relativeHumidity": 18,
                "updateTime": "2025-01-24T16:31:53.324000Z"
            }
        },
        "timestamp": "2025-01-24T16:31:53.324000Z"
    },
    "labels": {
        "name": "LEVE047-G101-OG03-00305",
        "sharedId":"C024363A-4CF9-448C-B3FD-600ABE8C0B86"
    },
    "metadata": {
        "deviceId": "testdevice103",
        "projectId": "cg7hsee3r2vq0mvm6pjg",
        "deviceType": "humidity",
        "productNumber": "102081"
    },
    "appId": "E50F9BEC-3B55-4D36-8200-85E15887371E",
    "productId": "65524f1e2a3ee7b45ebc1cfc"
}
After creation and linking of digital twin with device, the device is moved to correct application level
HTTPS authentication key
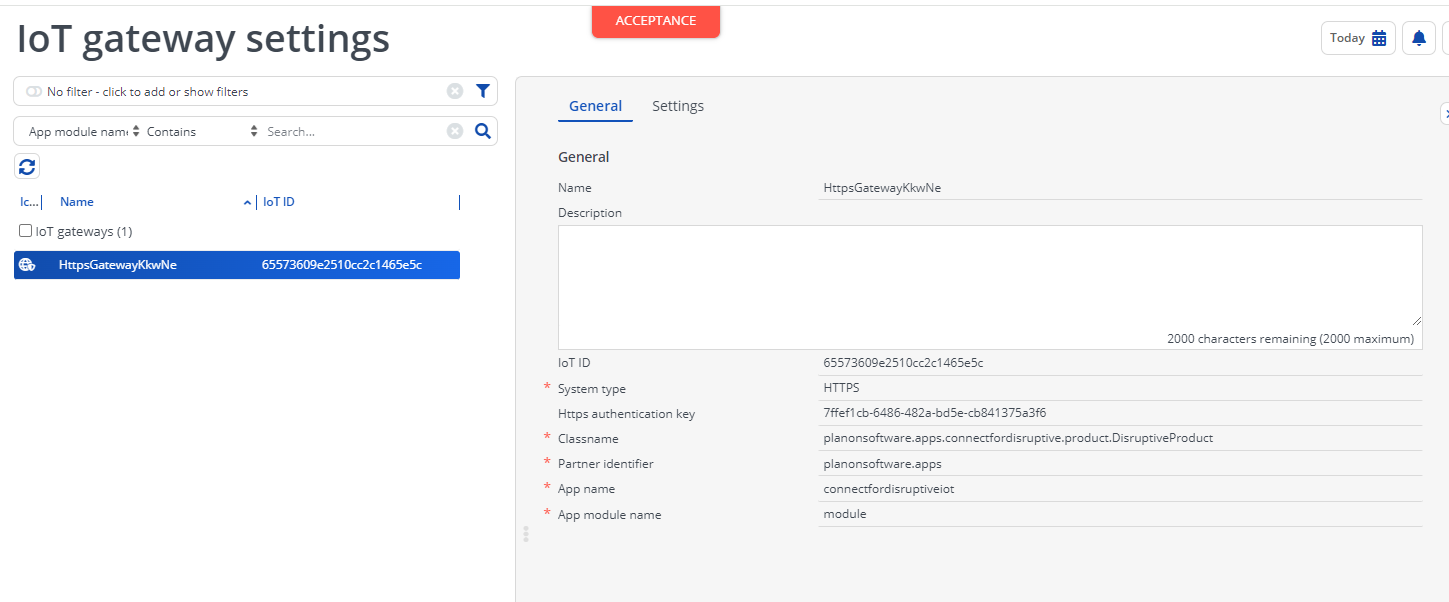
You need to access the Gateway TSI (FIOT_IoTGatewaySettings)
There all your gateways are displayed
https://webhelp.planoncloud.com/en/index.html#page/Planon%20IoT/c_iot_gateway_settings.html
When the App is configured and activated. The next step is to create the Gateway in the Gateway TSI.
The HTTPS authentication key is required. You need to fill this key in your Disruptive Technologies studio. This will enable the studio to send the sensor readings to Planon IoT.
Deleting the App
When the App is deleted, Planon will remove all products and associated devices. This action carries significant implications as it entails the deletion of all onboarded devices, resulting in the loss of their historical data. The digital twins will still contain the aggregated data that was provided by these devices.
De-activating the App, does not have any effect.
Installation
This chapter describes the steps required to install this app on your Planon environment.
Installation Process
There are two ways to install the app:
- Using the Marketplace
- Manual installation
Install the app by using the marketplace
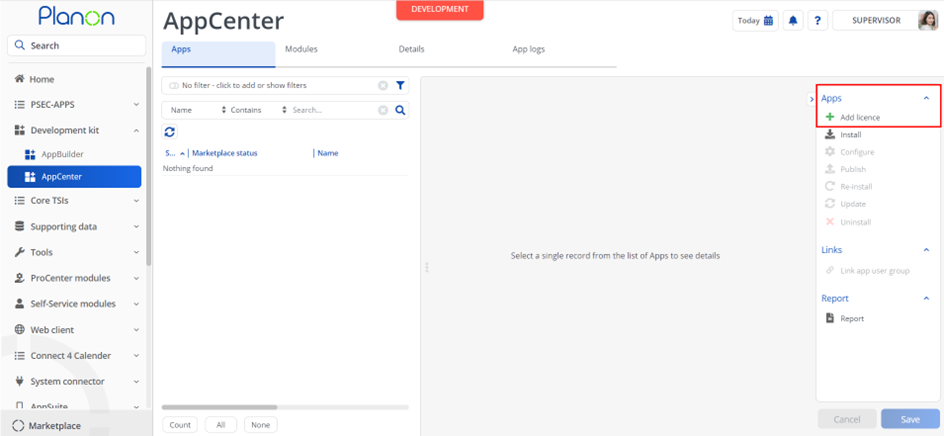
In case your environment is configured to use the Planon app store the only thing required to install the app is to add the app license in the AppCenter TSI. Planon will automatically download and install the app.
Manual installation
In case you want to perform a manual installation follow the steps below.
- Open AppCenter TSI from Planon webclient and click on install from action menu
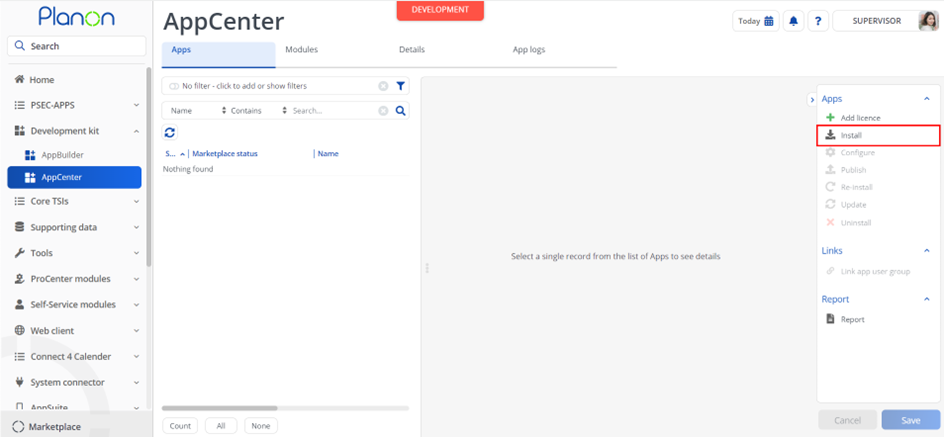
- Browse to the .ppk file
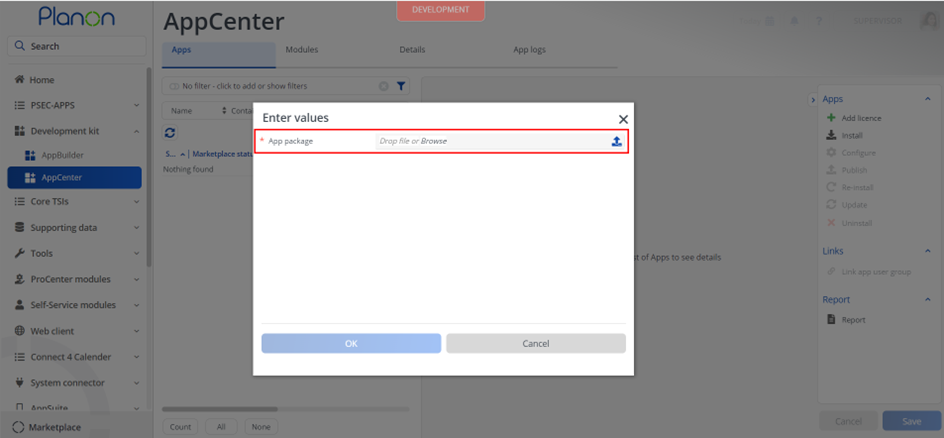
- Click OK to install the app and follow the installation process
- When the app is successfully installed, the app will appear in the AppCenter
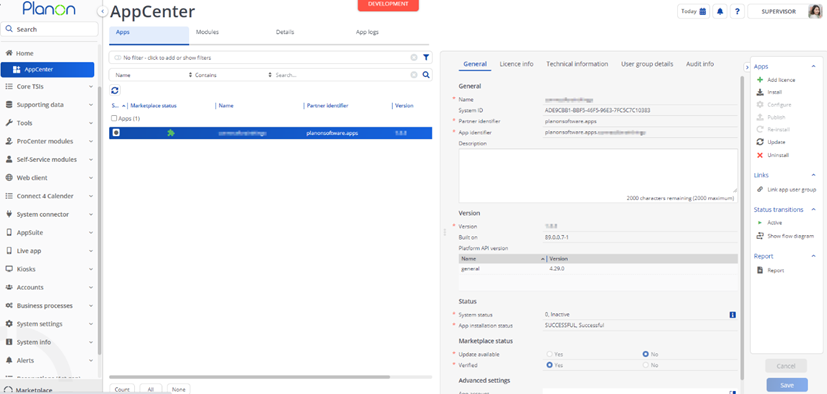
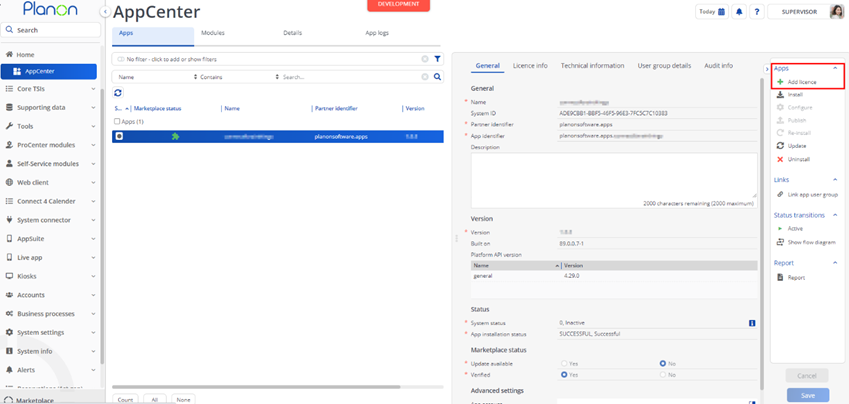
- Add the app license in Apps TSI
App settings – Keep-Alive Thresholds
For all the available Disruptive sensors, you can configure the keep-alive thresholds.
The default value is -1, signifying constant connectivity even in the absence of readings from the device. This parameter is adjustable, allowing you to define the duration before a device transitions to a disconnected state in the absence of readings.
Configuration
Before activating the App, you must first click the Configure action.
With this action, the required configuration and data in Planon will automatically be created.
During configuration, the required BOs and settings in Planon will be created automatically.
Activation
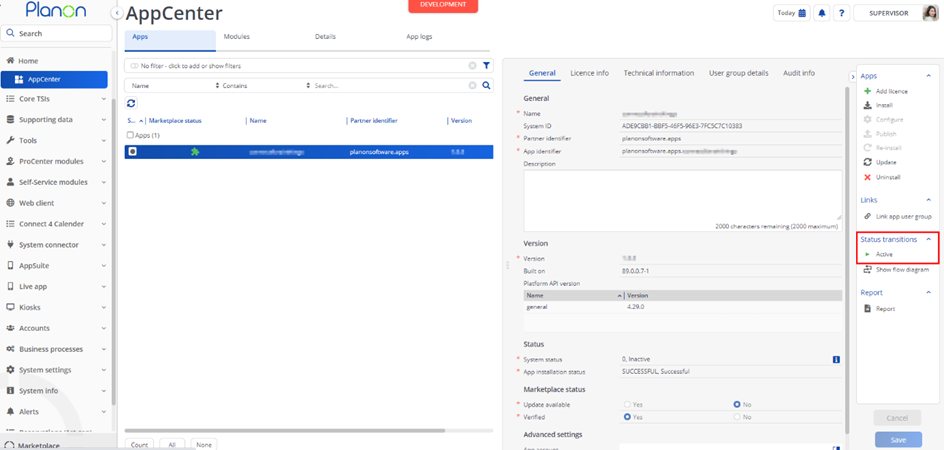
Once the app has been configured, you can activate the app by pressing the Active status transition from the action panel. Always make sure that the required User groups are linked correctly and the Configure action is executed before activating the App.
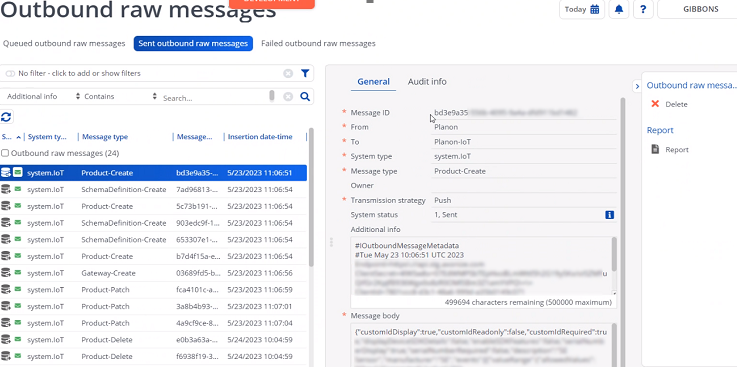
After activation, several outbound messages will be sent to the Planon IoT Platform in order to create the required Products and Schemas. The outbound message to create the Gateway will be send to the IoT platform, after the Gateway is created in the Gateway TSI.
Third party system configuration – Disruptive Studio
How to send Disruptive Technologies data to the HTTPS gateway**
Login to Disruptive Technologies Studio
Select the Project
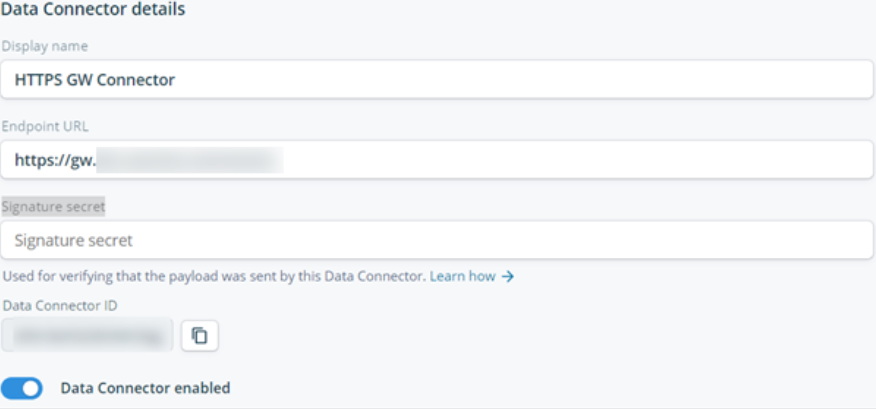
Go to API Integration/Data Connectors and ‘Create New Data Connector’
Enter a ‘Display name’ per user preference
Paste into the ‘Endpoint URL’ the HTTPS Gateway DNS per table below (‘HTTPS Gateway DNS’).
For PlanonIoT this is: https://gw.ams.planoniot.com/events
Leave ‘Signature secret’ blank
Select the Events to be forwarded to Planon IoT
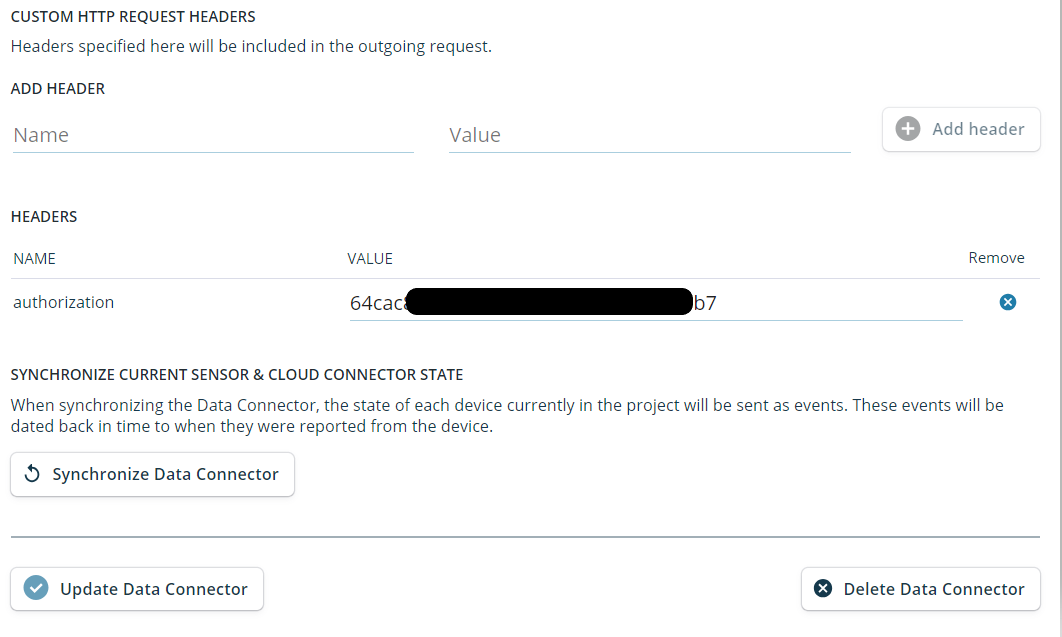
Add a Header:
Name - ‘authorization’
Value - The “authKey” generated when creating the GW.
- Include label ‘sharedId’
- Click ‘Save New Data Connector’
Check first Disruptive device in Planon IoT
When the first Disruptive Device (based on sensor or emulated sensor) is generated in Planon IOT, check if the Product type is matching the sensor type. See the picture below for an example of a correctly registered device.
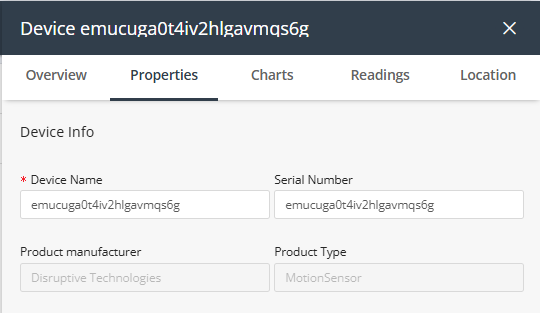
An example of a correct device (Disruptive Sensor = motion sensor) – product type ‘MotionSensor’:
If the Product Type is ‘UNSPECIFIED_Disruptive Technologies_Disruptive Sensor’, the configuration is not 100% correct and this could lead to problems.
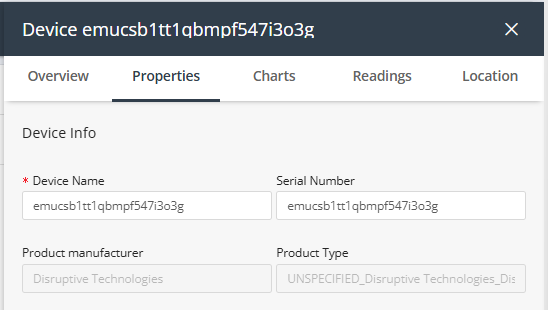
Example of an incorrect device – Product type is not correct
If this mistake is giving problems (also in the future), then the device must be deleted, with the loss of all data and loss of the link to the Digital Twin (there is no workaround for this).
Checking if the data on the device tiles, the data is correct on the Digital Twin or even is correct in Planon, does not grant that the configuration is correct!
Even if the data looks good, the configuration could be technically incorrect. The Wildfly logging can give indication where the configuration issue is.
Examples of the Wildfly logging indicating an configuration issue:


Example of the Wildfly logging of a correct processed device:

Troubleshooting
This chapter provides a comprehensive overview of common occurrences and known issues that can serve as a reference when the app is not functioning as anticipated.
Error handling
For all components, any errors encountered will be logged in the server logs. Additionally, components that feature a user interface, such as TSI Actions, will display any errors directly within the interface.
IoT activated
Make sure that IoT activated is set to Yes. This means the required clientID/secret of the Planon IoT platform is filled in.
You need to have specific IoT products in your License to enable IoT.
IoT user should be linked to the App
If the defined IoT user is not configured in the App. The App will not be able to communicate between Planon business application and Planon IoT.