Planon Connect For Terabee IoT
Introduction
Planon Connect for Terabee IoT streamlines the onboarding process for Terabee IoT devices. This app automates several essential steps during onboarding, leading to time savings and a reduction in errors.
This app facilitates the onboarding of Terabee devices into Planon IoT using the HTTPS Gateway. Additionally, it records People In and People Out readings within the Planon IoT system. Notably, this app supports sensor vendors, provided their payload adheres to the specified format in subsequent chapters.
The following (HTTPS) gateways are supported
Actility Gateway
PoE Gateway
TheThings Gateway
OpenArea-PoE Gateway
Additionally, this application calculates the People Count for each device by determining the difference between the aggregated People In and People Out readings from multiple sensors.
Prerequisites
Environment
This app is designed to work with Planon L100 and above.
Constraints
Active Planon IoT
IoT user must be linked to the App in order to be accessible by Planon IoT
User linked to the app should always have access to Event Connector, Enterprise Service API and Json Services product
Required (free)fields
N/A
Assumptions
N/A
Features
This chapter describes the features of the Connect for Terabee IoT app.
Onboarding
This app creates a gateway that enables the onboarding mechanism for the devices coming to Planon IoT. Planon IoT checks if the incoming device is new or existing based on the Custom ID.
If the incoming device is new, a device will be created in Planon IoT along with the record reading based on a defined schema.
Record reading in Planon IoT
Gateway creation by this app also takes care of updating readings from the devices into Planon IoT. Storage of readings is determined by the defined schema within the app. Readings are pushed to a Planon webservice using a webhook concept.
Currently the defined schema supports to store:
People In; People Out (Count coming from People flow sensor)
Latitude, Longitude
Time values
People Count (Difference of People In and People Out)
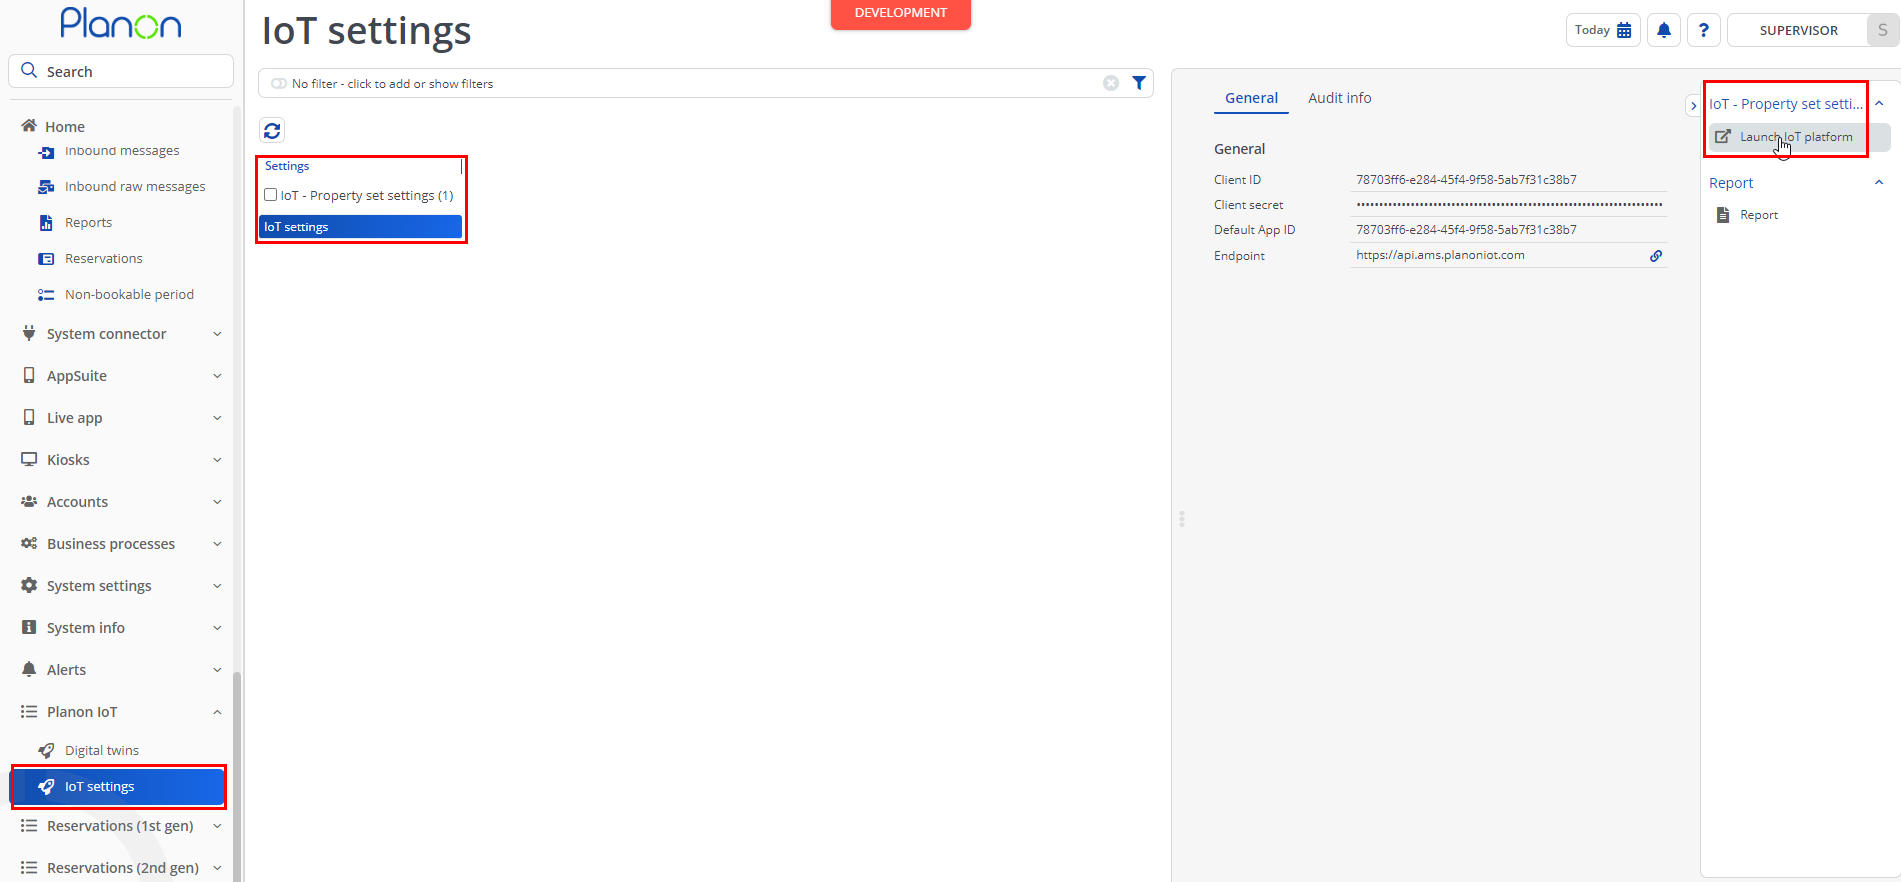
Planon IoT installation and configuration
Before we can start using the app, Planon IoT must be activated and configured.
For more information about Planon IoT and settings please visit Planon webhelp: IoT system settings (planoncloud.com)
Installation
This chapter describes the steps required to install this app on your Planon environment.
Installation Process
There are two ways to install the app:
- Using the Marketplace
- Manual installation
Install the app by using the marketplace
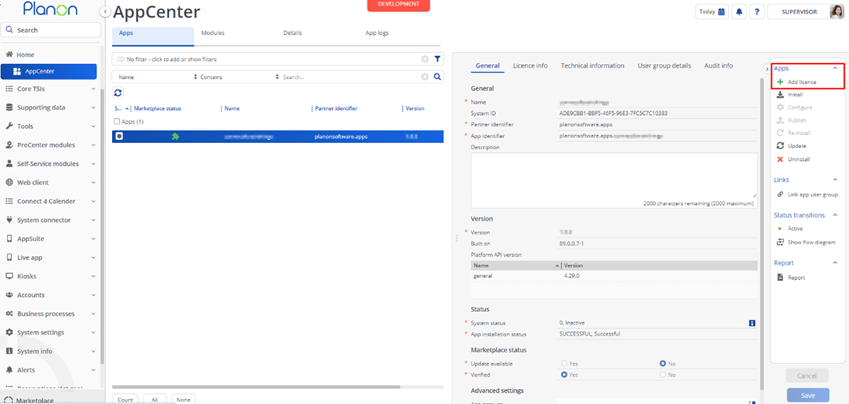
In case your environment is configured to use the Planon app store the only thing required to install the app is to add the app license in the AppCenter TSI. Planon will automatically download and install the app.
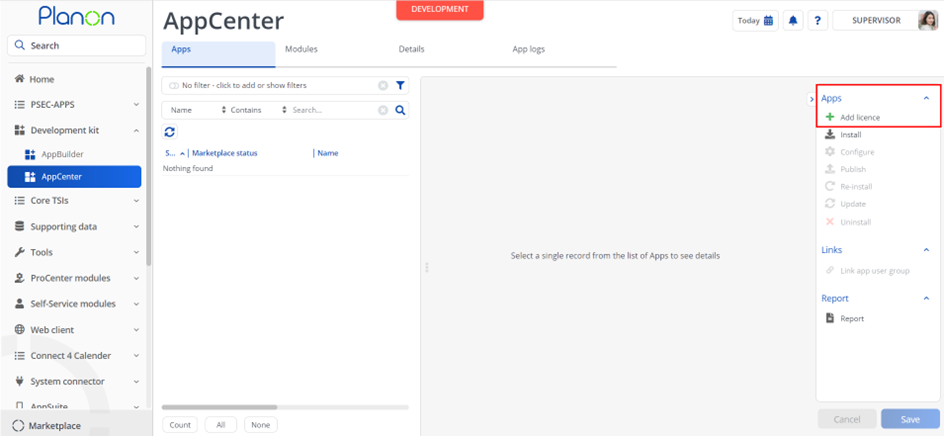
Manual installation
In case you want to perform a manual installation follow the steps below.
- Open AppCenter TSI from Planon webclient and click on install from action menu
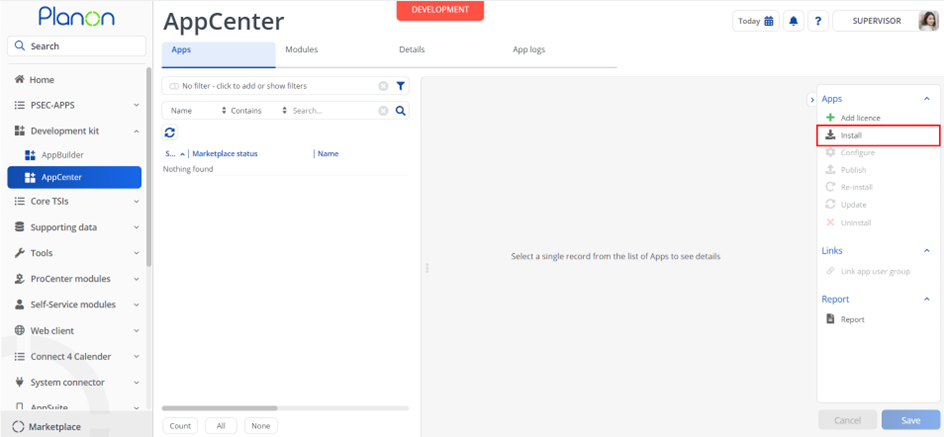
- Browse to the .ppk file
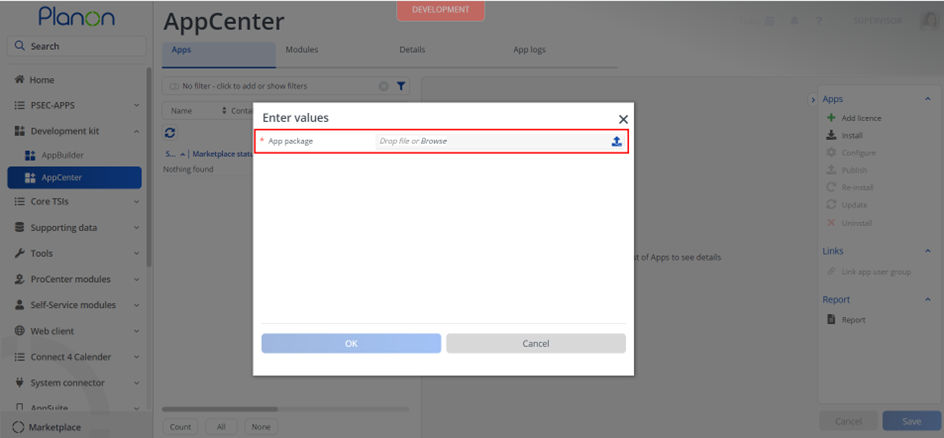
- Click OK to install the app and follow the installation process
- When the app is successfully installed, the app will appear in the AppCenter
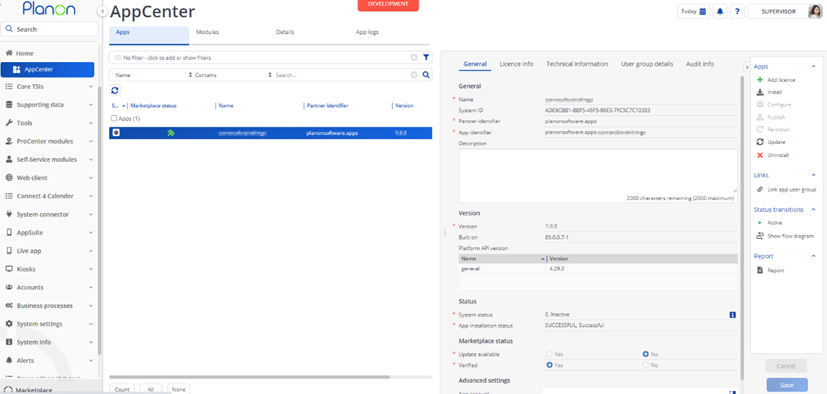
- Add the app license in Apps TSI
Configuration of settings (since app version 3.0.0)
Once the app is installed, Select the app and go to the Module Settings selection step under Details selection level and configure the settings as shown below
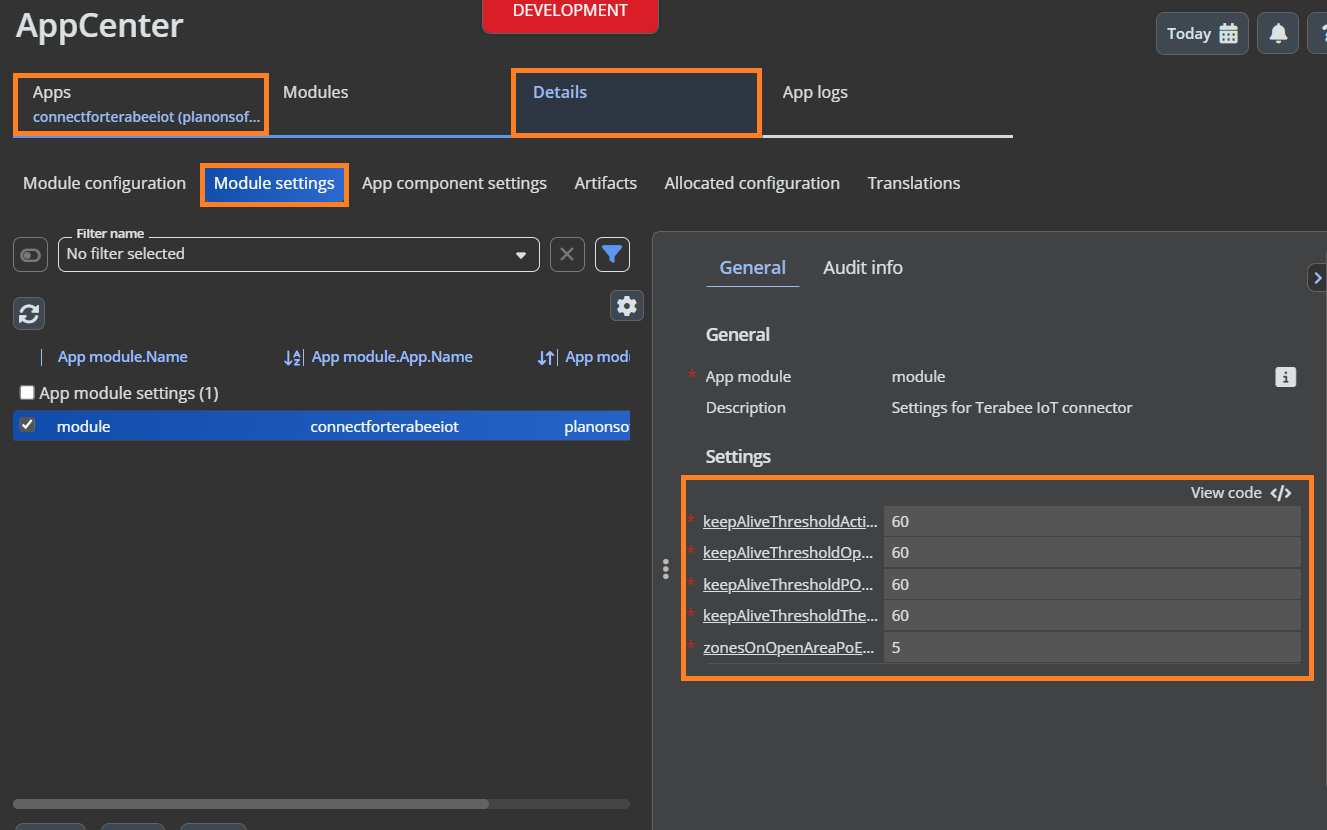
Details of settings
| Parameter | Recommended Value | Description |
|---|---|---|
| keepAliveThresholdActilityProduct | 60 | Timeout in mins for Terabee Actility Sensor Device before it get disconnected if no reading received with in the given time |
| keepAliveThresholdPOEProduct | 60 | Timeout in mins for Terabee PoE Sensor Device before it get disconnected if no reading received with in the given time |
| keepAliveThresholdTheThingsProduct | 60 | Timeout in mins for Terabee The Things Device before it get disconnected if no reading received with in the given time |
| keepAliveThresholdOpenAreaPoEProduct | 60 | Timeout in mins for Terabee OpenArea-PoE Device before it get disconnected if no reading received with in the given time |
| zonesOnOpenAreaPoEProduct | 5 | Maximum number of zones supported to show people count on Terabee Person Count device |
Activation
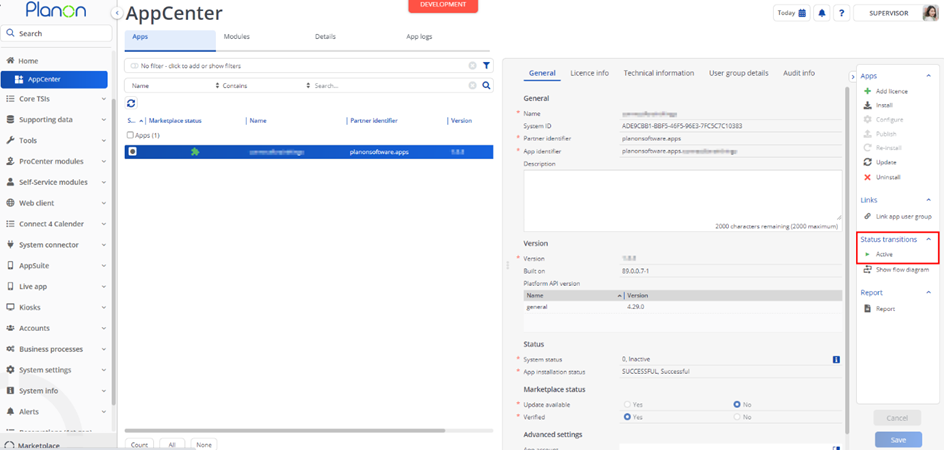
Once the app has been configured, you can activate the app by pressing the Active status transition from the action panel. Always make sure that the required User groups are linked correctly and the Configure action is executed before activating the App.
Planon IoT Configuration
Creation of Gateway
Gateway establishes the channel to send the devices and readings to Planon IoT. Once the app is installed and activated the following HTTPS Gateways are created with the details provided in the app.
Actility Gateway
PoE Gateway
TheThings Gateway
OpenArea-PoE Gateway
Select the same Gateway as the third party system that is being used for sending the devices and readings. A token is generated for the gateway which is used to authenticate with Planon IoT via the endpoint https://gw.ams.planoniot.com/events
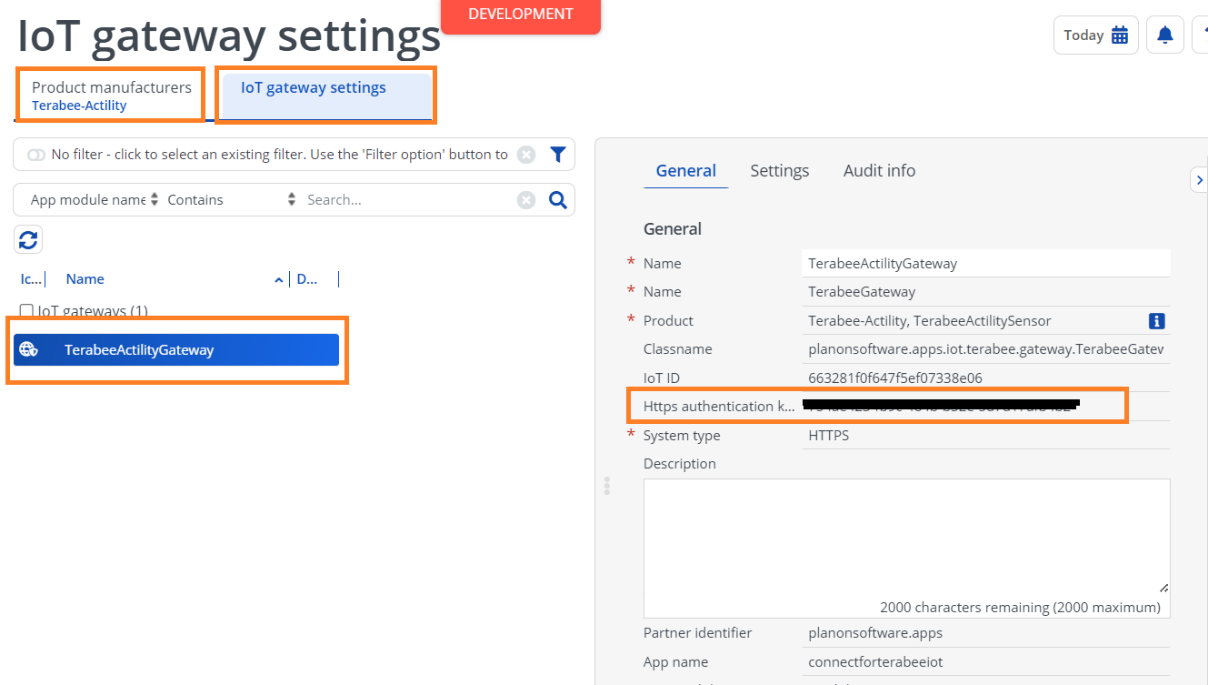
You can see the gateways in the TSI IoT gateway settings.
Steps to create Gateway
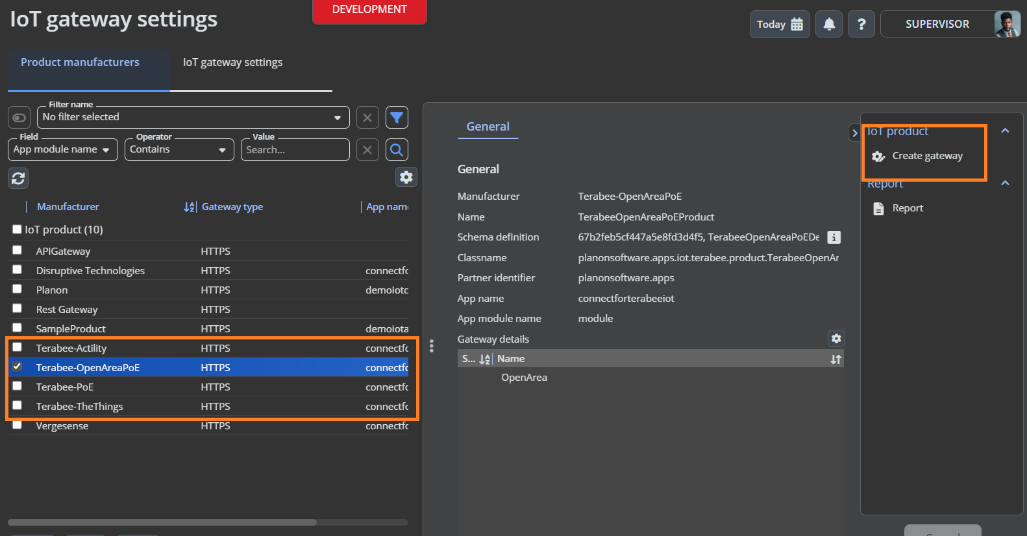
Go to IoT Gateways TSI
Select the required Product Manufacturer
Click on the Action “Create Gateway” as shown below
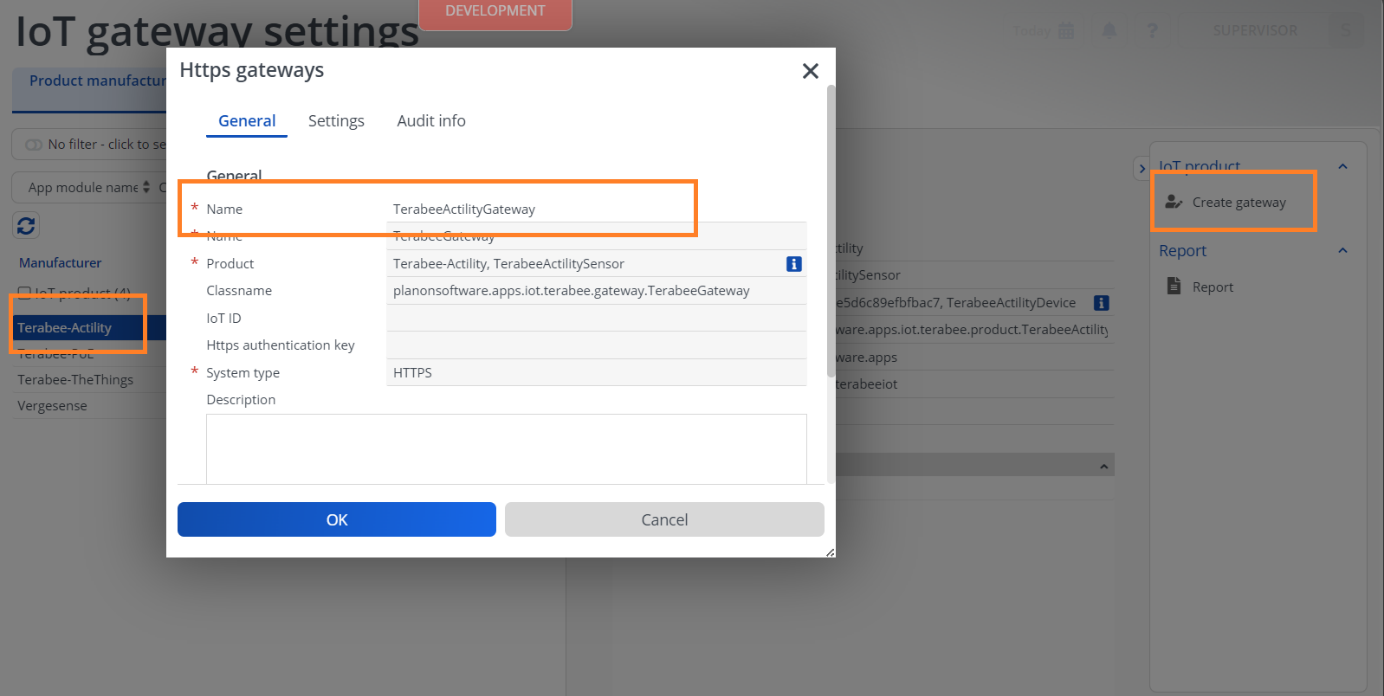
- Provide a name for the Gateway on the popup opened and click Ok
- The HTTPS Authentication Key can be found from the Gateway settings Selection level as shown below
Note: Upgrading of app from any version below 3.0.0 to the version 3.0.0 do not need any manual configuration of gateway. The gateway already present works as intended.
Product definition
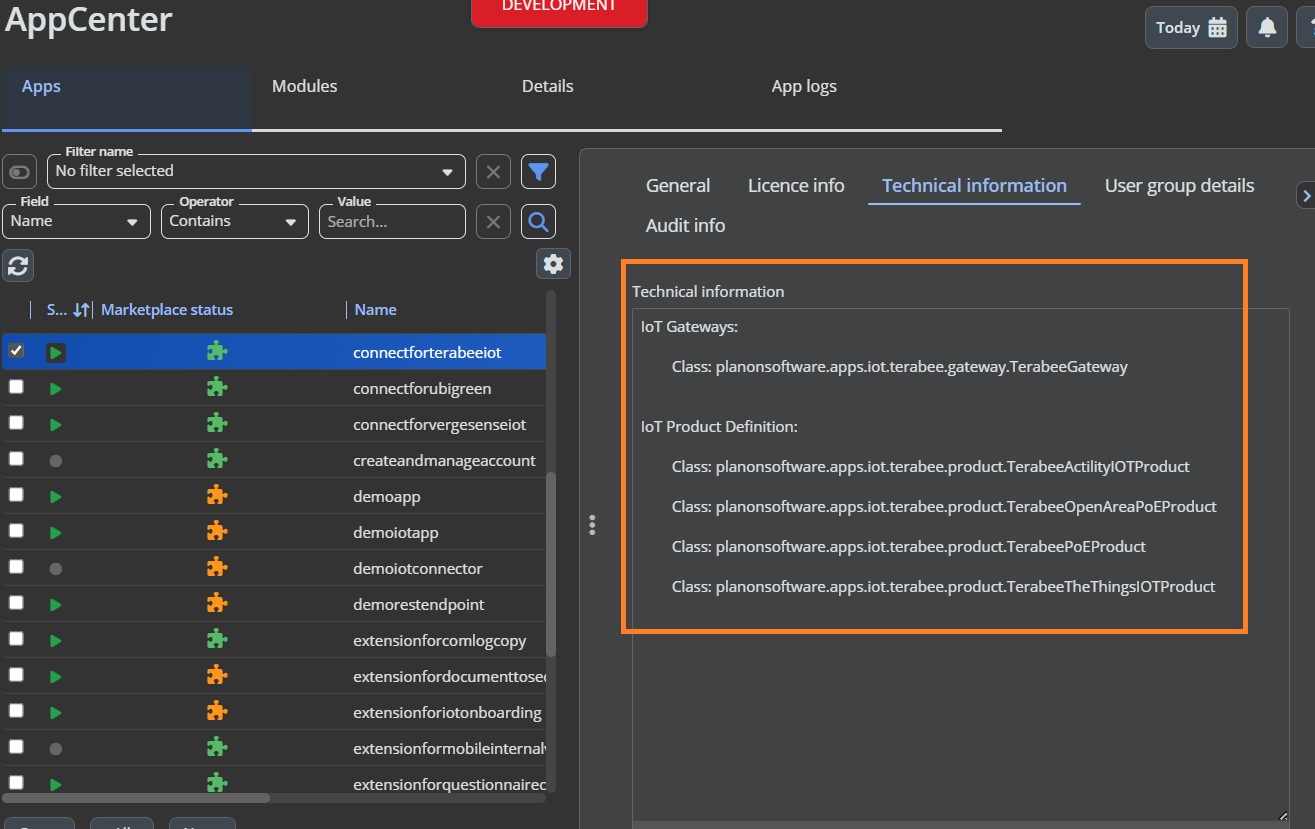
The product definition is the template of the device. It defines what readings needs to recorded, additionally providing the gateway information. We define the datapoints to be recorded on the Product. This app has the datapoints for People In and People Out which stores people flow data coming from the supported products.
Schema
The Schema plays a crucial role in ensuring that incoming data is accurately mapped to the appropriate fields and data types within the Planon IoT system.
Payloads
Actility Payload
Simple Payload
{
	"DevEUI_uplink": {
		"Time": "2023-11-22T09:33:26.675+00:00",
		"DevEUI": "AC1F09FFFE0AE786",
		"LrrLAT": 45.710266,
		"LrrLON": 5.901807,
		"payload": {
			"count_in": 61,
			"count_out": 40,
			"flags": "1 property"
		}
	}
}
Full Payload
{
	"DevEUI_uplink": {
		"Time": "2023-11-22T09:33:26.675+00:00",
		"DevEUI": "AC1F09FFFE0AE772",
		"FPort": 1,
		"FCntUp": 36,
		"LostUplinksAS": 2,
		"ADRbit": 1,
		"MType": 2,
		"FCntDn": 5,
		"payload_hex": "0000001c0000001b08",
		"mic_hex": "100bbdb4",
		"Lrcid": "00000211",
		"LrrRSSI": -112,
		"LrrSNR": -8.75,
		"LrrESP": -121.293648,
		"SpFact": 12,
		"SubBand": "G1",
		"Channel": "LC3",
		"Lrrid": "10000EE0",
		"Late": 0,
		"LrrLAT": 45.710266,
		"LrrLON": 5.901807,
		"Lrrs": {
			"Lrr": {
				"0": "5 properties"
			}
		},
		"DevLrrCnt": 1,
		"CustomerID": "100039162",
		"CustomerData": {
			"loc": null,
			"alr": {
				"pro": "TERA/PCLXL",
				"ver": "1"
			},
			"tags": {
				"0": "Lundby"
			},
			"doms": {
				"0": "2 properties",
				"1": "2 properties"
			},
			"name": "Terabee-Test-01-Back-Door"
		},
		"BaseStationData": {
			"doms": {
				"0": "2 properties"
			},
			"name": "LYON_FR_Chateau_Outdoor-Browan-Lora_Gateway_01"
		},
		"ModelCfg": "1:TPX_8fffe384-f0c9-4546-a33b-5290105cff77",
		"DriverCfg": {
			"mod": {
				"pId": "terabee",
				"mId": "pc-l-xl",
				"ver": "1"
			},
			"app": {
				"pId": "terabee",
				"mId": "pc-l-xl",
				"ver": "1"
			},
			"id": "terabee:terabee-pc-l-xl:1"
		},
		"InstantPER": 0.5,
		"MeanPER": 0.172414,
		"DevAddr": "001D3CF5",
		"TxPower": 16,
		"NbTrans": 3,
		"Frequency": 868.5,
		"DynamicClass": "A",
		"payload": {
			"count_in": 18,
			"count_out": 27,
			"flags": "1 property"
		},
		"downlinkUrl": "https://thingparkenterprise.eu.actility.com/iot-flow/downlinkMessages/aee89b0c-0c58-4028-a3cb-d4257426601a"
	}
}
PoE payload
People Flow
{
	"at": 1708575579,
	"type": "counters",
	"serial_number": "b827eb3f0f4d",
	"value": {
		"in": 5,
		"out": 2,
		"reset_period": "auto-5f495870"
	}
}
People Count
{
"serial_number": "b827eb3f0f4d",
"timestamp": "2022-10-13T12:35:58.09582",
"total_remaining_ID": 2
}
TheThings payload
{
	"end_device_ids": {
		"device_id": "eui-ac1f09fffe0757cf",
		"application_ids": {
			"application_id": "pcl-demo-at-terabee"
		},
		"dev_eui": "AC1F09FFFE0757CF",
		"join_eui": "0000000000000000",
		"dev_addr": "260B37A9"
	},
	"correlation_ids": [
		"gs:uplink:01HQ0GXR86H0APKBQB4AHC0W2C"
	],
	"received_at": "2024-02-19T11:09:54.517212967Z",
	"uplink_message": {
		"session_key_id": "AY2sQATO6+qlVEcl89lJaw==",
		"f_port": 1,
		"f_cnt": 5799,
		"frm_payload": "AAAAAwAAAAQA",
		"decoded_payload": {
			"count_in": 3,
			"count_out": 4,
			"flags": {}
		},
		"rx_metadata": [
			{
				"gateway_ids": {
					"gateway_id": "terabee-gateway-outdoor",
					"eui": "001BC5067020156A"
				},
				"timestamp": 290178187,
				"rssi": -91,
				"channel_rssi": -91,
				"snr": 10.2,
				"location": {
					"latitude": 46.23743511965731,
					"longitude": 6.025367975234986,
					"altitude": 400,
					"source": "SOURCE_REGISTRY"
				},
				"uplink_token": "CiUKIwoXdGVyYWJlZS1nYXRld2F5LW91dGRvb3ISCAAbxQZwIBVqEIuJr4oBGgwIgu7MrgYQsp3nkwEg+P3e/7iCAg==",
				"channel_index": 3,
				"received_at": "2024-02-19T11:09:54.214835262Z"
			}
		],
		"settings": {
			"data_rate": {
				"lora": {
					"bandwidth": 125000,
					"spreading_factor": 7,
					"coding_rate": "4/5"
				}
			},
			"frequency": "867100000",
			"timestamp": 290178187
		},
		"received_at": "2024-02-19T11:09:54.310694747Z",
		"consumed_airtime": "0.056576s",
		"network_ids": {
			"net_id": "000013",
			"ns_id": "EC656E0000000181",
			"tenant_id": "ttn",
			"cluster_id": "eu1",
			"cluster_address": "eu1.cloud.thethings.network"
		}
	}
}
OpenArea-PoE payload
{
	"msg": {
		"event_timestamp": 1899675579,
		"device_id": "testpc",
		"global": 9,
		"zone_0": 3,
		"zone_1": 6
	}
}
Onboarding & Readings
Onboarding
The onboarding process occurs via the endpoint and the HTTPS gateway established within Planon IoT
The endpoint https://gw.ams.planoniot.com/events needs to be configured at the third party gateway that sends the devices and readings. The token generated by the app on the gateway needs to be added as Authorization header.
Once this is done, the third party system is now able to communicate with Planon IoT. When the devices messages are sent to Planon IoT, Planon IoT determines if the device needs to be onboarded based on the Unique ID from the incoming message. If there is no device existing in Planon IoT with the Unique ID in the incoming message, a new device is created on the root application in Planon IoT.
The onboarded devices are availalbe at the Environments level and have to be moved to the correct Application level, see https://webhelp.planoncloud.com/en/index.html#page/Planon%20IoT/c_moving_devices.html for instructions and required keycloak configuration settings.
Readings
The readings are recorded in Planon IoT based on the datapoints and schema defined in the app.
TerabeeActilityProduct
| Payload field | IoT field/ reading |
|---|---|
| DevEUI_uplink.DevEUI | Device id in Planon IoT (Unique Id) |
| DevEUI_uplink.Time | Reading Time |
| DevEUI_uplink.LrrLAT | Lattitude |
| DevEUI_uplink.LrrLON | Longitude |
| DevEUI_uplink.payload.count_in | PeopleIn |
| DevEUI_uplink.payload.count_out | PeopleOut |
PersonCount on the device is calculated as the difference between PeopleIn and PeopleOut
PoE TerabeeActilityProduct
People Flow
| Payload field | IoT field/ reading |
|---|---|
| serial_number | Device id in Planon IoT (Unique Id) |
| at | Reading Time |
| value.in | PeopleIn |
| value.out | PeopleOut |
PeopleCount on the device is calculated as the difference between PeopleIn and PeopleOut
People Count
| Payload field | IoT field/ reading |
|---|---|
| serial_number | Device id in Planon IoT (Unique Id) |
| timestamp | Reading Time |
| total_remaining_ID | PeopleCount |
TerabeeTheThingsProduct
| Payload field | IoT field/ reading |
|---|---|
| end_device_ids.dev_eui | Device id in Planon IoT (Unique Id) |
| uplink_message.received_at | Reading Time |
| uplink_message.rx_metadat.location.lattitude | Lattitude |
| uplink_message.rx_metadat.location.longitude | Longitude |
| uplink_message.decoded_payload.count_in | PeopleIn |
| uplink_message.decoded_payload.count_out | PeopleOut |
PeopleCount on the device is calculated as the difference between PeopleIn and PeopleOut
TerabeeOpenAreaPoEProduct
| Payload field | IoT field/ reading |
|---|---|
| msg.device_id | Device id in Planon IoT (Unique Id) |
| msg. event_timestamp | Reading Time |
| msg.global | Person Count of global area |
| msg.zone_0 | Person Count of Zone 0 |
Number of zones supported for the product is configurable under App settings
Troubleshooting
This chapter describes common things and known issues to check in case the app is not working as expected.
Error handling
For all components the errors will be written in the server logs. For this app this can be either in the Tomcat or Planon IoT logging. Eventlogs are created for any onboarding issues.
IoT Activated
Make sure that IoT activated is set to Yes. This means the required clientID/secret of the Planon IoT platform is filled in. You need to have specific IoT products in your License to enable IoT.
IoT user must be linked to the App
If the defined IoT user is not specified in the App. The App will not be able to communicate between the Planon business application and Planon IoT.