Planon Extension - File Manager
Introduction
This document outlines the features and installation for the Extension for File Manager app.
The Extension for File Manager app makes it possible to manage Planon filestorage through the web client. This eliminates the need of having to use a WebDAV client. Additionally, it is possible to assign specific permissions to user groups. For example, you could provide access to a folder within the PEET WebDAV for a specific user group only, instead of exposing the entire PEET WebDAV.
This is possible for the following WebDAV locations;
TMS
PEET
WebDAV (documents)
Webservices
The following actions can be configured individually;
Browse
Upload
Download
Delete
Rename
Create folder
Prerequisites
Environment
This solution is designed to work with Planon Live L113 and above.
Constraints
This app only works on Planon cloud environments
In order to perform an action, the user group also needs to have ‘browse’ permissions for the location. For example, if a user group has permission to upload files in ‘webdav/forms’ this is only possible if the group is also allowed to browse to ‘webdav/forms’.
Maximum upload size is +- 2GB
There is always a limit in how many files / folders can be inside a parent folder. Uploading a lot of content in a single folder might lead to performance issues.
To use user groups or folders contains white spaces or special characters, make sure the corresponding special character or white space is provided with escape character as below.
For example User Group ‘Application Manager’ to access folder ‘Export Reports’ under webdav, both the user group and the folder has white spaces. This white space has to be escaped by providing the escape character “\. So the user group becomes ‘Application\ Manager’ and folder ‘Export\ Reports’. The final configuration looks as below
- Application\ Manager=webdav/Export\ Reports
Required (free)fields
This app does not require any (free)fields to be configured in the application.
Assumptions
N/A
Features
This chapter describes the features that this app contains.
Feature 1 – Manage files in Web Client
This app allows to adds a file manager to the Planon Web Client. The file manager allows to browse, upload, download, delete and rename files or folders on the Planon filestorage. Additionally, these permissions can be assigned to specific combinations of usergroups / paths.
This for example allows to configure that user group ‘contract management’ only has access to contract export files from Planon whilst user group ‘hr’ can only access personnel import/export files.
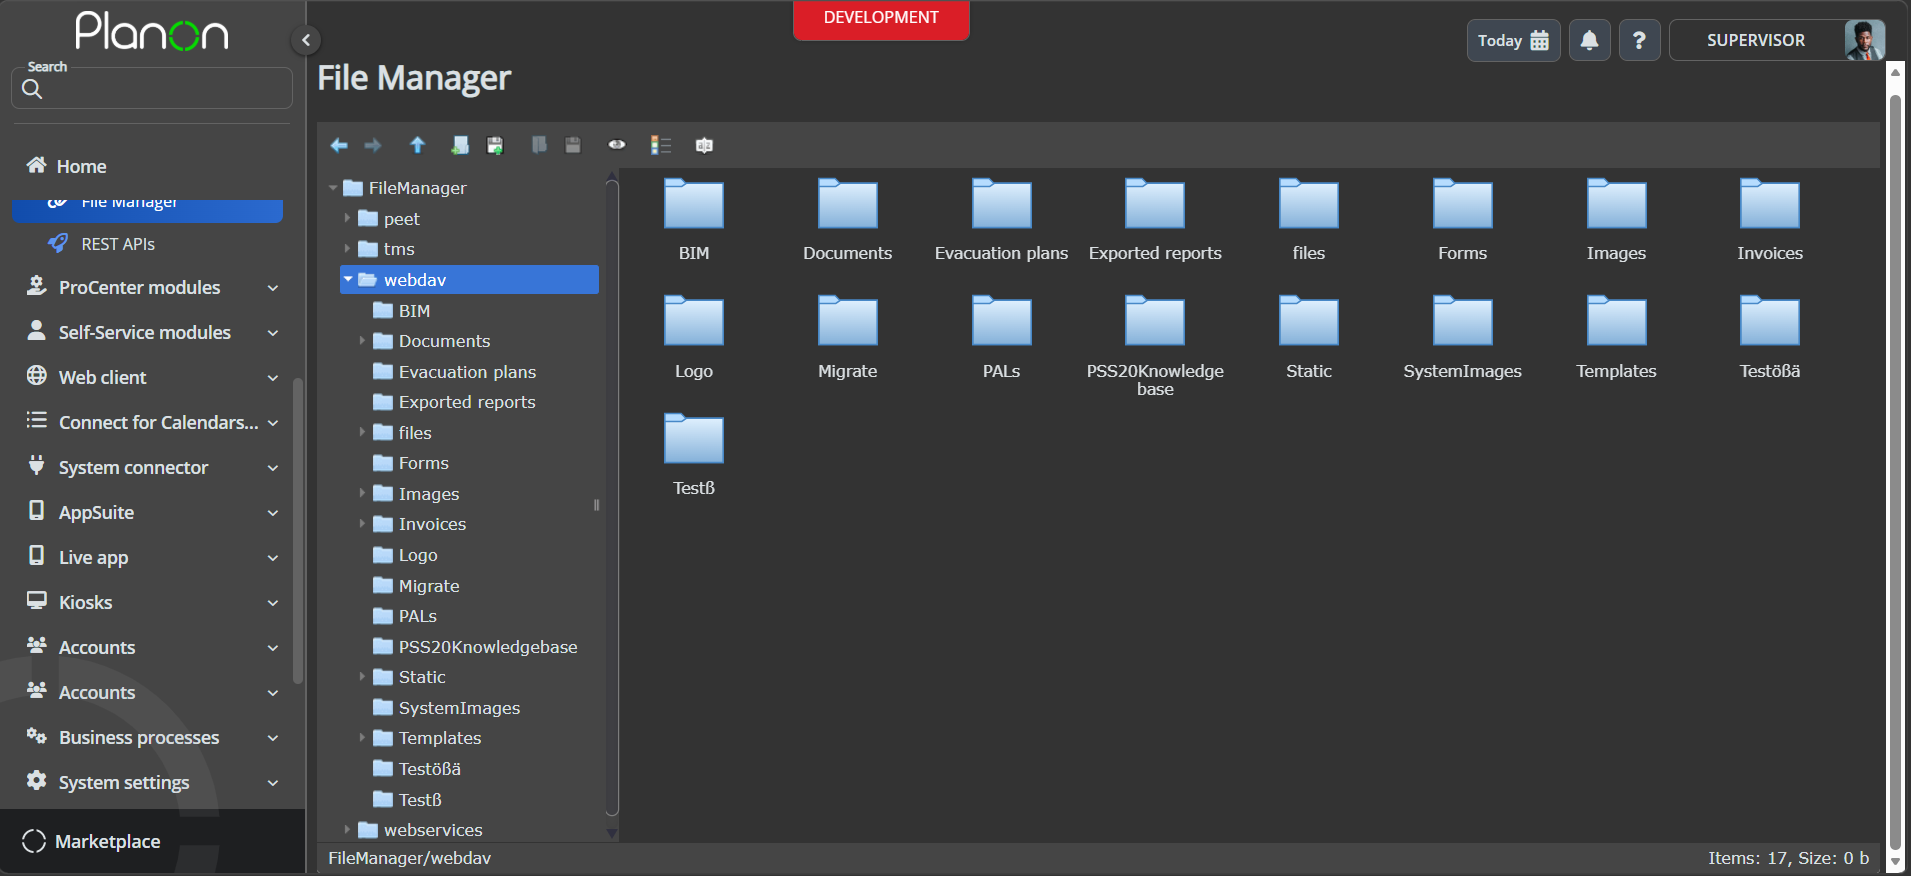
File Manager in the WebClient
How does it work
This chapter contains the functional and technical description (if applicable) of the features
Manage files in Web Client
Technically this app consists out of 2 components. A Jax-RS webservice (back-end) and a Wicket webpage (front-end). The Jax-RS webservice exposes several endpoints that can be used to directly access the Planon file storage. The webpage utilizes the webservice and exposes the actions in a user friendly matter.
Since both components run in Planon they can only be used once there is a valid Planon session. Using the platform API’s, specific data such as to which user groups the user is linked can be retrieved. This is used on the back-end in order to restrict access and/or actions based on user group permissions configured in the app settings
Installation
This chapter describes the steps required to install this app on your Planon environment.
Installation Process
There are two ways to install the app:
- Using the Marketplace
- Manual installation
Install the app by using the marketplace
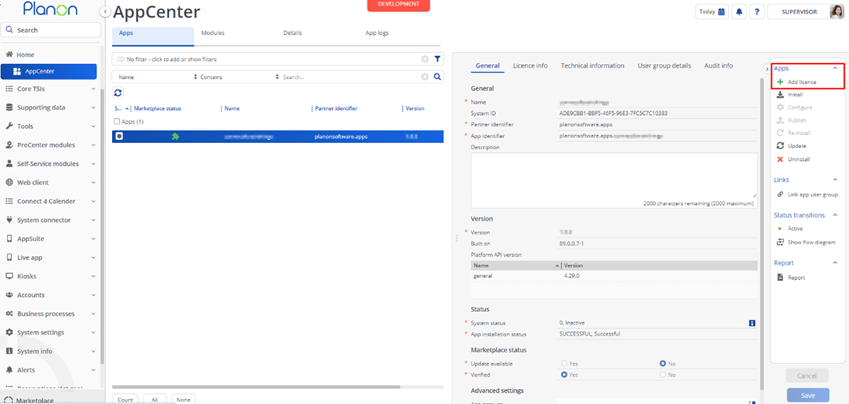
In case your environment is configured to use the Planon app store the only thing required to install the app is to add the app license in the AppCenter TSI. Planon will automatically download and install the app.
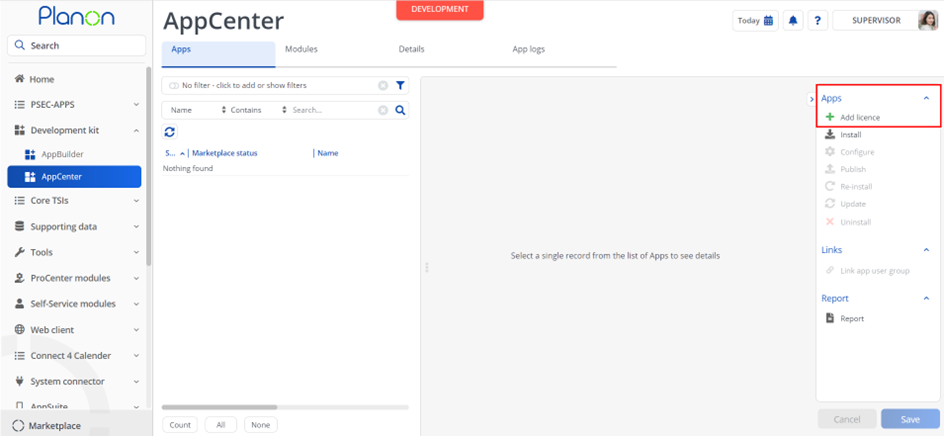
Manual installation
In case you want to perform a manual installation follow the steps below.
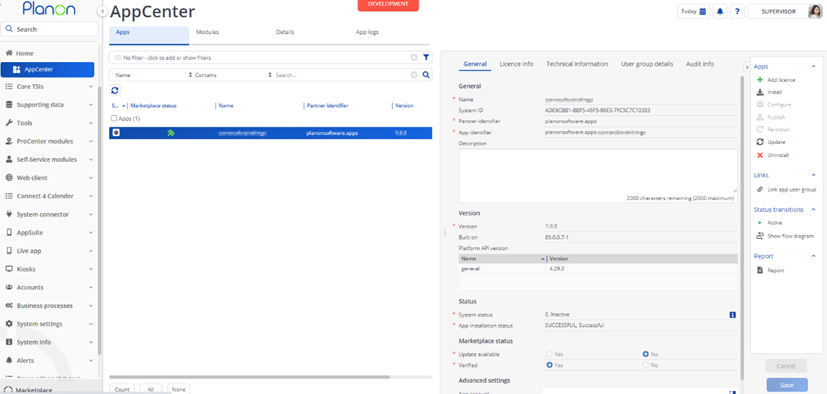
- Open AppCenter TSI from Planon webclient and click on install from action menu
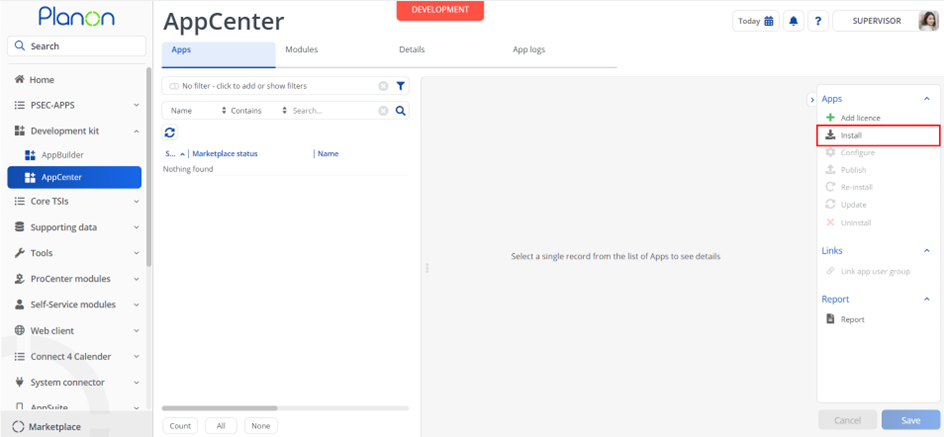
- Browse to the .ppk file
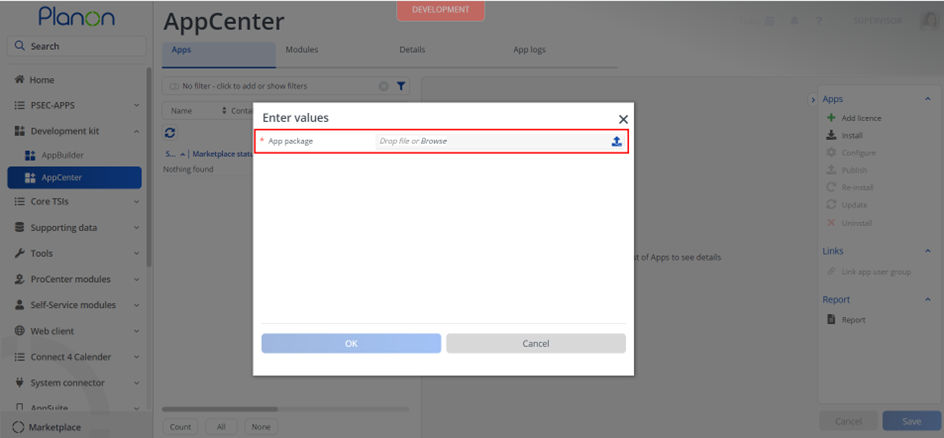
- Click OK to install the app and follow the installation process
- When the app is successfully installed, the app will appear in the AppCenter
- Add the app license in Apps TSI
App settings
This chapter describes and explains the settings that are available for this app.
- Now that the app is installed we can provide the app module settings in the ‘modules’ selection level. The ‘module settings’ can be found in the Details section.
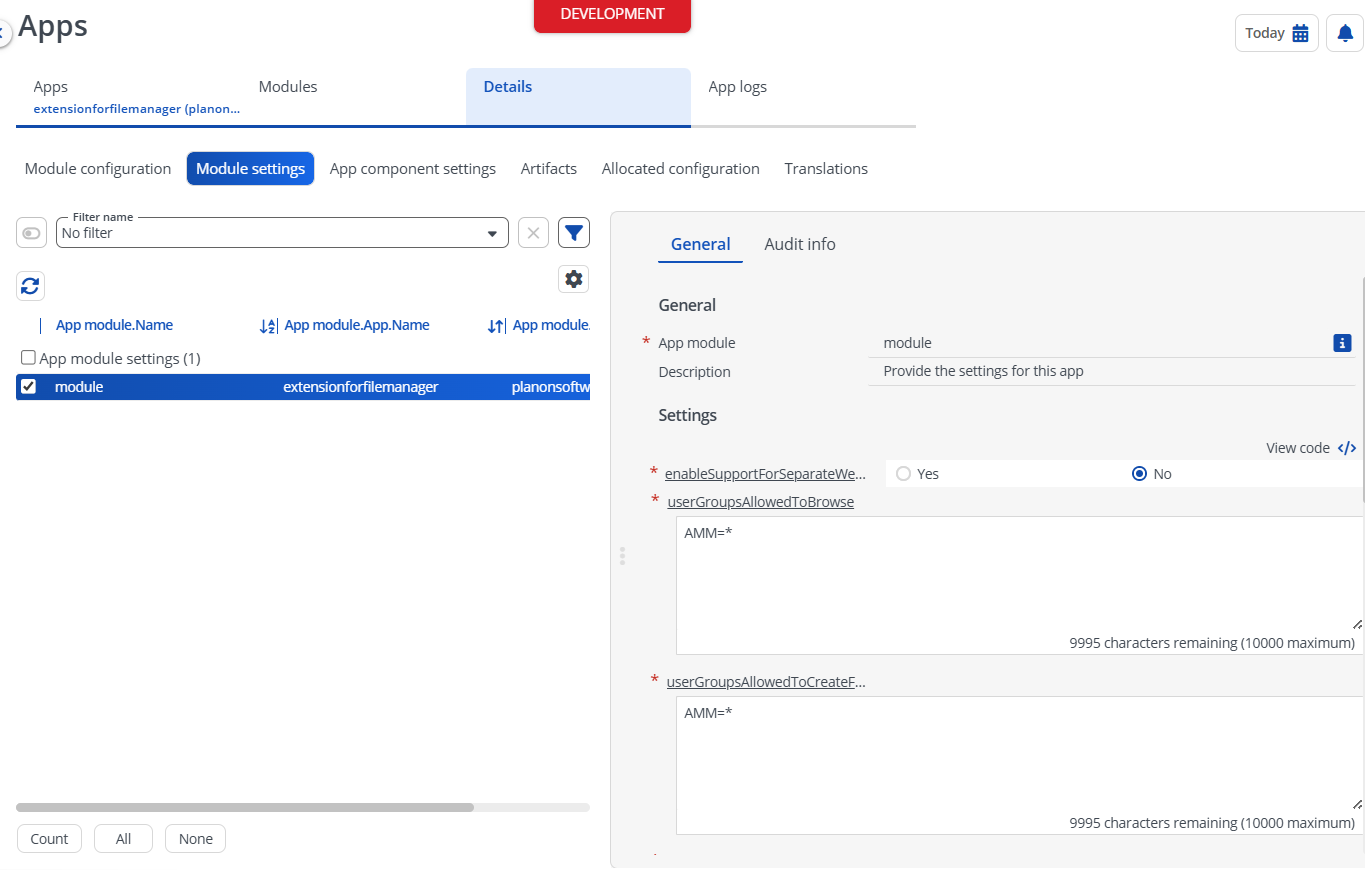
For more details regarding the settings see the next chapter.
Click Save button after providing the module settings.
Description of settings
The app contains 6 settings which all work in the same way. Using each settings you can control which user groups are allowed to perform which actions. This can be configured generally or for specfic paths only. Keep in mind that browse permission is always required when performing a certain action (see constraints).
userGroupsAllowedToBrowse
userGroupsAllowedToCreateFolder
userGroupsAllowedToDelete
userGroupsAllowedToDownload
userGroupsAllowedToRename
userGroupsAllowedToUpload
Examples of settings
This chapter provides more detailed examples of possible combinations that can be added in the settings of this app.
Allowing action for all user groups
In case you want to allow a certain action (for example browse) for all user groups you can simply provide ‘*’ as a setting. This will allow all user groups to perform this action on all folders.
Allowing action for a particular user group
In case you want to allow a certain action for particular user groups only (for example delete), without restricting it to specific folders, you can provide the user group system name followed by ‘*’. Multiple groups can be added by using a new line.
SystemAdministrator=*
Allowing actions on a specific path only
It is also possible to allow a action (for example download) on specfic folders only. This can be done like the example below. Multiple folders can be provided comma separated. A path can point to a specifc folder or use a wildcard, allowing the action for all other folders in the provided folder. Multiple groups can be added by using a new line.
SystemAdministrator=webdav/*
Developer=tms/*,peet/*
ContractManagers=peet/inbound/newContracts
Users in group ‘SystemAdministrator’ can perform the action in folder ‘webdav’ and any subfolders
Users in group ‘Developer’ can perform the action in folder ‘tms’ and ‘peet’ and any subfolders
Users in group ‘ContractManagers’ can only perform the action in folder ‘peet/inbound/newContracts’
Linking user groups
This app uses Jax-RS webservices in order to communicate with the Planon backend. Therefore it is required to link any user groups to the app that should be allowed to use it. If a user group is not linked to the app, users in this group will not be able to use it, even if they are allowed to based on the app settings.
Linking user groups must be done in the AppCenter TSI.
Select the ‘extensionforfilemanager’ app
In the action panel on the right side of the screen click ‘Link app user group’
Move the applicable groups to ‘in use’ and press ‘ok’
Activation
Once the app has been configured, you can activate the app by pressing the Active status transition from the action panel. Always make sure that the required User groups are linked correctly and the Configure action is executed before activating the App.
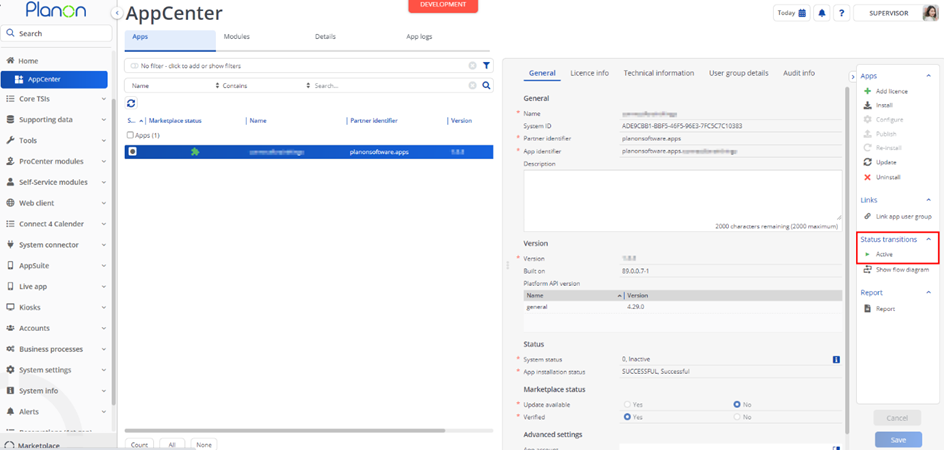
Planon Configuration
This chapter describes the required configuration of the application.
File Manager TSI configuration
Go to the TSI ‘Navigation panel’.
In selection step ‘Navigation panels’ open the navigation group in which you want to add the File Manager TSI.
In the action menu click ‘Add embedded content’.
Add the File Manager by selecting the following class name
- planonsoftware.apps.extensionforfilemanager.page.FileManager
Fill in the rest of the fields and save the embedded content.
Troubleshooting
Error handling
- Errors are recorded in the server logs:
- Tomcat log for web components
- Webpages
- PSS modules
- Stepview
- TSI Action
- JAX-RS webservices
- Wildfly log for server-side components
- Business rules
- Scheduled tasks
- Workers
- Event Connector
- Tomcat log for web components
- UI components (TSI Actions) also display errors in the interface