Planon Configuration
The configurations can be made in the order in which they appear in this document. Occasionally this is not possible, but in those case it is specifically mentioned including jump links between chapters to make the configuration as simple as possible.
Pick lists
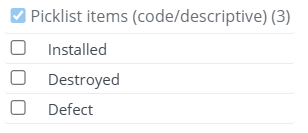
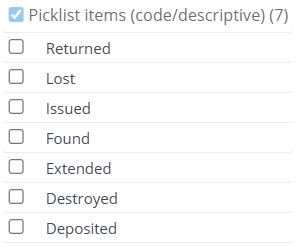
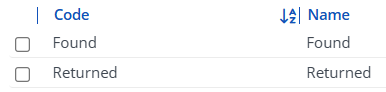
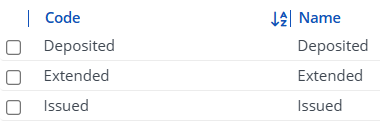
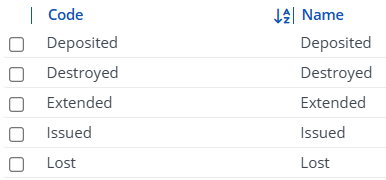
In the chapter Field definer status fields will be added to both Keys and Locks. For these fields the following two pick lists need to be created. They should both be of type Picklists (code/descriptive).
Lock status
Key status
Field definer
For the system configuration some UDBOs have to be created and fields configured, other UDBOs already exist and just need some extra fields. The exact specification for all of them can be found in this chapter.
Note: It is possible to use different free fields as written below, e.g. if they have already been allocated otherwise. In that case the field type should still match and the User-defined system name must be copied exactly.
Note: After saving the system will automatically add “Usr” to the beginning of all User-defined system names. That is expected.
BO Orders
The BO Orders already exists. Some fields need to be added (or rather configured), that will later be used in the new Key distribution UDBO.
Fields
| Field | System name | User-defined system name | Planon input length | Field type | In use | History | In selection | Simple selection | Name DE | Name EN | Note |
|---|---|---|---|---|---|---|---|---|---|---|---|
| Deposited with | FreeString53 | KMDepositedWith | 30 | Person | Yes | Yes | Yes | Yes | Hinterlegt bei | Deposited with | - |
| Key | FreeInteger5 | KMKey | 10 | Key | Yes | Yes | Yes | Yes | Schlüssel | Key | - |
| Key set | FreeInteger4 | KMKeySet | 10 | Key set | Yes | Yes | Yes | Yes | Schlüsselbund | Key set | - |
| Extended Until | FreeDateTime8 | KMExtendedUntil | 10 | DateTime neutral | Yes | Yes | Yes | Yes | Verlängert bis | Extended until | - |
| Comlog Status Ref | FreeString51 | KMComlogStatusRef | 30 | FreeString | Yes | No | No | No | - | Comlog Status Ref | The field is not visible anywhere, it’s just necessary in the background, therefore a full translation is not necessary. |
UDBO Requests
In this UDBO the statuses for the new Key distribution UDBO need to be created as follows.
Statuses
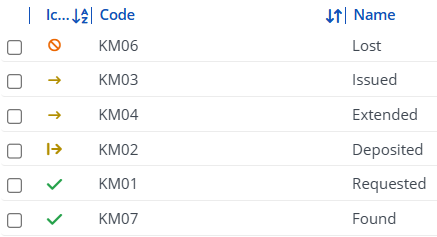
As there are already several statuses present for other UDBOs the new statuses should fall into the existing structure, see screenshot (the highlighted rows are the new statuses).
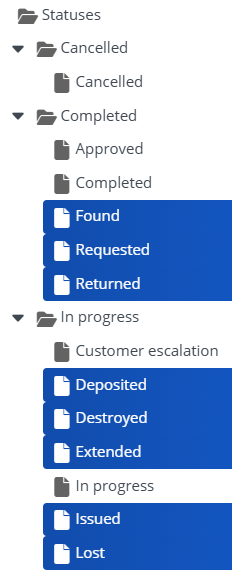
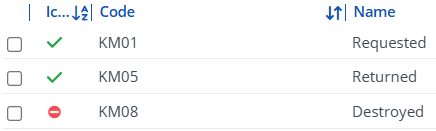
When creating a new status only three things have to be added: code, System name and translation. Codes and System names should be as follows.
- KM01 🡪 Requested
 “status check green”
 - KM02 🡪 Deposited
 “status from right yellow”
 - KM03 🡪 Issued
 “status arrow right yellow”
 - KM04 🡪 Extended “status arrow right yellow”
- KM05 🡪 Returned “status check green”
- KM06 🡪 Lost
 “status cancel orange”
 - KM07 🡪 Found “status check green”
- KM08 🡪 Destroyed
 “status circle minus red”
Note that the system will automatically attach “Usr” at the beginning of each System name after saving.
An icon matching each status can also be added, an example is provided in the above list.
Angefragt, Hinterlegt bei, Ausgegeben, Verlängert, Zurückgegeben, Verloren, Gefunden, Zerstört are suggestions for the german translations.
Excursion: Condition Filter
For use in the next paragraph UDBO Key distribution some condition filters should be created ahead of time.
Note: The name of the code is not relevant, but it’s best to keep it descriptive.
KM001 – Key (set) deposited

KM002 - Request status is not requested

KM003 - Key (set) requested or deposited

Multiple values selected:

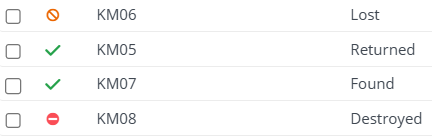
KM004 - Key (set) returned, lost, found destroyed
Multiple values selected:
KM005 - Key set not empty or status not requested

KM006 - Key not empty or status not requested
UDBO Key distribution
Create UDBO
The new UDBO Key distribution should be created under the existing UDBO Requests with below parameters.
| System name | KeyDistribution (The system will automatically add “Usr” to the beginning after saving. This field cannot be changed at a later date.) |
|---|---|
| Description | Key distribution |
| Default status | KM01, Requested |
| Translation DE | Schlüsselausgabe |
| Translation EN | Key distribution |
Status Transitions
After the UDBO is created the status transitions to the statuses created in a previous chapter can now be added on the Details level.
These transitions are needed:
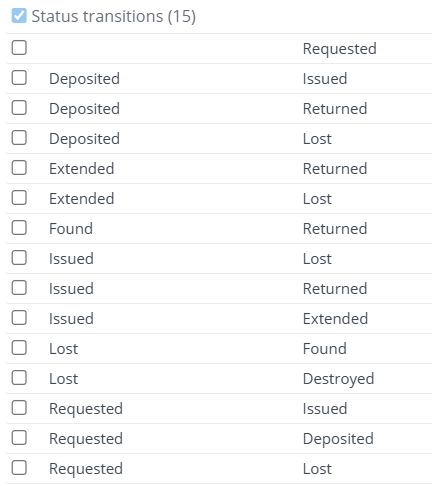
The finished workflow should look like this:

Condition Filter
In this UDBO Key distribution the fields Deposited with, Key, Key set and Extended until that were previously created for the BO Orders need to be assigned their condition filters in the details of the fields.
| Field | Mandatory for condition | Invisible for condition | Read-only for condition |
|---|---|---|---|
| Deposited with | KM001 – Key (set) deposited | - | KM002 – Request status is not requested |
| Key | - | - | KM005 – Key set not empty or status not requested |
| Key set | - | - | KM006 – Key not empty or status not requested |
| Extended until | - | KM003 – Key (set) requested or deposited | KM004 – Key (set) returned, lost, found, destroyed |
Extensions
Key distribution BO has to be configured few extensions that comes with the app in order to have the functionality.
This can be configured under the Extensions selection step in Details selection level of the business object
A separate extension has to be configured with described values below
| Class Name | Event | Sequence |
|---|---|---|
| planonsoftware.apps.extensionforkeymanagement.businessrules.PlausibilityCheck | BI, Before Insert | 10 |
| planonsoftware.apps.extensionforkeymanagement.businessrules.ExtendedUntilValidator | BI, Before Insert | 20 |
| planonsoftware.apps.extensionforkeymanagement.businessrules.ExtendedUntilValidator | BU, Before Update | 20 |
| planonsoftware.apps.extensionforkeymanagement.businessrules.ComlogRefFieldCleanup | BU, Before Update | 30 |
| planonsoftware.apps.extensionforkeymanagement.businessrules.Issuing | AI, After Insert | 10 |
| planonsoftware.apps.extensionforkeymanagement.businessrules.Issuing | AU, After Update | 10 |
| planonsoftware.apps.extensionforkeymanagement.businessrules.StatusTransition | AI, After Insert | 20 |
| planonsoftware.apps.extensionforkeymanagement.businessrules.StatusTransition | AU, After Update | 20 |
| planonsoftware.apps.extensionforkeymanagement.businessrules.DeleteRequestValidator | BD, Before Delete | 10 |
Later changes
Link notifications to status transitions
This can only be done after the changes from the Alerts chapter have been made. There will be a reminder and a jump link to come back here to add these changes.
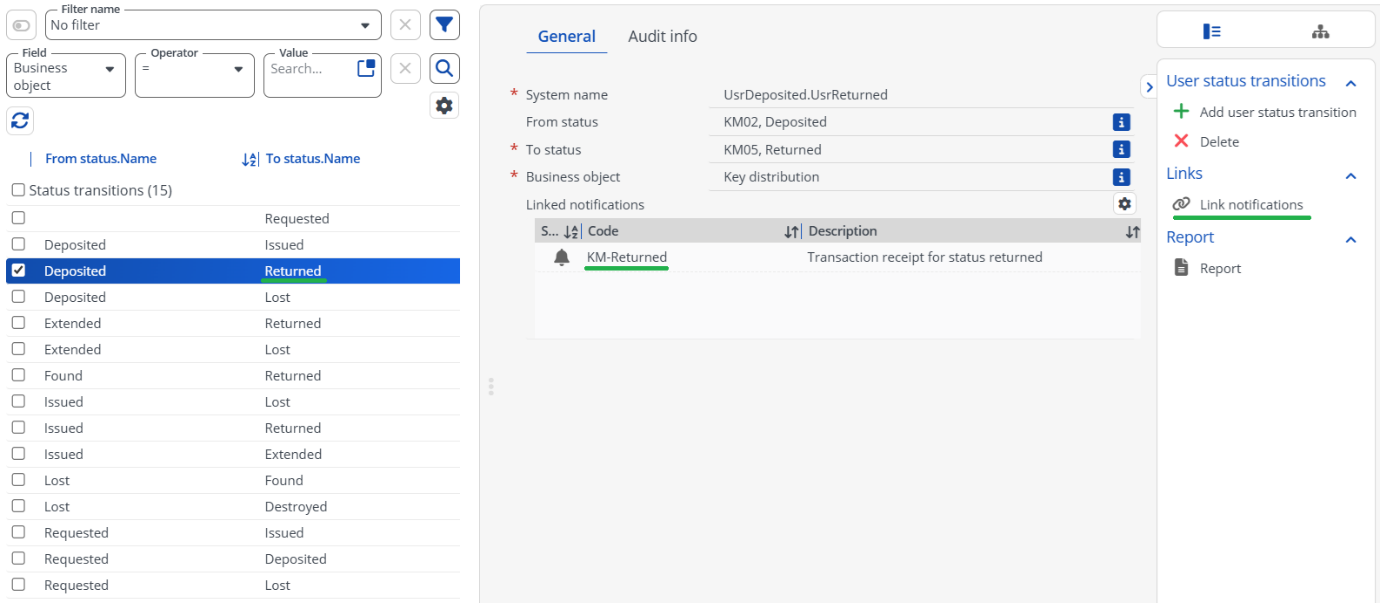
In order for the transaction reports to be triggered and created after every status transition the corresponding alerts need to be linked to the status transitions. This can be done in the step Status transitions with the action Link notifications. There will be an event-based notification for each target status, e.g. KM-Returned. All status transitions that have Returned as the To status should get this link.
BO Keys
For this BO only some fields have to be configured as specified below.
Fields
| Field | System name | User-defined system name | Planon input length | Field type | Picklist – code descriptive | In use | History | In selection | Simple selection | Name DE | Name EN |
|---|---|---|---|---|---|---|---|---|---|---|---|
| Key holder | FreeString10 | KMKeyHolder | 100 | Person | - | Yes | No | Yes | Yes | Schlüsselinhaber | Key holder |
| Status | FreeString5 | KMStatus | 30 | CodesCodeName | KEY_STATUS (or however the picklist has been named in the Pick lists chapter) | Yes | No | Yes | Yes | Status | Status |
TSI Actions
For the lock plan a TSI actions needs to be added.
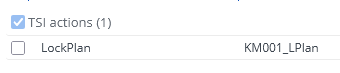
System name and Code should just be something descriptive, see screenshot above (System name left, Code right)
They will later have to be added to the layout as well. This will be explained in the corresponding chapter.
BO Locks
For this BO only some fields have to be configured as specified below.
Fields
| System name | User-defined system name | Planon input length | Field type | Picklist – code descriptive | In use | History | In selection | Simple selection | Name DE | Name EN |
|---|---|---|---|---|---|---|---|---|---|---|
| FreeString5 | KMStatus | 30 | CodesCodeName | LOCK_STATUS (or however the picklist has been named in the Pick lists chapter) | Yes | No | Yes | Yes | Status | Status |
TSI Actions
For the lock plan a TSI actions needs to be added.
System name and Code should just be something descriptive, see screenshot above (System name left, Code right)
They will later have to be added to the layout as well. This will be explained in the corresponding chapter.
BO Key sets
For this BO only some fields have to be configured as specified below.
Fields
Key holder
| System name | User-defined system name | Planon input length | Field type | In use | History | In selection | Simple selection | Name DE | Name EN |
|---|---|---|---|---|---|---|---|---|---|
| FreeString10 | KMKeyHolder | 10 | Person | Yes | No | Yes | Yes | Schlüsselinhaber | Key holder |
BO Key issuings
For this BO only some fields have to be configured as specified below.
Fields
| Field | System name | User-defined system name | Planon input length | Field type | Picklist – code descriptive | Mandatory | In use | History | In selection | In selection for personal filter only | Simple selection | Name DE | Name EN |
|---|---|---|---|---|---|---|---|---|---|---|---|---|---|
| Status | FreeString5 | KMStatusr | 30 | CodesCodeName | KEY_STATUS (or however the picklist has been named in the Pick lists chapter) | - | Yes | No | Yes | - | Yes | Status | Status |
| Issued on | FreeDateTime2 | KMIssuedOn | - | DateTimeTransaction | - | - | Yes | No | Yes | - | Yes | Ausgegeben am | Issued on |
| Request Number | FreeInteger5 | KMKeyRequestNumber | 10 | BaseOrder | - | Yes | Yes | No | Yes | - | Yes | Meldungsnummer | Request number |
| Description | FreeRemark01 | KMDescription | - | StringExtended | - | - | Yes | No | Yes | Yes | Yes | Beschreibung | Description |
BO Key set issuings
For this BO only some fields have to be configured as specified below.
Fields
| Field | System name | User-defined system name | Planon input length | Field type | Picklist – code descriptive | Mandatory | In use | History | In selection | In selection for personal filter only | Simple selection | Name DE | Name EN |
|---|---|---|---|---|---|---|---|---|---|---|---|---|---|
| Status | FreeString5 | KMStatusr | 30 | CodesCodeName | KEY_STATUS (or however the picklist has been named in the Pick lists chapter) | - | Yes | No | Yes | - | Yes | Status | Status |
| Issued on | FreeDateTime2 | KMIssuedOn | - | DateTimeTransaction | - | - | Yes | No | Yes | - | Yes | Ausgegeben am | Issued on |
| Request Number | FreeInteger5 | KMKeyRequestNumber | 10 | BaseOrder | - | Yes | Yes | No | Yes | - | Yes | Meldungsnummer | Request number |
| Description | FreeRemark01 | KMDescription | - | StringExtended | - | - | Yes | No | Yes | Yes | Yes | Beschreibung | Description |
BO Communication logs
Fields
Request Status Ref
| System name | User-defined system name | Planon input length | Field type | In use | History | In selection | Simple selection | Name EN | Note |
|---|---|---|---|---|---|---|---|---|---|
| FreeString17 | KMRequestStatusRef | 600 | FreeString | Yes | No | No | No | Request Status Ref | The field is not visible anywhere, it’s just necessary in the background, therefore a full translation is not necessary. |
UDBO Key logs
Create UDBO
The new UDBO Key log should be created under the existing UDBO Communication logs with below parameters.
| System name | KeyDistributionLogs (The system will automatically add “Usr” to the beginning after saving. This field cannot be changed at a later date.) |
|---|---|
| Description | Key distribution logs |
| Default status | CL10, Registered |
| Translation DE | Schlüssel Log |
| Translation EN | Key log |
Status Transitions
After the UDBO is created the status transition to make Registered a start status must be added.
Extensions
Key distribution BO has to be configured few extensions that comes with the app in order to have the functionality.
This can be configured under the Extensions selection step in Details selection level of the business object
A separate extension has to be configured with described values below
| Class Name | Event | Sequence |
|---|---|---|
| planonsoftware.apps.extensionforkeymanagement.businessrules.ComlogInsertRule | BI, Before Insert | 10 |
UDBO Locking Systems
Create UDBO
The new UDBO Locking System should be created under the existing UDBO Assets with below parameters.
| System name | LockSystem (The system will automatically add “Usr” to the beginning after saving. This field cannot be changed at a later date.) |
|---|---|
| Description | Locking system |
| Default status | BA20, In use |
| Translation DE | Schließanlagen |
| Translation EN | Locking systems |
Status Transitions
After the UDBO is created the status transition to make In use a start status must be added.
TSI Actions
For the lock plan a TSI actions needs to be added.
System name and Code should just be something descriptive, see screenshot above (System name left, Code right)
They will later have to be added to the layout as well. This will be explained in the corresponding chapter.
BO Key definitions
TSI Actions
For the lock plan a TSI actions needs to be added.
System name and Code should just be something descriptive, see screenshot above (System name left, Code right)
They will later have to be added to the layout as well. This will be explained in the corresponding chapter.
BO Lock definitions
TSI Actions
For the lock plan a TSI actions needs to be added.
System name and Code should just be something descriptive, see screenshot above (System name left, Code right)
They will later have to be added to the layout as well. This will be explained in the corresponding chapter.
Layouts
Note: (Almost) all of the (UD)BOs we utilize already have Layout definitions. For the Key management new layouts will be created, but for filtering purposes all the fields that have been created in the previous chapter should be added to the standard layout. In some cases, e.g. for BO Keys, there is only one layout that is both actively used elsewhere but also the standard layout. Fields shouldn’t just be added there but instead a copy should be made that will become the new standard layout, where the fields can be added. That way the original layout remains unchanged and will continue to be used as intended in other TSIs.
Key distribution
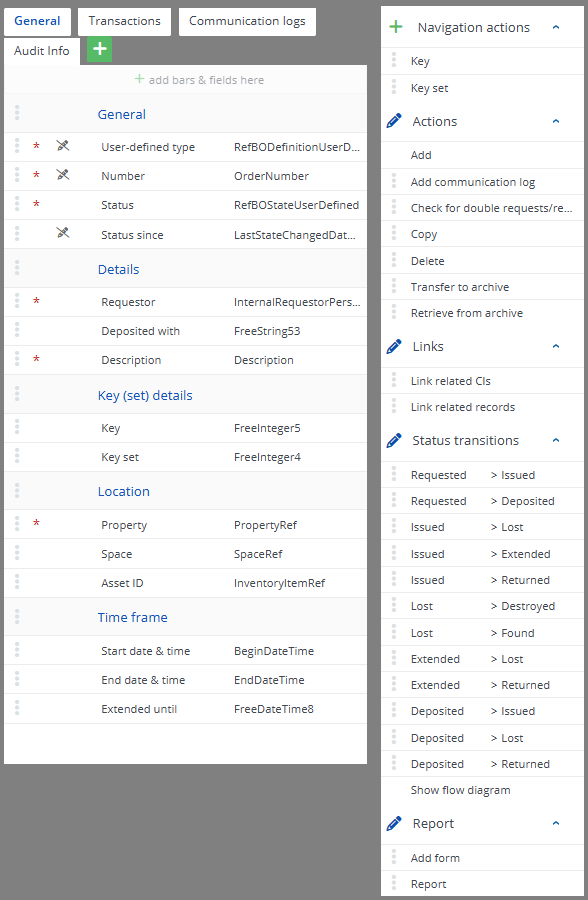
Layout
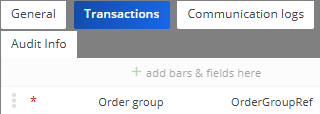
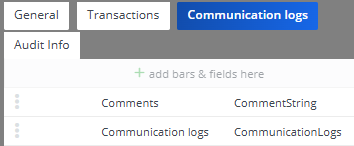
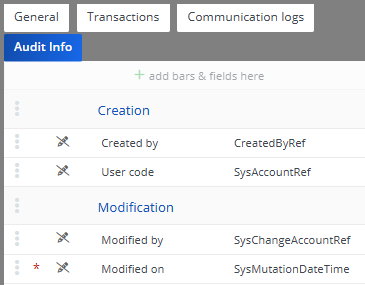
Finetuning
Requestor should be mandatory.
Description should be mandatory.
Key should have this fixed filter:

Multiple values selected:
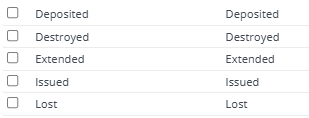
- Key set should have this fixed filter:

For Property the option Fill in the drill-down context should be Yes.
Order group should have a default value. The field is not relevant for Key distribution but it is a mandatory field for the BO Orders so it has to be filled. The easiest option is to create an order group for Key distribution and use this as the default value.
All status transitions should be added to this layout.
Later changes
There are two more changes here that can only be made after the TSIs have been created. In the chapter TSI there will be a reminder and a jump link to come back here to add these changes.
- A navigation action should be added to jump directly to TSI Access to display the key selected for this Key distribution request.
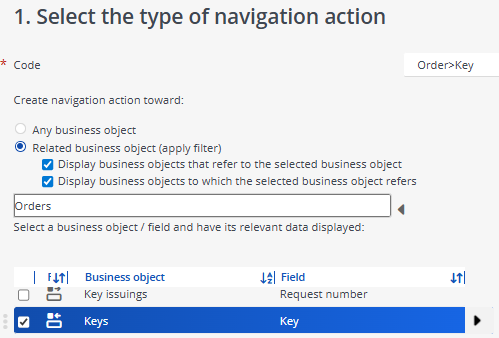

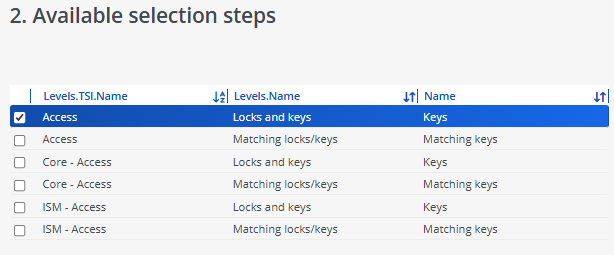
- A similar navigation action should be added for Key sets. In that case in step 1 Key sets needs to be selected instead of Keys.
Keys
Layout
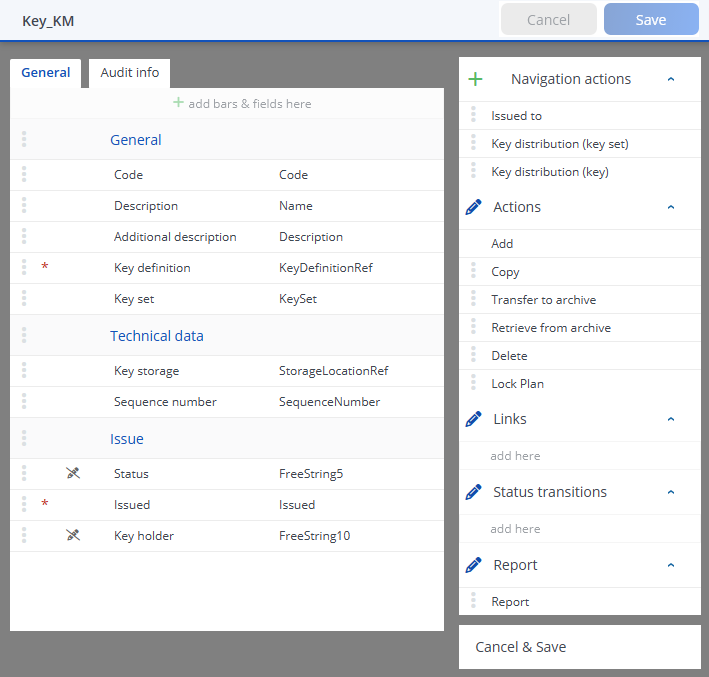
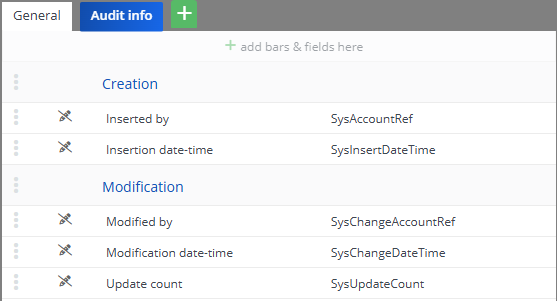
Finetuning
- Status and Key holder need to be read-only as they will be automatically filled in when changes happen to the Key distribution request the key is used in.
Later changes
There are two more changes here that can only be made after the TSIs have been created. In the chapter TSI there will be a reminder and a jump link to come back here to add these changes.
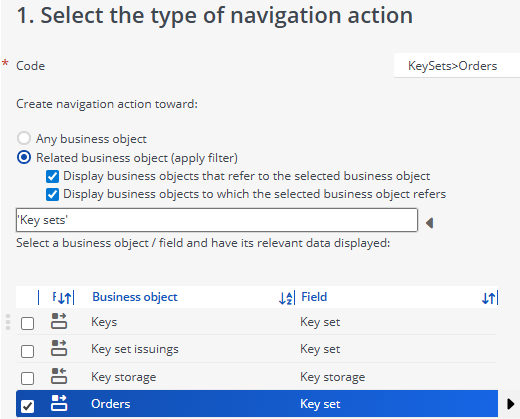
- A navigation action should be added to jump directly to TSI Key Distribution to display the Key distribution request for this key.
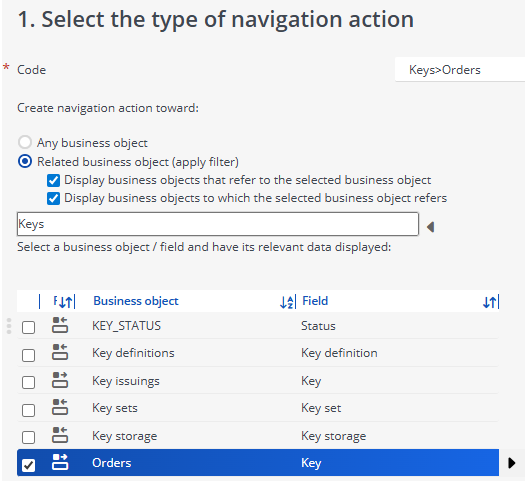

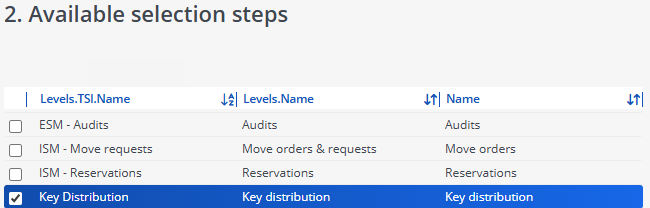
- A similar navigation action should be added in case the key is part of a key set. In that case in step 1 Key sets and then Orders needs to be selected instead of Keys.
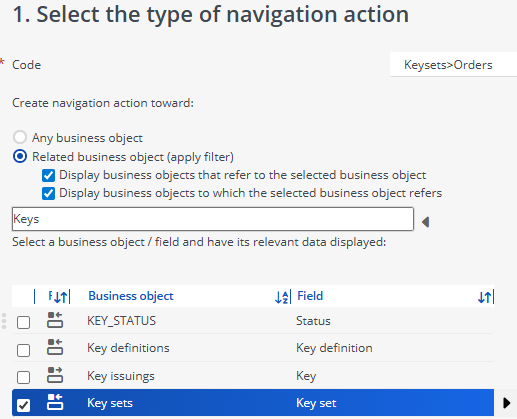
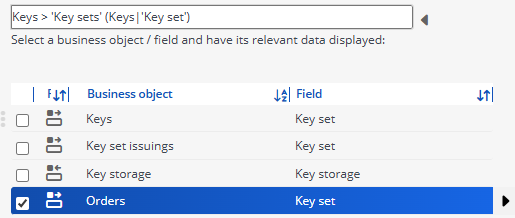

Step 2 is the same as before.
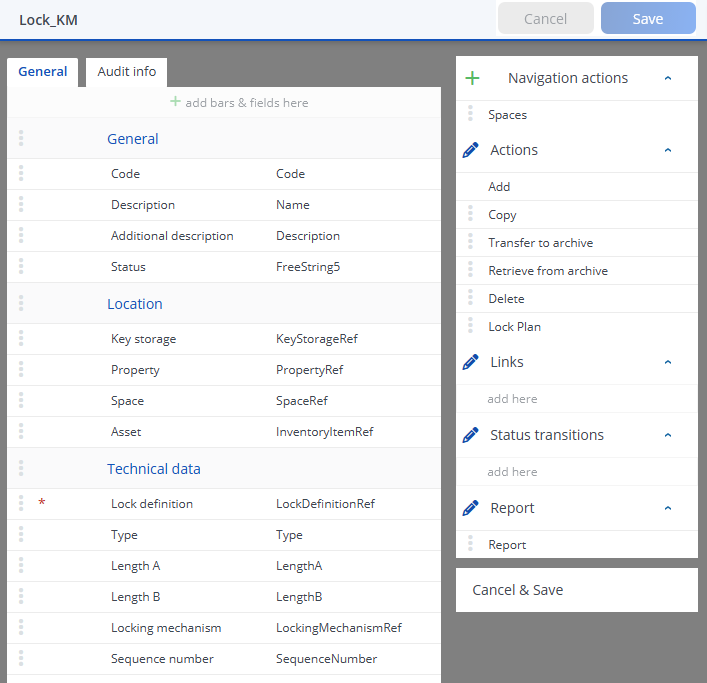
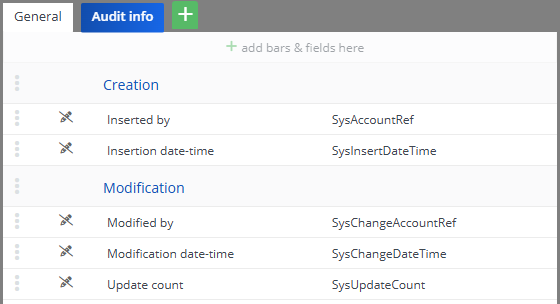
Lock
Layout
Key sets
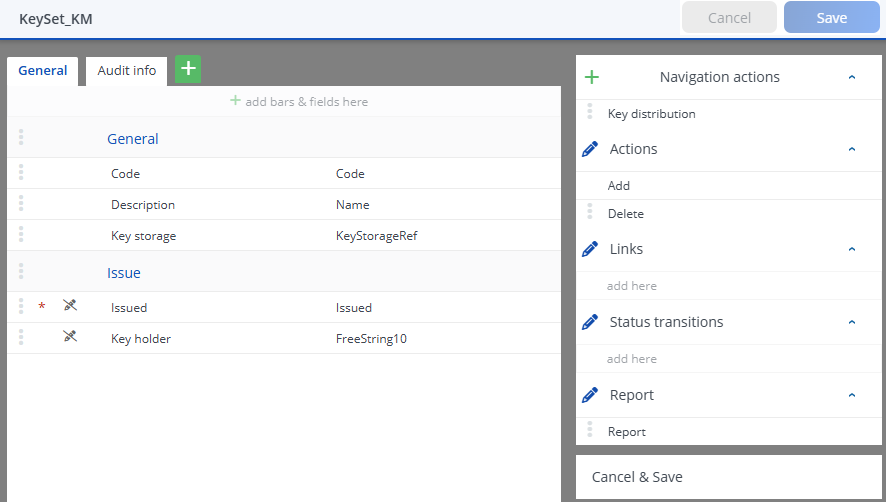
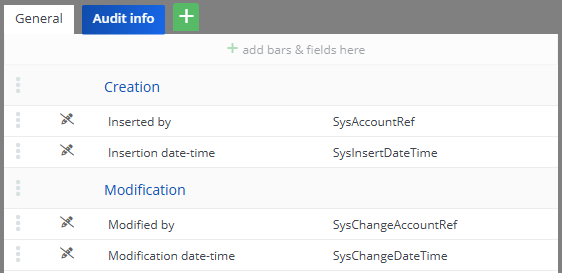
Layout
Finetuning
- Key holder needs to be read-only as it will be automatically filled in when changes happen to the Key distribution request the key is used in.
Later changes
There is one more change here that can only be made after the TSIs have been created. In the chapter TSI there will be a reminder and a jump link to come back here to add these changes.
- A navigation action should be added to jump directly to TSI Key Distribution to display the Key distribution request for this key set.

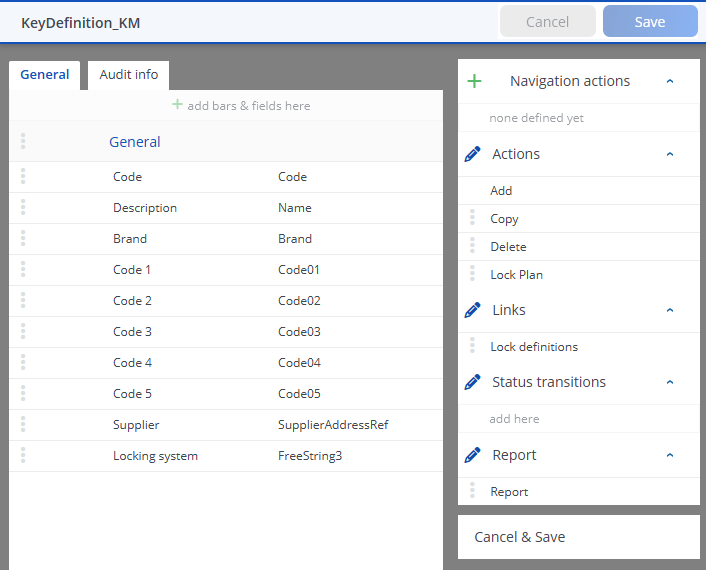
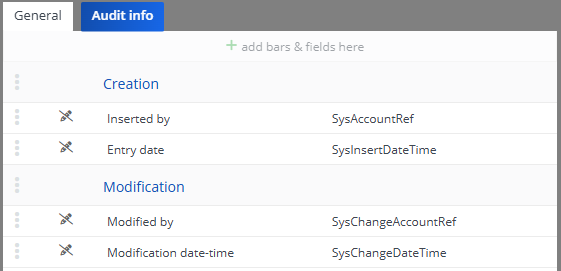
Key definition
Layout
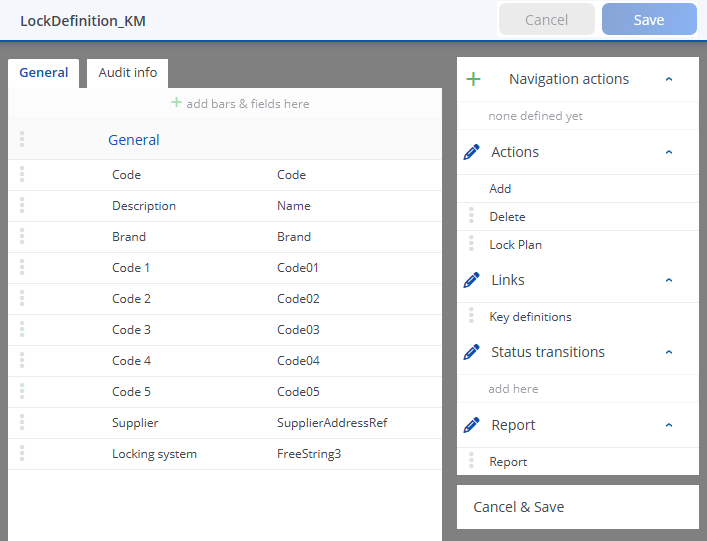
Lock definition
Layout
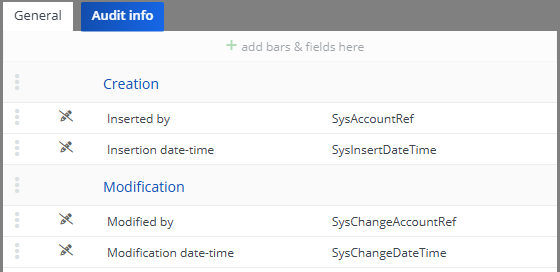
Key issuings
Layout
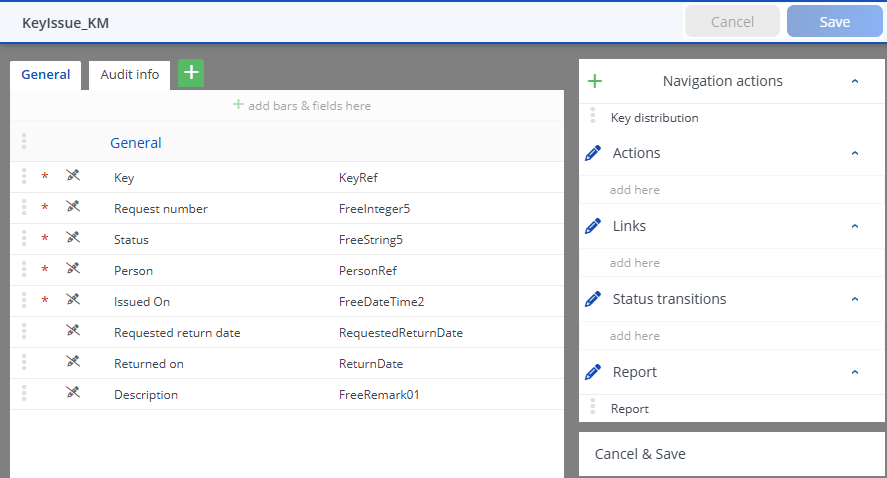
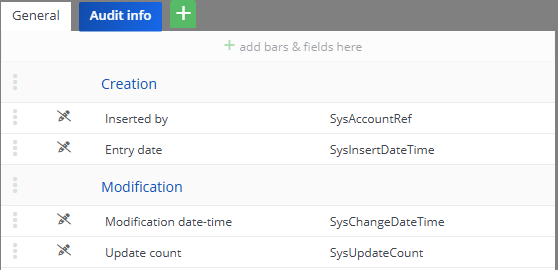
Finetuning
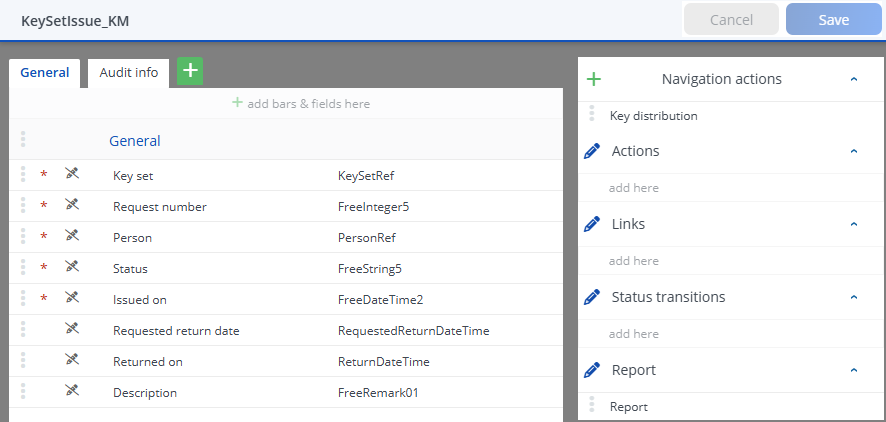
- All fields should be read-only. The contents will be set automatically when the Key distribution request that corresponds to the key changes.
Later changes
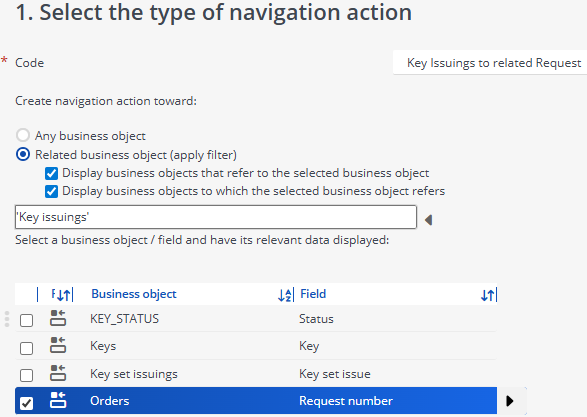
There is one more change here that can only be made after the TSIs have been created. In the chapter TSI there will be a reminder and a jump link to come back here to add these changes.
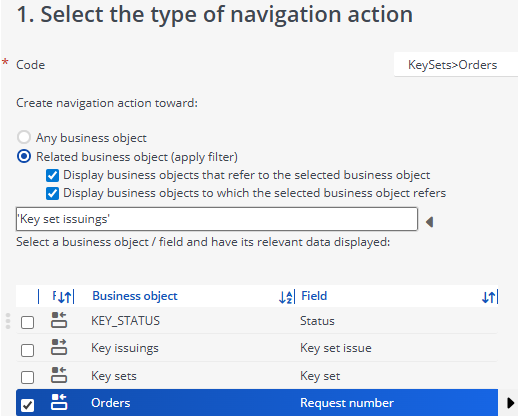
- A navigation action should be added to jump directly to TSI Key Distribution to display the Key distribution request for this key.

Key set issuings
Layout
Finetuning
All fields should be read-only. The contents will be set automatically when the Key distribution request that corresponds to the key changes.
Later changes
There is one more change here that can only be made after the TSIs have been created. In the chapter TSI there will be a reminder and a jump link to come back here to add these changes.
A navigation action should be added to jump directly to TSI Key Distribution to display the Key distribution request for this key set.

Key logs
Layout
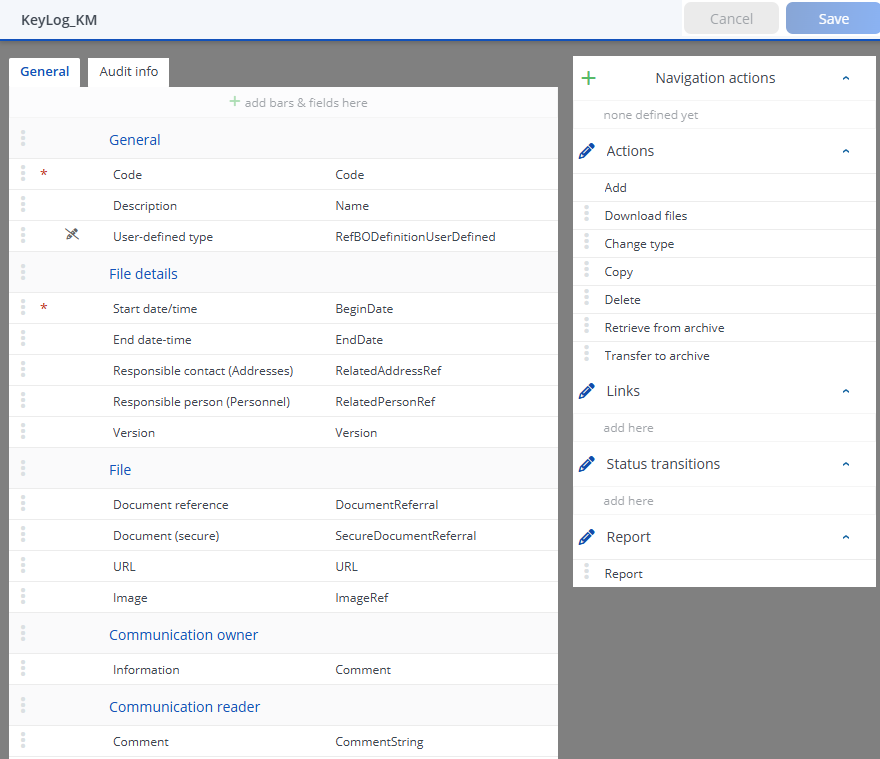
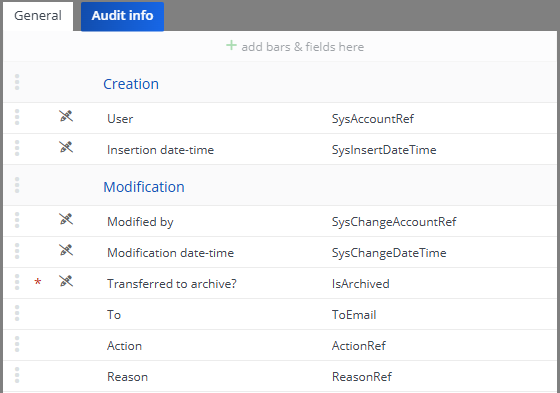
This is just a copy of the standard Communication log, except for the name of course.
Locking System
Layout
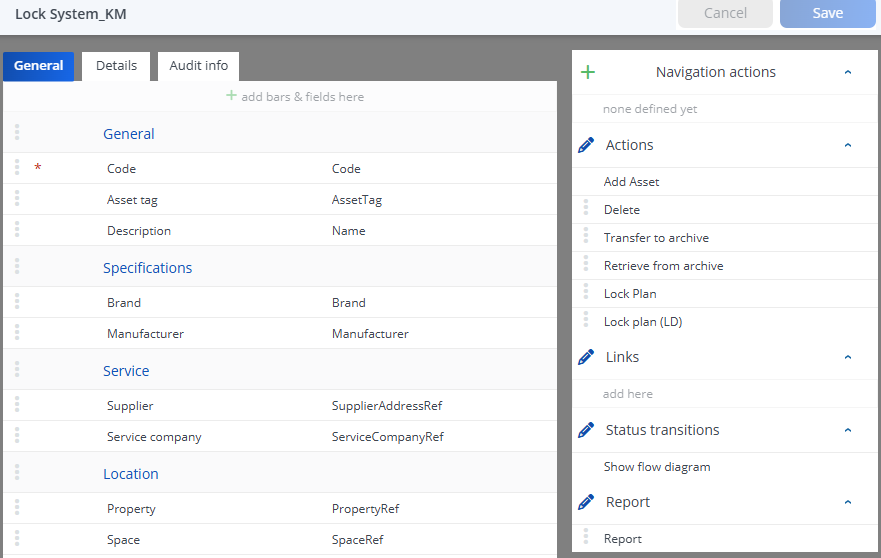
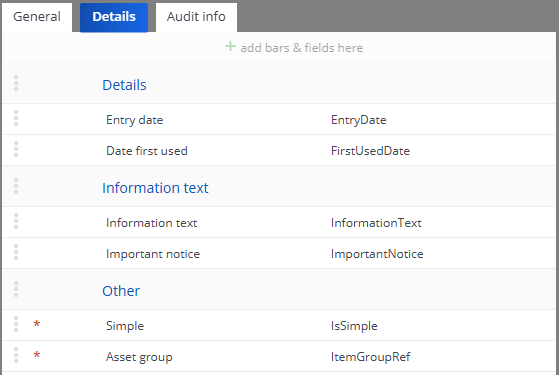
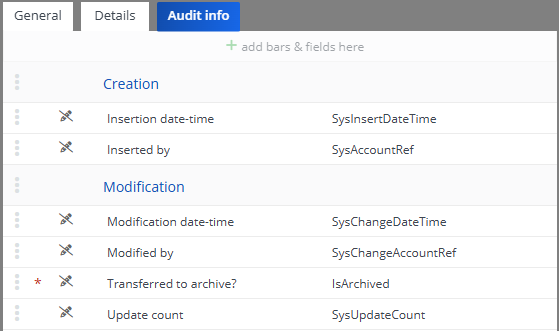
Finetuning
Asset group should have a default value. The field is not relevant for Key distribution but it is a mandatory field for the BO BaseAsset so it has to be filled. The easiest option is choose To be determined as the default value.
TSI
Access
This TSI is a copy of the TSI Core – Access. This should be the start point. Below, all the necessary changes will be listed.
In TSI settings the TSI should be named Access.
Levels and steps
The level Matching locks/keys is renamed to Details.
For the level Components the steps Communication logs – properties and History – properties are removed.
For the level Locks and keys the step Communication logs – assets are removed.
For the level Locks and keys the step Issued and Returned key sets is renamed to Key set transactions (Hint: This step might only be visible, if on level Component the step Key sets is selected.)
For the level Details the step Issued and returned keys is renamed to Key transactions.
Layouts
For all occurrences of layouts for keys (steps Keys and Matching keys), key sets (step Key sets), locks (steps Locks and Matching locks), key definitions (step Key definitions), lock definitions (step Lock definitions), key issuings (level Details step Transactions) and key set issuings (level Locks and keys step Transactions) the previously created layouts should be used.
Lists and filters
Some steps should get a selection step filter, a customisable list and some user filters.
Customisable lists
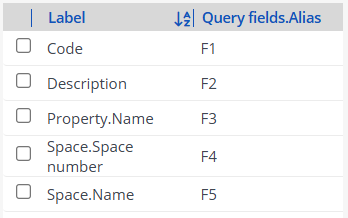
In order to see more meaningful information on this step creating a customised list is a good idea. Here are examples of what they could look like:
Steps Locks and Matching Locks
Steps Keys and Matching keys
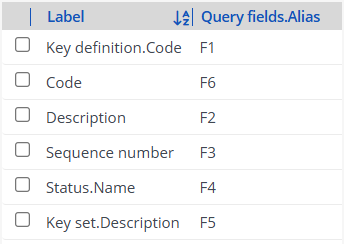
Step Key set transactions
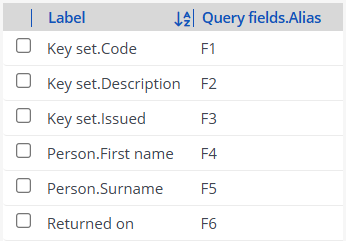
Step Key transactions
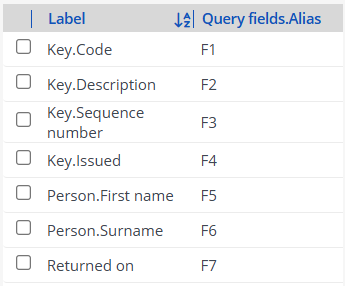
User filters
User filters aren’t a necessity, but here are some examples of meaningful filters, which might also be useful to quickly select the data to show in a report.
Step Assets
- Only locking systems

Steps Locks and Matching Locks
- Defect locks

- Destroyed locks

- Installed locks

Steps Keys and Matching keys
- Available keys

- Issued keys

- Lost keys

- Unavailable keys

Key distribution
This TSI is a copy of the TSI Core – Orders. This should be the start point. Below, all the necessary changes will be listed.
In TSI settings the TSI should be named Key distribution.
Levels and steps
The levels Components and Order subdetails are removed.
The level Orders is renamed to Key distribution.
The level Order details is renamed to Details.
Properties only has the step Properties. This will remain unchanged.
Key distribution only has the step Orders, which is renamed to Key distribution as well.
Details only has the steps History and Communication logs (renamed from Communication logs - orders).
Layouts
For level Key distribution step Key distribution there should only be two layouts: The standard layout of the BO and the layout for Key distribution that was created in a previous chapter.
For Details / Communication logs the newly created layout for Key logs should be added. The standard layout for Communication Log should be retained, but all other Communication Log related layouts should be unassigned.
Lists and filters
Level Key distribution step Key distribution should get a selection step filter, a customisable list and some user filters.
Selection step filter
Key distribution should only show orders of type Key distribution:

Customisable lists
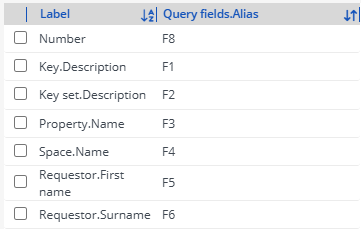
In order to see more meaningful information on this step creating a customised list is a good idea. Here is an example of what it could look like for the step Key Distribution:
User filters
User filters aren’t a necessity, but here are some examples of meaningful filters, which might also be useful to quickly select the data to show in a report.
Key distribution
- Open key distribution requests

- Overdue key distribution requests

Changes in Layouts
In the chapter Layouts there were several changes that couldn’t be made before the TSIs existed.
These are the (UD)BOs that still need to be adjusted.
The jump links lead to their respective chapters.
Navigation Group
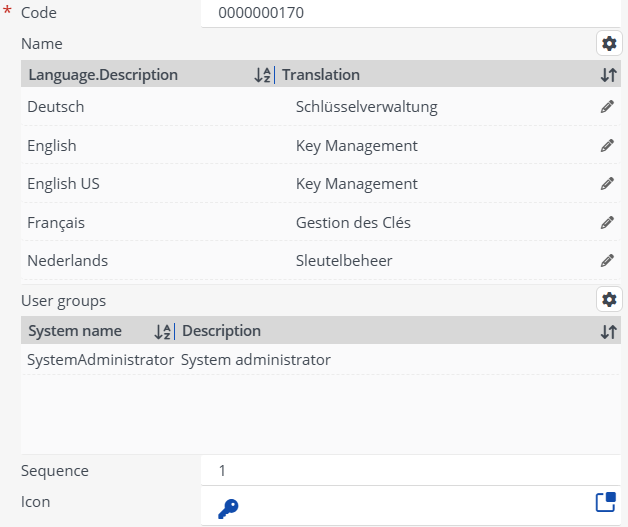
A new navigation group with the newly created TSIs should be added for a better overview, but the TSIs could be added to any other navigation group too. Here’s an example:
Navigation group:
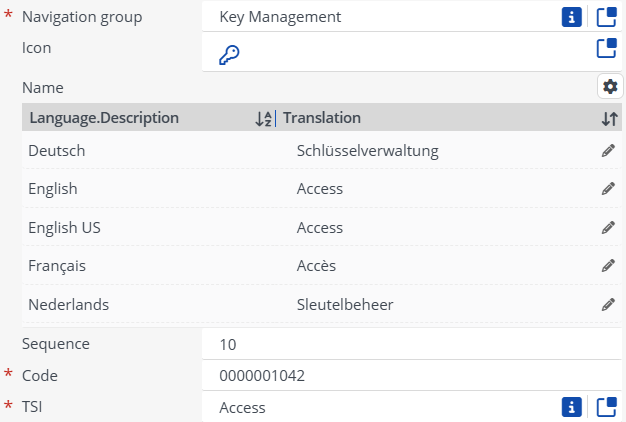
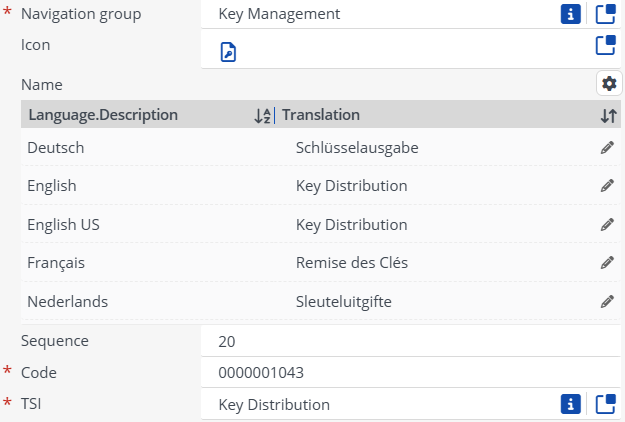
Adding the TSIs:
Reports
There will be three different types of reports: “normal” grid reports, a lock plan and transaction reports. The transaction reports will give a receipt for every transaction (issue, return, etc.) with the signature if available. The grid reports together with some of the user filters created for the TSIs (Access and Key distribution) serve to provide the user with a basic overview over e.g. all keys, all installed locks, all issued key sets, etc. Of course the user can add further user or temporary filters and reports to better support their own needs.
Note: It is also possible to import the reports via configuration transfer.
Grid reports
These reports can be taken over into the target system via configuration transfer, therefore they will not be explained in detail. They will merely be listed and their intended purpose will be explained.
As explained in the chapters about user filters in the TSIs Access and Key distribution, these reports can be used on previously filtered data with either the help of (the existing) user filters or temporary filters. The title and subtitle can also be amended to better reflect the purpose of the reports, as well as the shown attributes.
All key distributions
Key Distribution – Key distribution
This report shows all selected Key distributions, sorted descending by Key distribution request number, along with the Status, Requestor (with first and last name), Key (set) (either or, whichever is being used in the request), Rq. Return Date (End date & time), Property and Space.
With effective filtering this report can be used to show all open requests, all request made by a certain requestor, all overdue requests, etc.
All lock definitions
Access – Components – Lock definitions
This report shows all selected Lock definitions, sorted ascending by Code, along with the Description, Brand, Supplier and Locking system.
All key definitions
Access – Components – Key definitions
This report shows all selected Key definitions, sorted ascending by Code, along with the Description, Brand, Supplier and Locking system.
All key sets
Access – Components – Key sets
This report shows all selected Key sets, sorted ascending by Code, along with the Description, Key storage, Issued (whether the key set is currently issued or not) and Key set holder.
All locks
Access – Locks and keys / Details – Locks / Matching locks
This report shows all selected Locks, sorted ascending by Code, along with the Description, Status, Lock definition and Location.
All keys
Access – Locks and keys / Details – Keys / Matching keys
This report shows all selected Keys, sorted ascending by Code, along with the Description, Key definition, Key Holder, Order #, Issued, Status, and Key set.
Key transactions
Access – Details – Key transactions
This report shows all transactions of a selected key, sorted descending by Order #, along with the Status, Key holder, Issue Date, Rq. Return Date, Return Date, and Description.
Key set transactions
Access – Locks and keys – Key set transactions
This report shows all transactions of a selected key set, sorted descending by Order #, along with the Status, Key set holder, Issue Date, Rq. Return Date, Return Date, and Description.
All locking systems
Access – Components – Assets (User filter Only locking systems)
This report shows all selected Locking systems, sorted ascending by Code, along with the Description, Property, Space, Brand, and Supplier.
Lock plan
In the chapter Layouts the TSI actions for the lock plan(s) were added to the layouts of the (UD)BOs Locking systems, Keys, Locks, Key definitions and Lock definitions.
In TSI Access in each of those steps the lock plan can be opened and will produce an excel file like this:
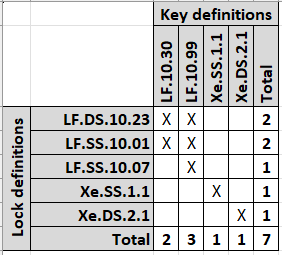
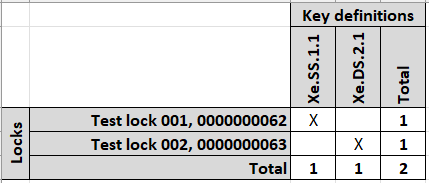
The user can see the relations between different lock and key definitions or locks and key definitions.
Transaction reports
These transaction reports can be taken over into the target system via configuration transfer, therefore they will not be explained in detail here. They can be found in the TSI Key distribution on the level Key distribution. They are available in german and english and will be executed in the language of the Key holder. When multiple users have the same person then those reports will be executed multiple times. Persons should only be assigned to one user.
The following reports are available:
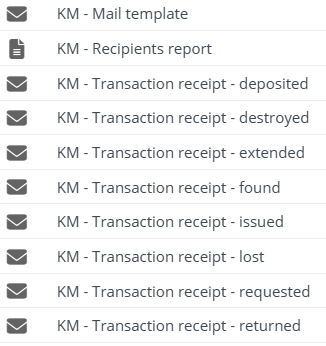
All reports containing Transaction receipt in their name are the actual transaction receipts. They have corresponding Word templates that can be replaced or edited to the customers liking. In that case, the placeholders and used fields in these reports need to be adjusted as well.
The Recipients report and the Mail template are basically dummy reports that are necessary so that with the help of event-based notifications the transactions reports will be automatically attached to each request after a transaction has taken place. They shouldn’t need to be changed.
This is an example of a transaction report after a key has been returned:
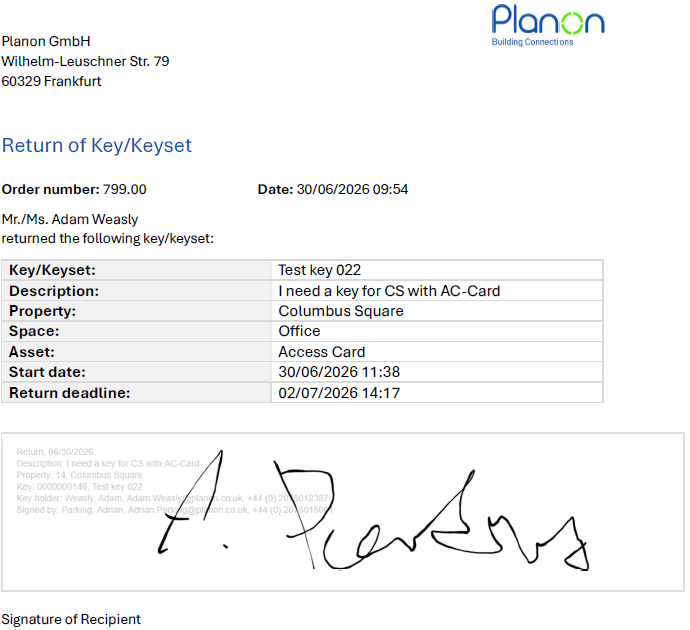
It is automatically attached to the request as a pdf in the communication logs:
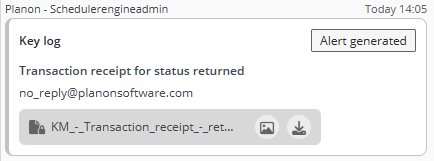
Note: The scheduler runs only every 5 minutes, so it can take a little while until the transaction report is visible here.
Alerts
In order for the transaction reports to be automatically attached to the communication logs of the requests, these event-based notifications need to be created.
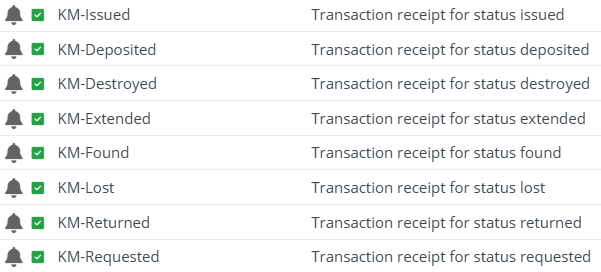
They are all the same with the obvious exception of different reports being referenced. They should look like this:
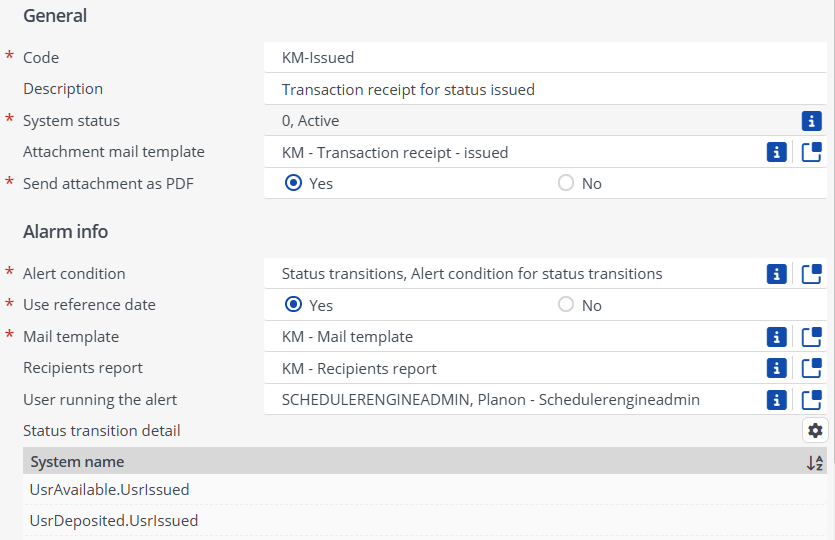
Attachment mail template is the report that has been mentioned in the previous chapter. So are Mail template and Recipients report.
Alert condition should be:

User running the alert must be SCHEDULERENGINEADMIN, otherwise it won’t work. There is also a scheduling job that needs to be active in order for it to work. It can be activated in the TSI Scheduled Tasks and it’s called SYSNOTIFY_EVENTBASED.
The status transition details are linked in the field definer after the creation of these notifications. You can jump there from here or at the end of this chapter.
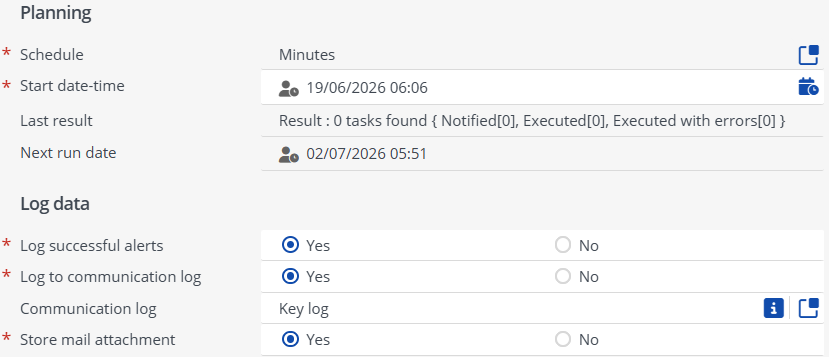
In Schedule the frequency can be set for how often the scheduler checks and executes tasks. By default it is set to one minute, however, the minimum is every 5 minutes. You may enter a different frequency but anything under 5 minutes will have no effect.
The communication log should be Key log, that has been created specifically for the Key management.
Afterwards, the notifications have to be set to active. Of course, this has to be done for all target status.
Note: The created notifications need to be linked to the corresponding status transitions, this can be done here.
Planon Self Service (PSS)
Almost all functions for Key distribution can be done via PSS. Since these forms can be taken over into the target system via configuration transfer, they will not be explained in detail. They will merely be listed and their intended purpose will be explained. For explanation of their functionality, see here.
Note: For the configuration transfer it is important that all free fields for UDBO Key Distribution have been configured according to this document. If other free fields were used, the imported PSS definitions need to be adjusted accordingly.
Additional Information
This chapter contains a collection of other information, hints and tips that have no place in the other chapters.
Authorization
- In order to keep data consistent Key distribution requests should not be deleted. The Delete button has been removed in the layout, but obviously could be added again by the end user. In that case it should be authorized carefully. However, the Paap App does not allow deletion of Key distribution requests in any other status but Requested.
Date & Time
- The display of dates and especially times can be a bit confusing. In requests, the fields Start date & time, End date & time and Extended until all show the time from the time zone of the property that is selected in the request.
The field Status since displays the time from the time zone of the currently logged in user.
In Key issuings (Key transactions) the fields Issued on, Requested return date and Returned on also refer to the time zone of the currently logged in user.
That means, that in a request the End date & time might show 11AM but in the corresponding the Key issuing the Requested return date might be 9AM, but it is the same time because they are referring to different time zones.
Unfortunately, as some of these fields are system fields and can’t or should not be changed by us, there is no way around this.