Planon Extension - Visitor Check-In
Introduction
This document outlines the functionality of the ‘Extension for Visitor check in’ app.
The Visitor check in app contains a web page that allows both internal and external visitors to check in at the office themselves. The page can be accessed using a link and passing an access key in the URL.
Check in can be done both by using a QR code or by manually searching for the visitor name.

Prerequisites
Environment
This app is designed to work with Planon L96 and above.
Constraints
The webpage is intended to show the visitors for the current day only
The webpage is designed to be shown on tablets / kiosk devices
The webpage only supports browsers as supported by the Planon core product (see supported configurations)
The webpage shows a fixed set of fields. Below is the set of Business Objects and respective fields which are visible on the screen:
Visitor
Name
Host
Start / end time
Required (free)fields
- When the NDA signing feature is used a FreeField of type ‘image’ is required to store the visitors autograph.
Assumptions
N/A
Features
This chapter describes the features of the visitor check-in app.
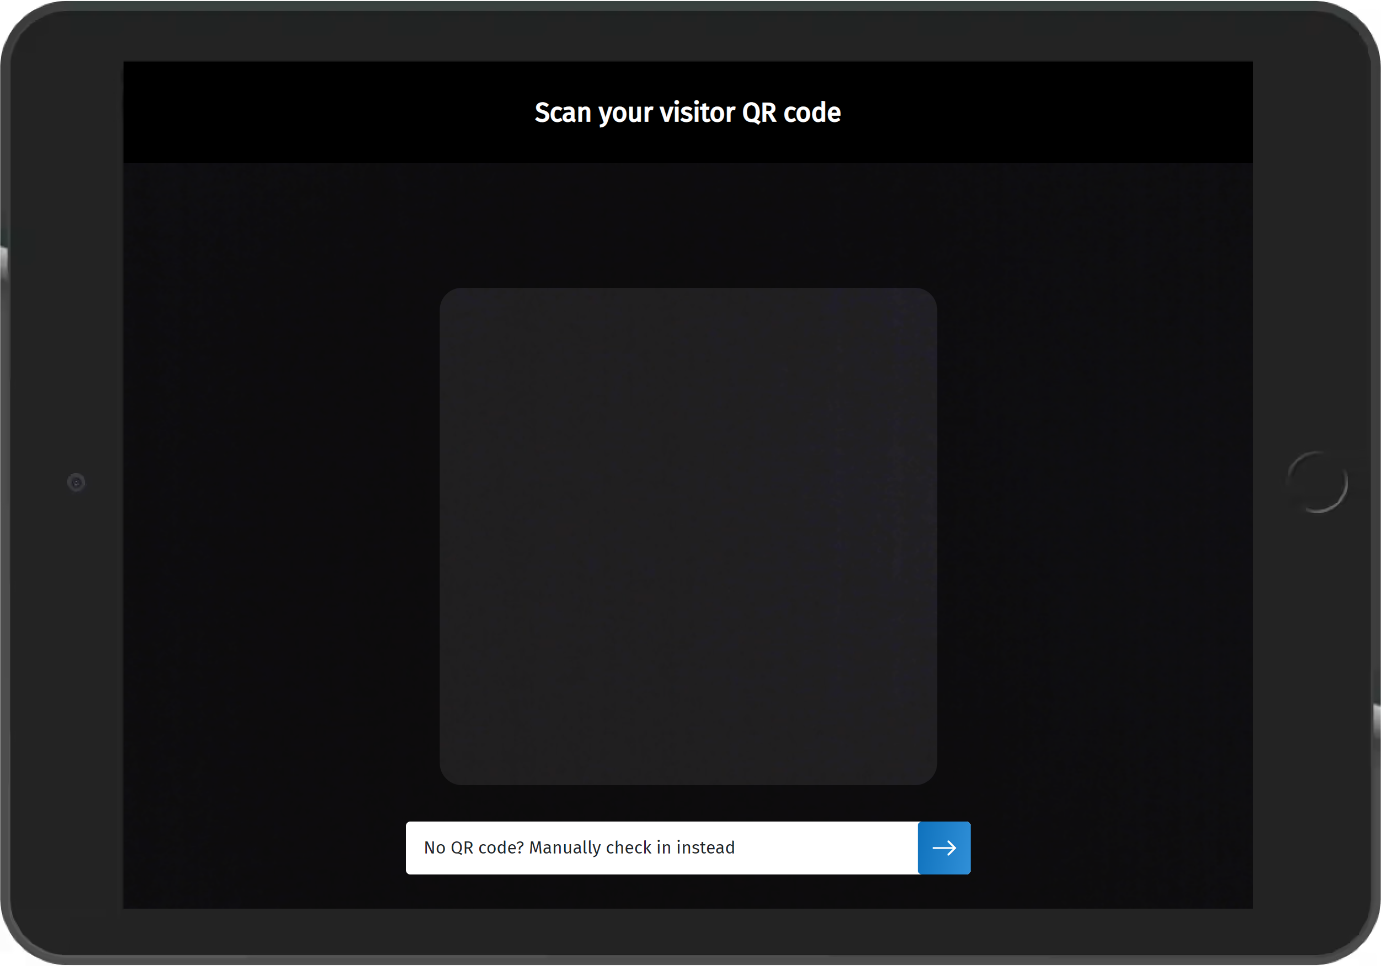
QR code check in
The app allows visitors to check in using a QR code. This QR code should contain the Syscode of the visitor. Generating a QR code can be done using the Planon app ‘Extension for QR code generator’.
Manual check in
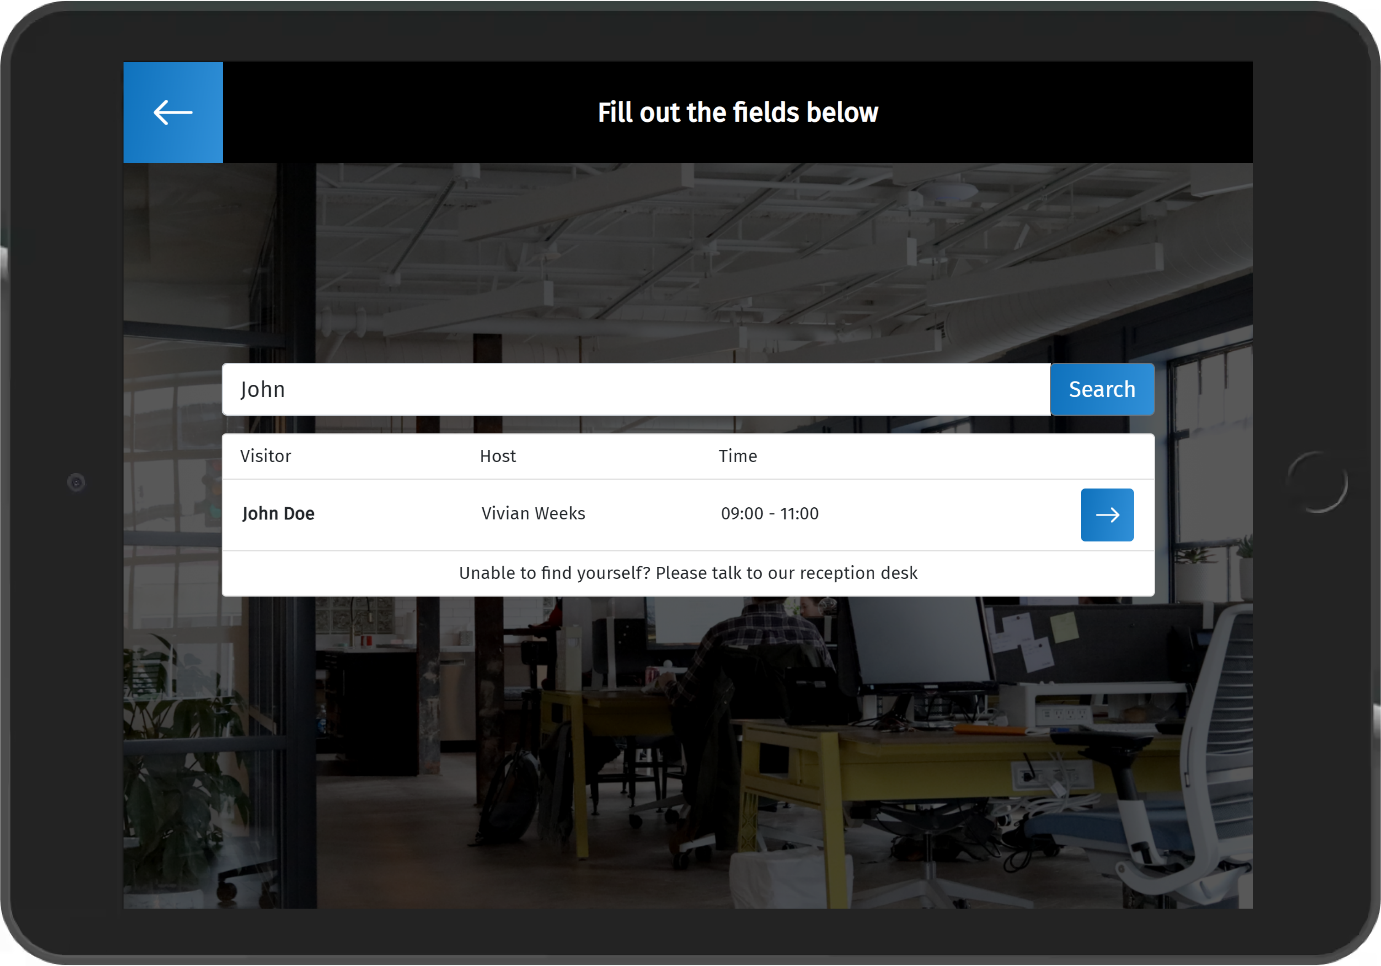
The app also allows for visitors to manually search for a visitor record and check in. Search can be done based on name or email address.
Require visitor to sign NDA
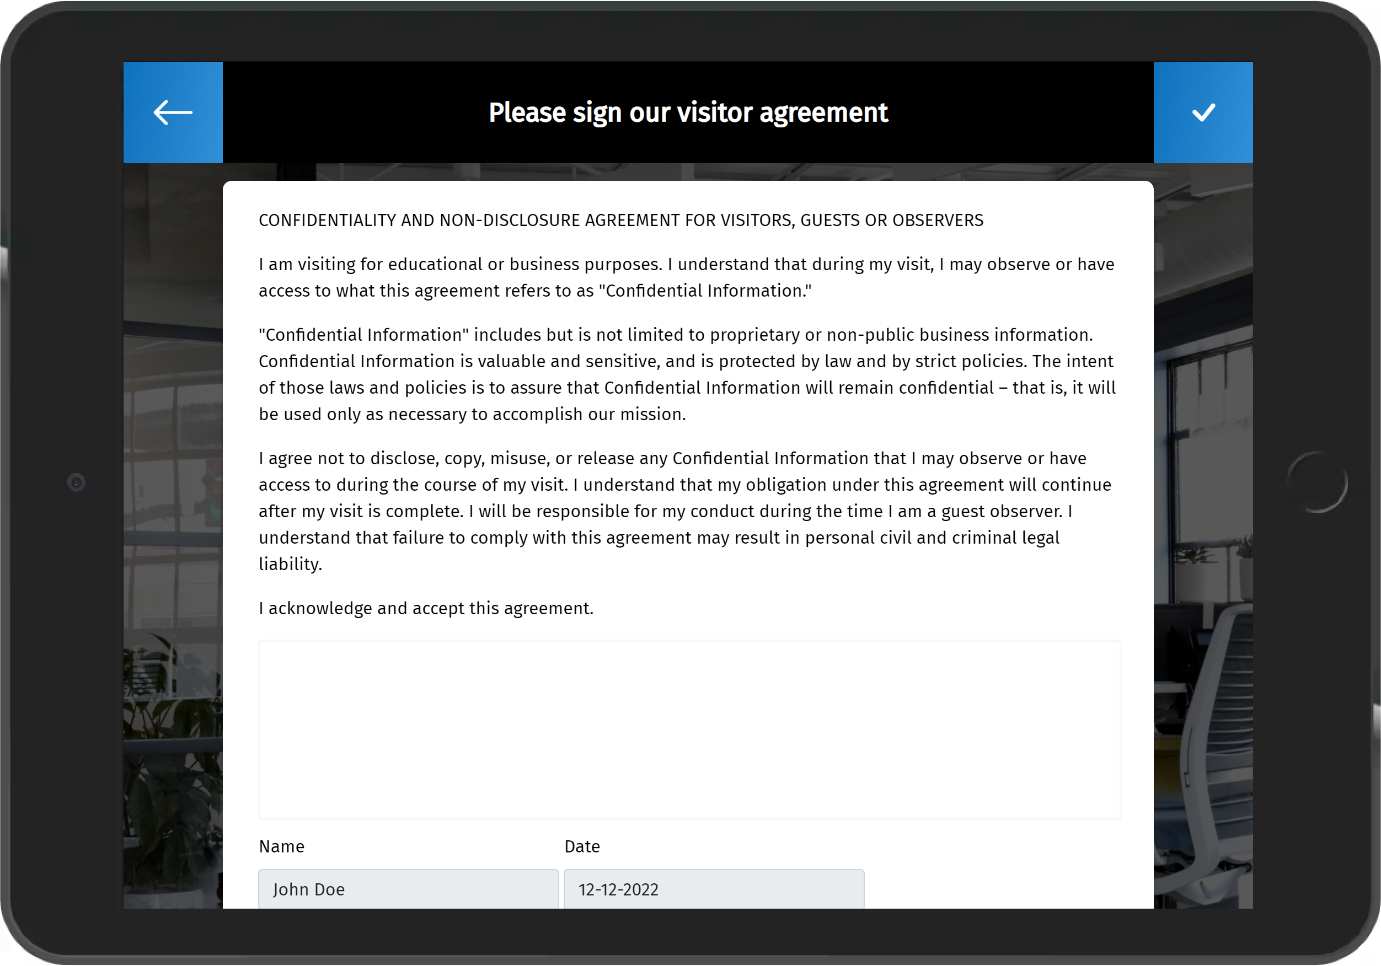
It is possible to require external visitors to sign an NDA / visitor agreement before being able to check in. The autograph will be stored on the visitor record. External visitors are visitors that have a ‘visiting’ reference (PersonRef) filled out.
How does it work?
This chapter contains the functional and technical description of the features.
Deployment
Once the app is installed and activated, a webpage must be configured through the following Planon TSI ‘Web configuration’ to be able to create and configure a webpage that shows a list of visitors.
Most likely the URL will have to be accessed using an access key. In this case a parameter ‘accesskey=<your key here>’ has to be appended to the URL. Please refer to the Planon web help on how to create an access key.
Installation
This chapter describes the steps required to install this app on your Planon environment.
Installation Process
There are two ways to install the app:
- Using the Marketplace
- Manual installation
Install the app by using the marketplace
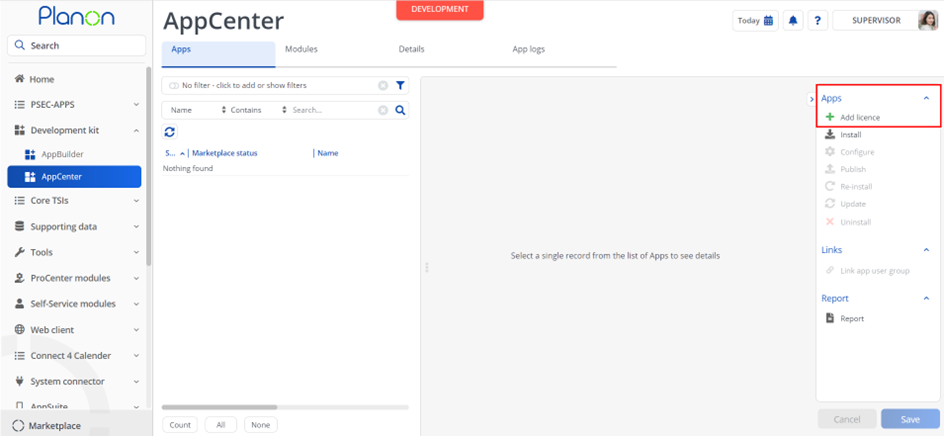
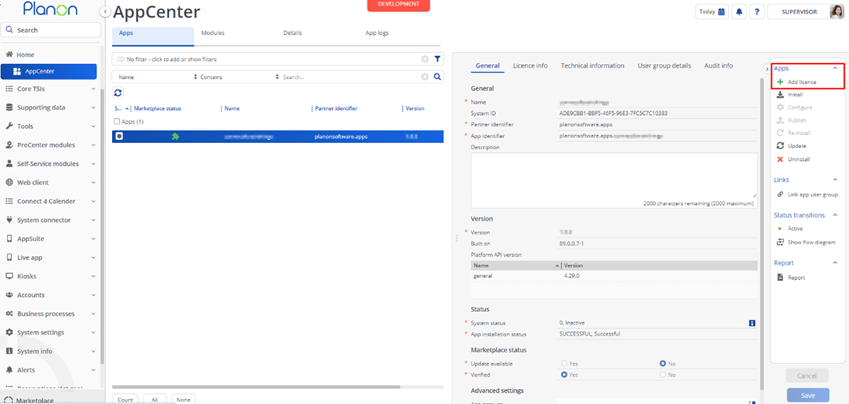
In case your environment is configured to use the Planon app store the only thing required to install the app is to add the app license in the AppCenter TSI. Planon will automatically download and install the app.
Manual installation
In case you want to perform a manual installation follow the steps below.
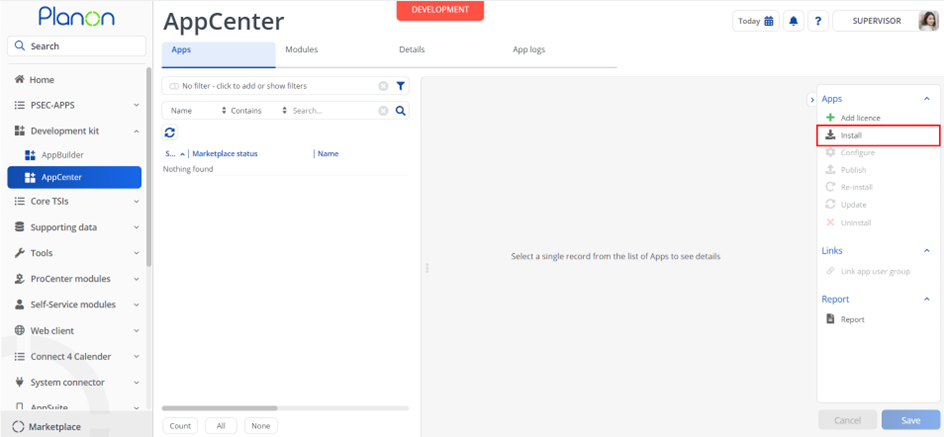
- Open AppCenter TSI from Planon webclient and click on install from action menu
- Browse to the .ppk file
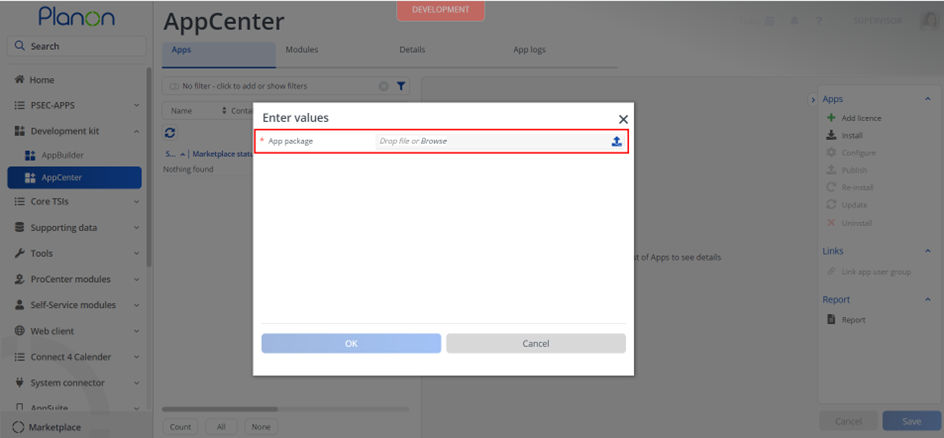
- Click OK to install the app and follow the installation process
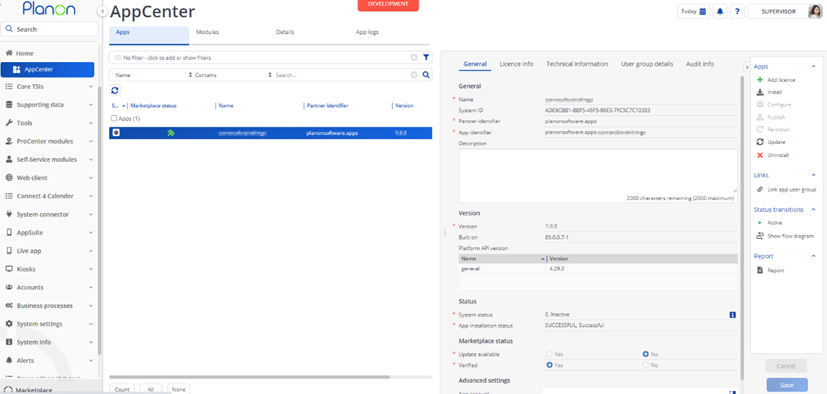
- When the app is successfully installed, the app will appear in the AppCenter
- Add the app license in Apps TSI
Translations
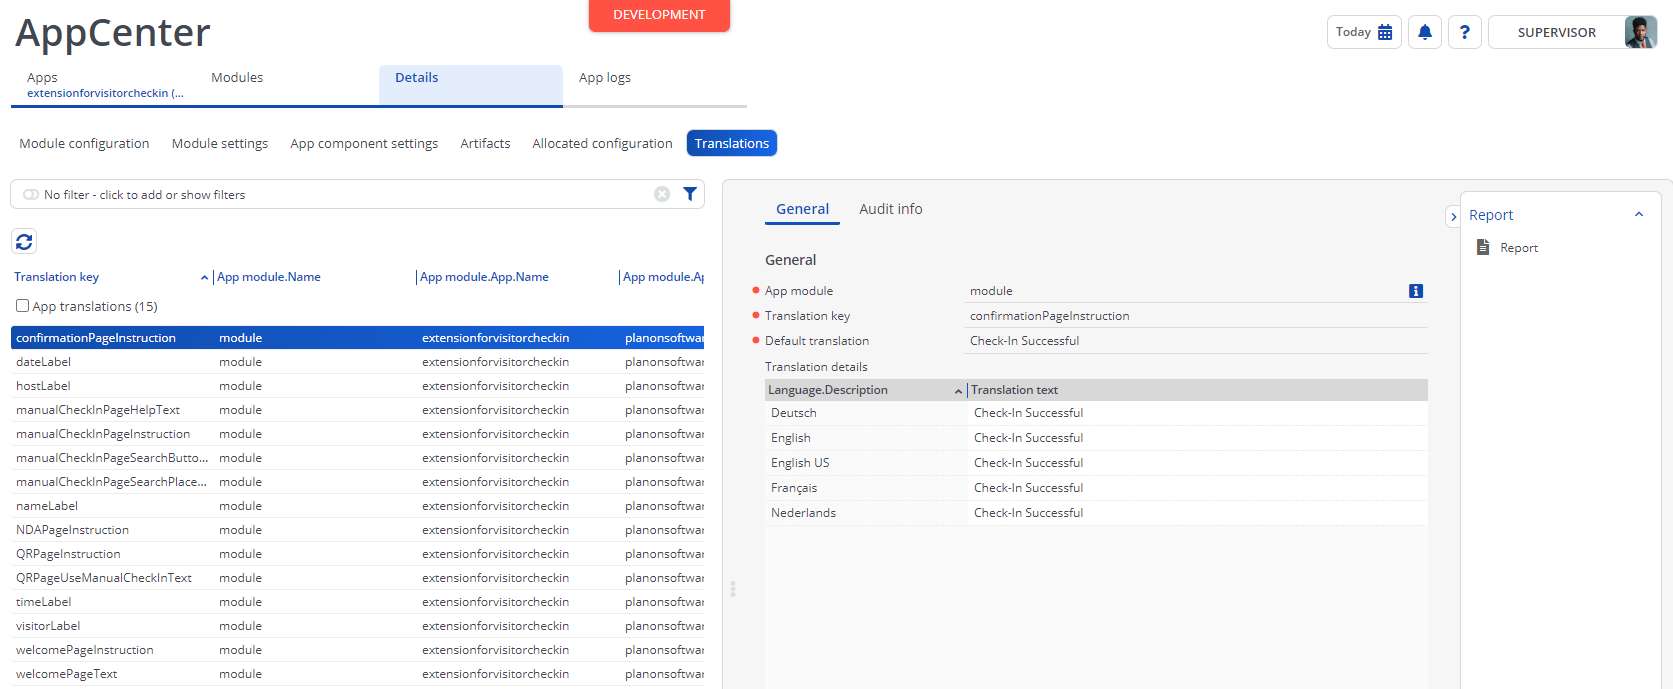
It is possible to provide a translation for any visible text in the app. Translations can be provided in the AppCenter TSI.
- Select the app
- Drilldown to Details selection step
- Select the Translations selection level.
Activation
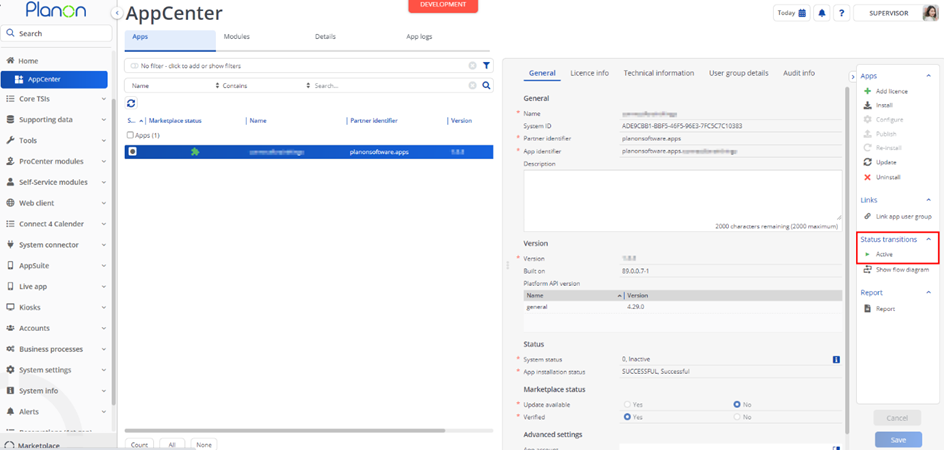
Once the app has been configured, you can activate the app by pressing the Active status transition from the action panel. Always make sure that the required User groups are linked correctly and the Configure action is executed before activating the App.
Configuration
PSS Module
In order to add/configure the PSS - Visitor Check in module to Planon, follow the below steps described.
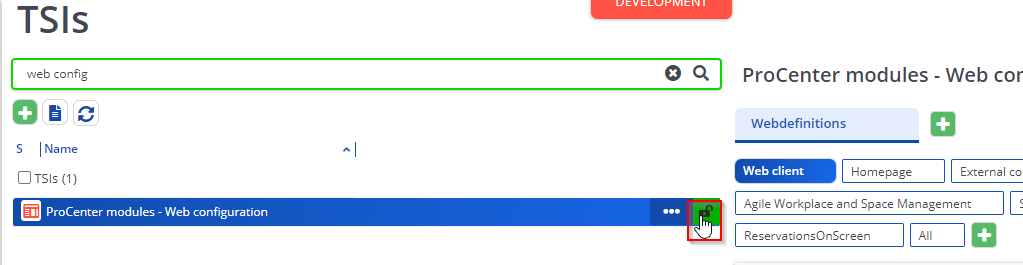
Navigate to the TSI with name TSIs.
Find the TSI ProCenter modules – Web configuration.
Select the TSI and set it to under construction.
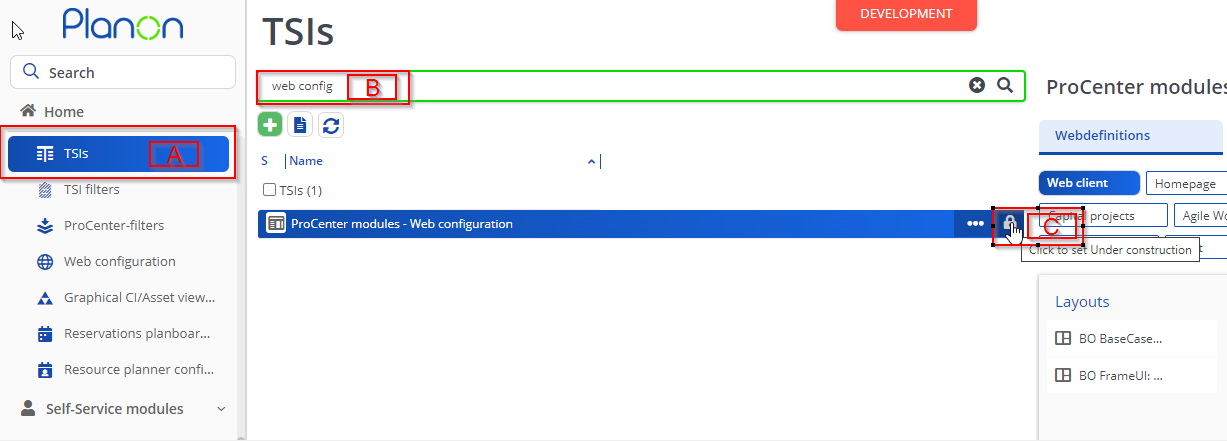
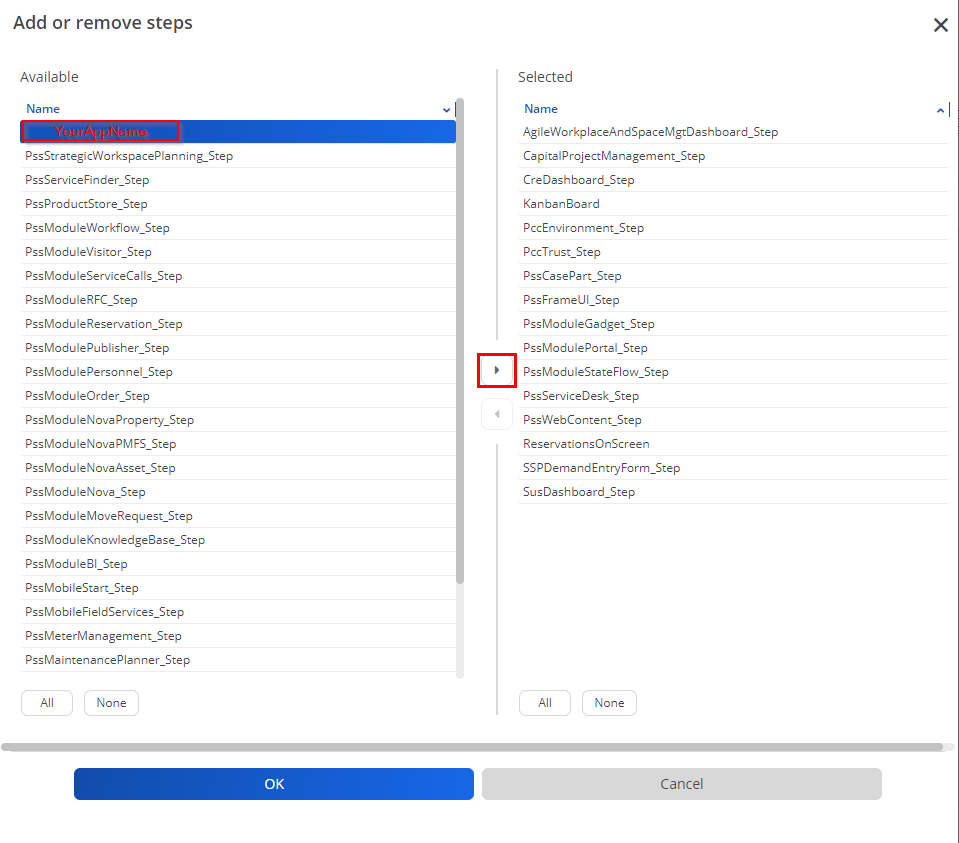
Click on the Add action as shown below
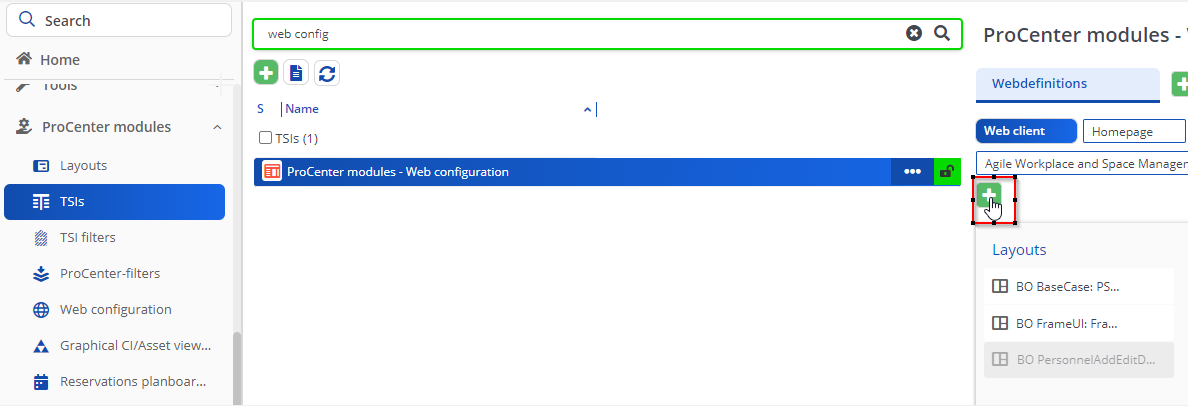
Add the step ‘VisitorCheckIn’ to the selected list
Set the TSI back to completed.
Logout and Login to Planon
Navigate to the Web configuration TSI and selection step VisitorCheckin.
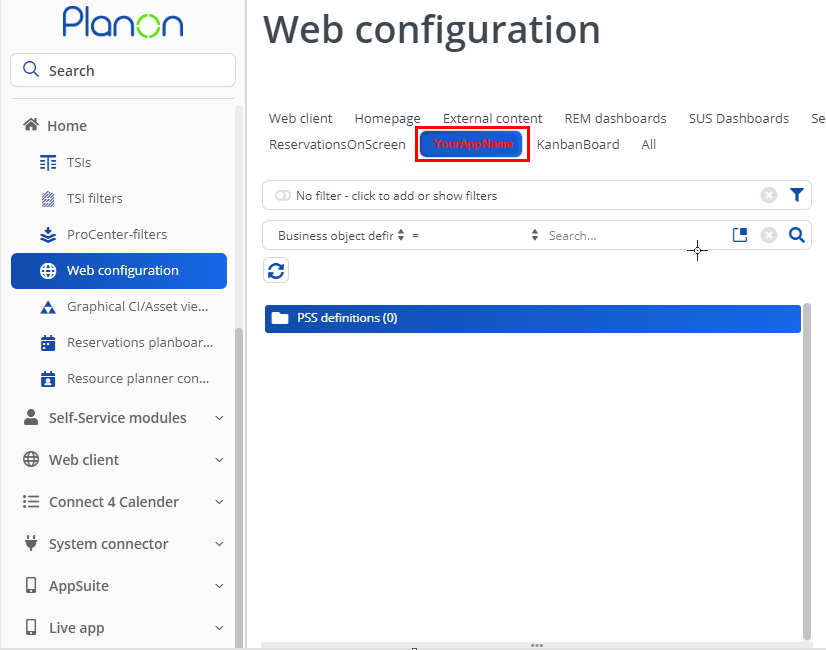
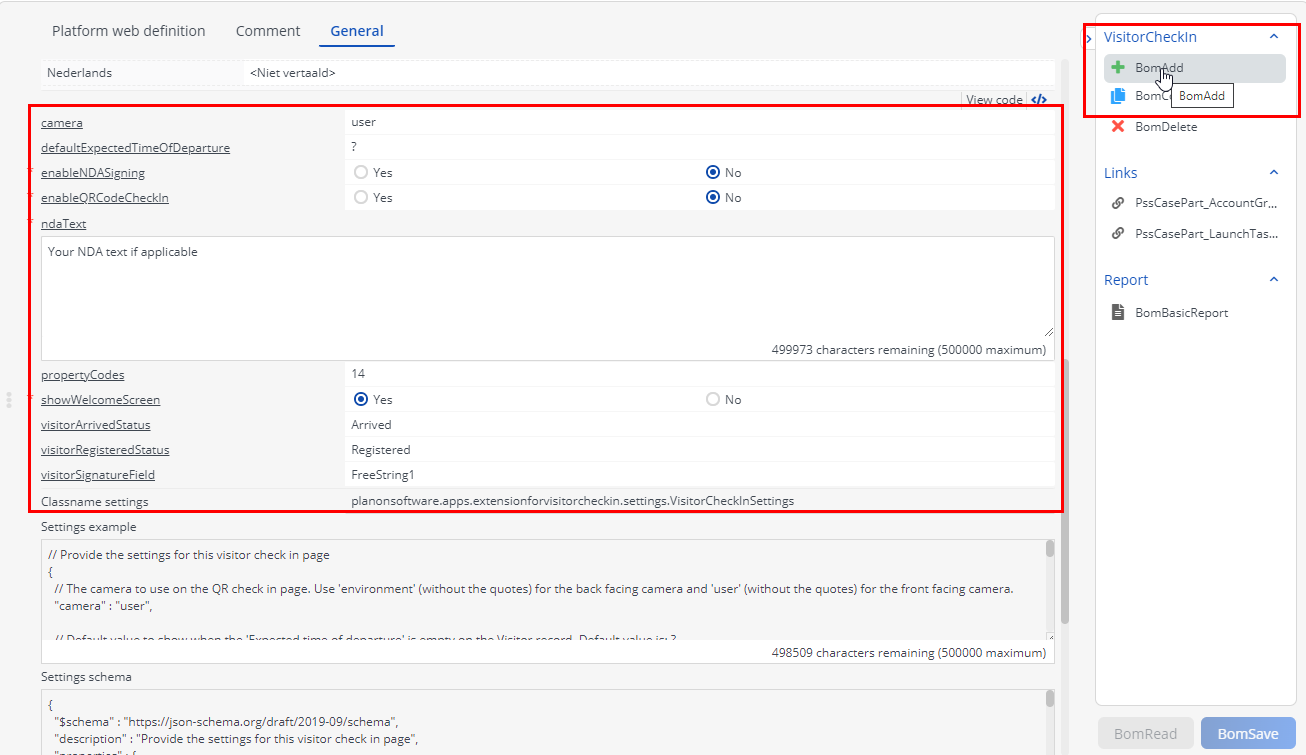
Now you can add a new definition of your PSS Module in the Web configuration TSI and fill the setting as needed in General tab. More information about settings can be found in the further chapters.
Visit the webpage by pasting the URL or clicking on the link icon
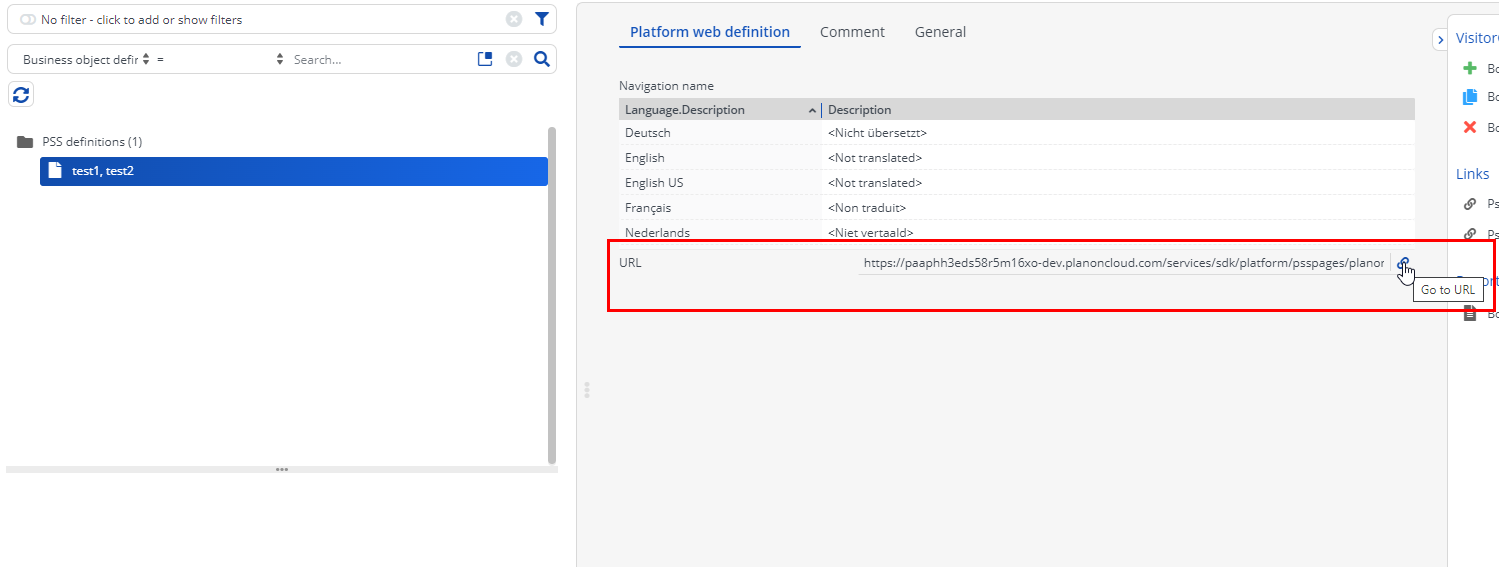
The url can be extended with param propertyCode which is used to pass codes of property. When this param is passed, the setting propertyCodes is ignored. This feature is available from version 1.4.0
System images configuration
This apps make use of system images that is shown within the welcome screen. This can be configured as follows:
- Navigate to the ‘System images’ TSI
- Add a new System images record with the following name ‘VisitorCheckInLogo’.
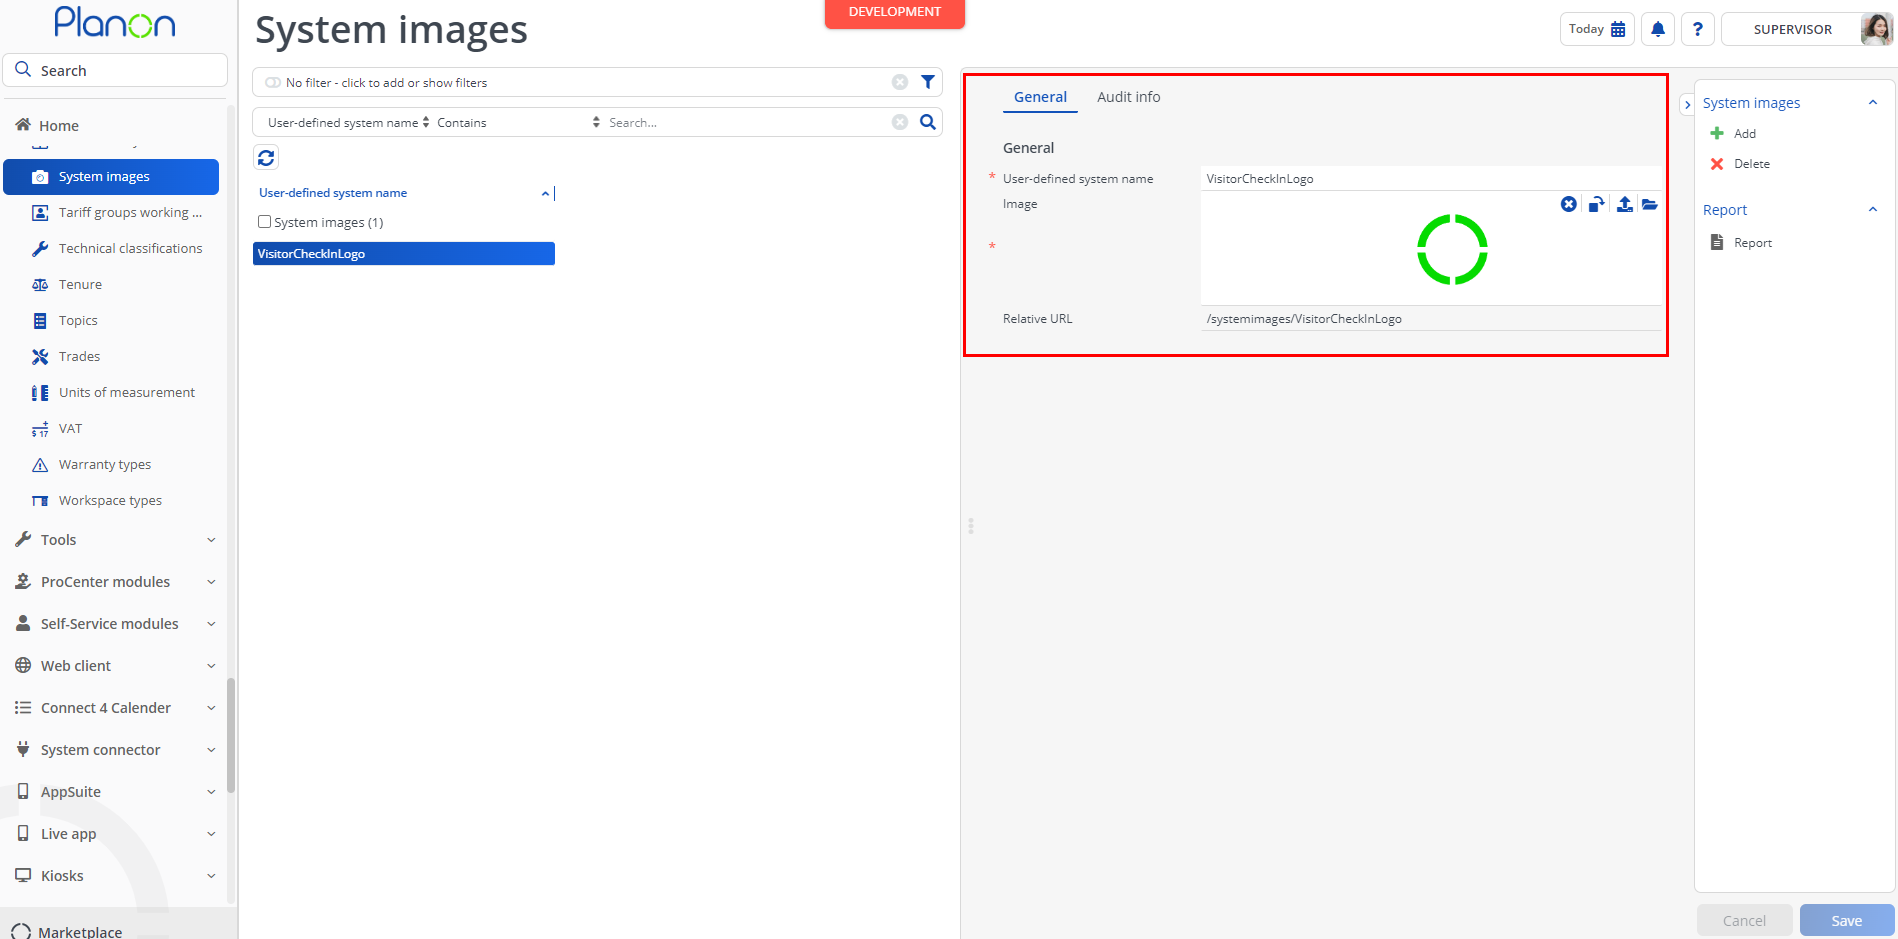
Note : Logos can be downloaded here Planon Dark Theme Logo
Planon Default Logo

PSS Module settings
This chapter describes and explains the settings that are available for this app.
Description of settings
| Setting | Explanation |
|---|---|
| Camera | The camera to use on the QR check in page. Use ’environment’ (without the quotes) for the back facing camera and ‘user’ (without the quotes) for the front facing camera. |
| defaultExpectedTimeOfDeparture | Default value to show when the ‘Expected time of departure’ is empty on the Visitor record. Default value is: ? |
| enableNDASigning | Set to yes to ask external visitors to sign an NDA before checking in |
| enableQRCodeCheckIn | Set to yes to enable QR code check in functionality |
| ndaText | The NDA text to be displayed. Only needed when NDA signing is enabled. |
| propertyCodes | Provide the property codes (comma separated) for which this visitor check-in definition should work. This is a security measure to prevent visitors registered for Property A checking in at Property B. This can be overridden with url param ‘propertyCode’ |
| showWelcomeScreen | Set to yes to display a welcome screen. |
| visitorArrivedStatus | The name of the visitor arrived status. After check in the visitor BO will be set to this state |
| visitorRegisteredStatus | The name of the visitor registered status. The app will only lookup / display visitors which are in this status |
| visitorSignatureField | The system name of the FreeField (type image) in which the signature should be stored. Only applicable when NDA is enabled. |
| visitorLookupField | The system name of the field that is used to retrieve the visitor when checking in with a QR code. So for example, if the QR code contains the visitors syscode, this should be set to the field ‘Syscode’. The value in this field should be unique for the Visitor BO. |
Troubleshooting
Error handling
- Errors are recorded in the server logs:
- Tomcat log for web components
- Webpages
- PSS modules
- Stepview
- TSI Action
- JAX-RS webservices
- Wildfly log for server-side components
- Business rules
- Scheduled tasks
- Workers
- Event Connector
- Tomcat log for web components
- UI components (TSI Actions) also display errors in the interface