Planon Configuration
This document explains the necessary configurations to work with the feedback tool. Let us go through each section
Pick list
This pick list contains the Feedback options to be provided in the email requested for feedback.
The pick list consists of 5 options as below
- Extremely unsatisfied
- Unsatisfied
- Neutral
- Satisfied
- Extremely satisfied
Based on the setting highestScoreNumberIsBestScore, the rating can change for these options.
Let us consider highestScoreNumberIsBestScore is set to No meaning ‘1’ being the best score
Now, let us create the pick list in Planon by follwing below steps with options as described
| Code | Name |
|---|---|
| 1 | Extremely unsatisfied |
| 2 | Unsatisfied |
| 3 | Neutral |
| 4 | Satisfied |
| 5 | Extremely satisfied |
- Log on to the Planon webclient with Admin rights.
- Go to the ‘Picklists’ TSI.
- Create a new code/descriptive picklist with name FEEDBACK_OPTIONS.
- Add the desired picklist items as defined in above table
Feedback UDBO
The next step to setup the UDBO for Feedback item. The UDBO can be created either under Communication Log or Order Document based on the setting storeFeedbackAsOrderDocument
Let us follow below steps
- Log on to the Planon webclient as supervisor
- Open the TSI ‘Field definer’
- Select the Business Object (BO) with system name ‘CommunicationLog’ or ‘Orderdocument’ depending on the desired configuration
- Set the BO under construction via the action menu.
- Create the following new User Defined Business Object (UDBO) via the action menu:
- Click on Add action in action panel
| Attribute | Value |
|---|---|
| Systemname | UsrFeedback |
| Description | Feedback |
| Is authorized | Yes |
| Translation(s) | Feedback |
- Go to selection level ‘Details’ and selection step ‘Fields’.
- Use a ‘FreeString’ field that is not yet in use to create a field for the feedback. Set the following attributes:
| Attribute | Value |
|---|---|
| Fieldtype = | CodesCodeName |
| Picklist code descriptive | FEEDBACK_OPTIONS |
| In selection | Yes |
| Translation(s) | Feedback |
Note: remember the database fieldname of this field because it will be used in the dashboard which is optional
- Use a ‘FreeString’ field that is not yet in use to create a field for the feedback key. Set the following attributes:
| Attribute | Value |
|---|---|
| Fieldtype | String |
| In selection | Yes |
| Translation(s) | Feedback key |
- Select the field with systemname ‘Code’ and set the following attributes:
| Attribute | Value |
|---|---|
| Unique | Yes |
- Go to selection step ‘Status transitions’.
- Create a new status transition as a begin status.
- Go back to selection level ‘Business objects’.
- Set the attribute ‘Standard status’ to the begin status.
- Set the BO with systemname ‘CommunicationLog’ or ‘OrderDocument’ to completed.
Business Rule Generate Feedback key
The business rule is key for the entire app. Without this business rule, the app cannot be used.
- Log on to the Planon webclient with Admin rights.
- Open the TSI ‘Field definer’.
- Select the Business Object (BO) with system name ‘BaseOrder’.
- Set the BO under construction via the action menu.
- Select the User Defined Business Object (BO) for which the Feedback tool should function.
- Go to selection level ‘Details’ and selection step ‘Extensions’.
- Create a new extension with the following details:
| Attribute | Value |
|---|---|
| Extension | com.planonsoftware.feedbacktool.businessrule.Feedback |
| Activated | Yes |
| Sequence | 5 |
| Event type | AU, AfterDBUpdate |
| Settings | See the table below |
| Settings | Explanation |
|---|---|
| keyLength | The Business rule will generate a random key for each feedback communication log. With this parameter the length of this key can be modified. Default it will have a length of ‘10’ characters. |
| feedbackItemBOTypeName | Mandatory setting; The value contains the system name of the feedback item udbo. |
| descriptionFieldValueTemplate | Optional setting. The value from this setting will be set as description on each feedback communication log item. The default value is ‘Feedback for order with number: {0}’. The ‘{0}’ tag will be replaced with respective order number. |
| completedStatusPnName | Mandatory setting which contains the system name of the status of the specific order udbo for which a feedback item will be generated. Multiple status possible 🡪 completedStatusPnName : UsrCompleted;UsrReady;UsrReady2 |
| isPercentageEnabled | Default value is No not mandatory Example: isPercentageEnabled : Yes/No |
| percentageValue | This value will determine on what percentage the order will trigger for example 30% percentageValue : 30 |
| isOrderFieldValueCheckEnabled | If this value is true the solution extension will check the target field values if the business rule should trigger isOrderFieldValueCheckEnabled : Yes/No |
| commaSeparatedOrderFieldPnNamesForTriggerValidation | These values contains the fields on the order which should contain a value given in the ‘orderFieldValueToCheckEquals’ parameter commaSeparatedOrderFieldPnNamesForTriggerValidation : FreeStringX |
| orderFieldValueToCheckEquals | Value must be equal to the target field value. For example, FreeStringX is set to Y in Planon and the solution extension must only trigger if FreeStringX is Y, The values will compared as strings and is non capital sensitive orderFieldValueToCheckEquals : Y |
| markOrder | Default value is false, this will activate the logic for setting a mark on the Order Example: markOrder : Yes/No |
| orderMarkFieldPnName | This setting value is the field on the order what should contain a value given in the ‘orderMarkFieldValue’ parameter orderMarkFieldPnName : FreeStringX |
| orderMarkFieldValue | This value will be set on the given target in ‘orderMarkFieldPnName’ (FreeStringX) orderMarkFieldValue : Y |
| standardOrderTypeCodeValidationEnabled | This will activate the logic for setting standard order type value filter Example: standardOrderTypeCodeValidationEnabled: Yes/No |
| standardOrderTypeCodeValuesToCheck | This setting is for setting allowed Standard Order type code values. For example: standardOrderTypeCodeValuesToCheck: FM087;FM001 |
| standardOrderTypeValidationModeNotIN | This value is responsible for setting the allowed values to a cannot contains mode. Allowed values to Cannot contain the given allowed values from the parameter: standardOrderTypeCodeValuesToCheck standardOrderTypeValidationModeNotIN= Yes/No |
- Go back to selection level ‘Business objects’.
- Select the BO with system name ‘BaseOrder’.
- Set the BO on completed via the action menu.
Order – Optional feedback field
This conifguration is required if the given feedback has to be stored on the Order BO.
The given feedback will be set on a field on the feedback item udbo. However, for TSI filtering it can be required to also set the feedback on a field on the order udbo. The field configured in this section should be configured in the app setting feedbackFieldOnOrder
- Log on to the Planon webclient with admin rights.
- Open the TSI ‘Field definer’.
- Select the Business Object (BO) with system name ‘BaseOrder’.
- Set the BO under construction via the action menu.
- Go to selection level ‘Details’ and selection step ‘Fields’.
- Use a ‘FreeString’ field that is not yet in use to create a field for the feedback. Set the following attributes:
| Attribute | Value |
|---|---|
| Fieldtype | CodesCodeName |
| Picklist code descriptive | FEEDBACK_OPTIONS |
| In selection | Yes |
| Translation(s) | Feedback |
- Go back to selection level ‘Business objects’.
- Select the BO with system name ‘BaseOrder’.
- Set the BO on completed via the action menu.
Layout
For the feedback item udbo a layout needs to be created. Recommended is to set all fields to read-only and to leave out all actions. The screenshot below gives an example of how the layout could look like.
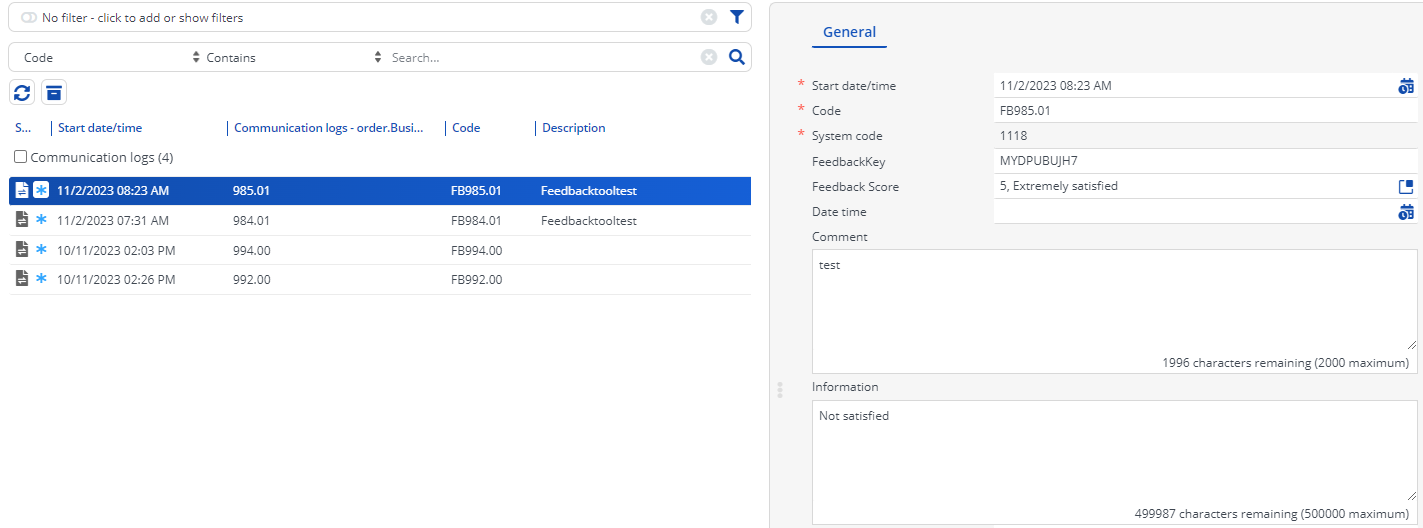
Furthermore, if requested, the feedback field can be added to the respective order udbo layouts.
Authentication and Authorization
Authorization
The User associated with access key configured in the template should have the rights to create or update Order documents or communication logs and Order BO.
This setup is done via Function Profiles.
Below steps take you through the necessary configuration
- Log on to the Planon webclient with admin rights
- Open the TSI ‘Function profiles’.
- Create a new function profile with the following attributes.
| Attribute | Value |
|---|---|
| System name | FeedbackTool |
| Description | FeedbackTool |
| Default Rights | 1, Read only |
- Go to selection level ‘Business object rights’.
- Select the created feedback item udbo. If it is non-existent in this list, the attribute ‘Is authorized’ needs to be set to ‘Yes’ in ‘Field definer’.
- Set attribute ‘Type field rights’ to ‘3, Specification’.
- Click on the ‘Fields’ button in the action menu and add the fields with the following system names:
- Code
- Name
- BeginDate
- Comment
- CommentString
- Furthermore, add the created feedback and feedback key fields
- Add the actions with the following system names:
- BomRead
- BomSave
- Also make sure the Business object orders (BaseOrder) has enough rights on updating an or saving.
Authentication
For the feedback tool to function for users outside of your SSO realm an access key is required. This chapter describes how configure an access key with a user.
The access keys are associated to users.
In case you only want to use the feedback tool within an SSO enabled domain it is not required to use an accesskey. In this case the ‘regular’ user session will be used meaning the feedback is saved by the user account.
Below steps take you through the setup of User group, user and access key
User group
- Log on to the Planon webclient with Admin rights.
- Open the TSI ‘Usergroups’.
- Create a new usergroup with the following attributes.
| Attribute | Value |
|---|---|
| System name | FeedbackTool |
| Description | FeedbackTool |
| Function profile | FeedbackTool (the one created above) |
- Click on the ‘Product definitions’ button in the action menu and add the following product definitions:
- EnterpriseServiceAPI
User
- Go to selection level ‘Details’ and selection step ‘Users’.
- Create a new user with the following attributes.
| Attribute | Value |
|---|---|
| System name | FeedbackTool |
| Description | FeedbackTool |
| Begindate | Current date |
- Click on the ‘Usergroups’ button in the action menu and add the usergroup ‘FeedbackTool’.
- Go to selection level ‘Settings’ and selection step ‘Access keys’. If this selection step is not available, it should be added by using the ‘TSI manager’.
Accesskey
The accesskey generated here is required to store in the template which will be explained in the further sections.
- Create a new accesskey with the following attributes.
| Attribute | Value |
|---|---|
| User | FeedbackTool |
| Name | FeedbackTool |
| Expiry date-time | Set this to the desired date-time. After this date, the key will not be valid anymore and a new key should be generated. |
- By saving the new accesskey, Planon will automatically generate the accesskey. This key will be used in the url in the notification.
Please refer to the Planon webhelp for more details on Access keys. https://webhelp.planoncloud.com/en/#page/Accounts/t_generating_access_keys.html
Notification
The email notifications requesting for feedback are sent using Notify Once Definition feature in Planon. This chapter contains an example on how this can be done.
Planon report
- Log on to the Planon webclient as supervisor.
- Open the TSI ‘Workorders’.
- Go to selection level ‘Details’ and selection step ‘Communication logs’ or ‘Order documents’ depending on your configuration.
- Click on the button ‘Report’.
- Create a new report with the following attributes. Select as template a html template.
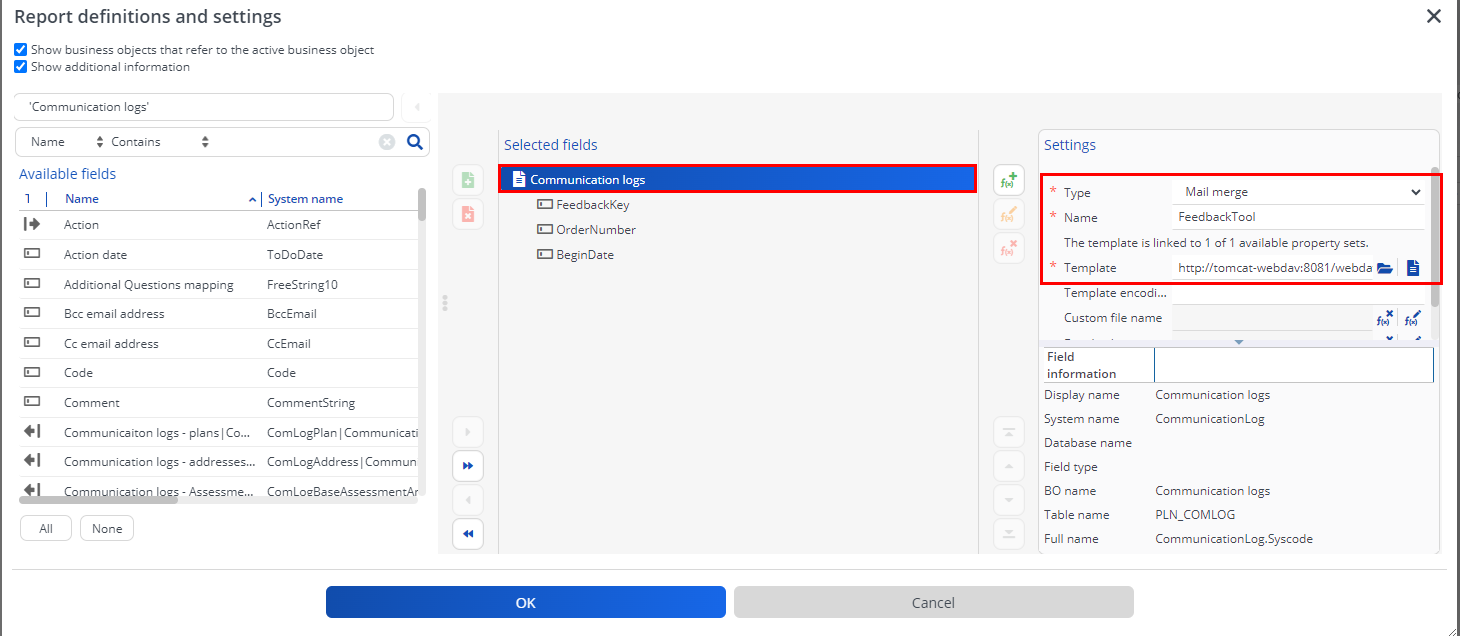
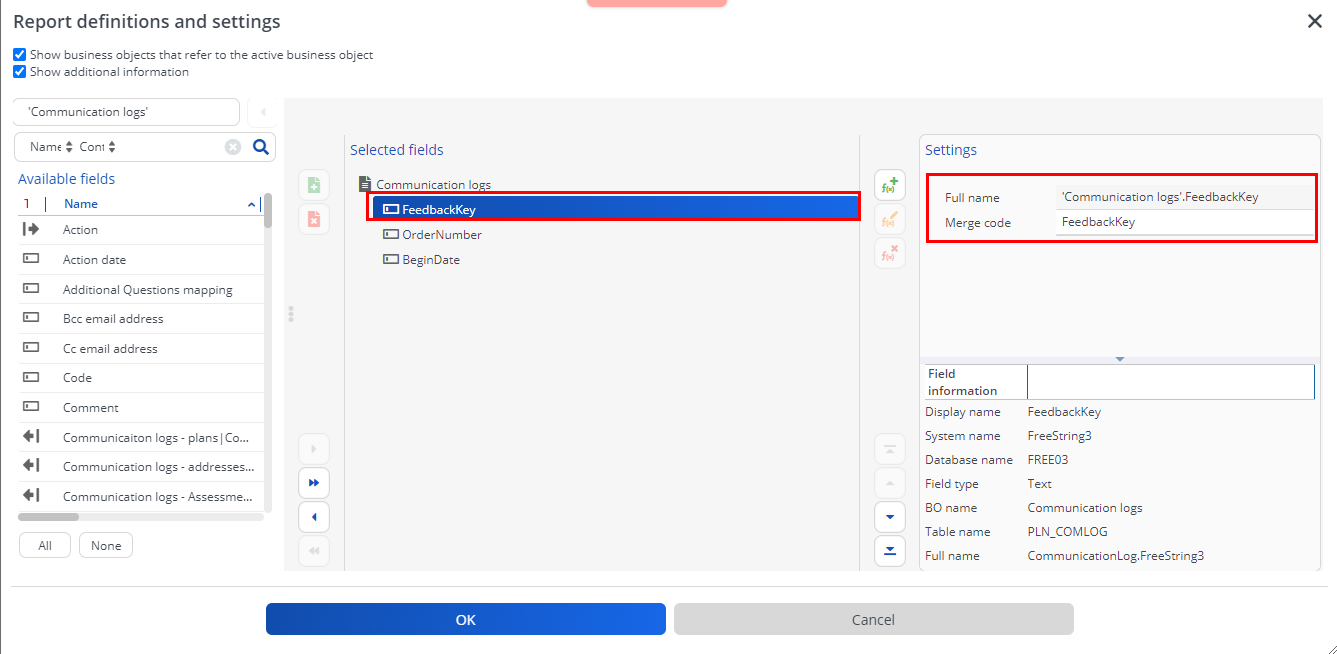
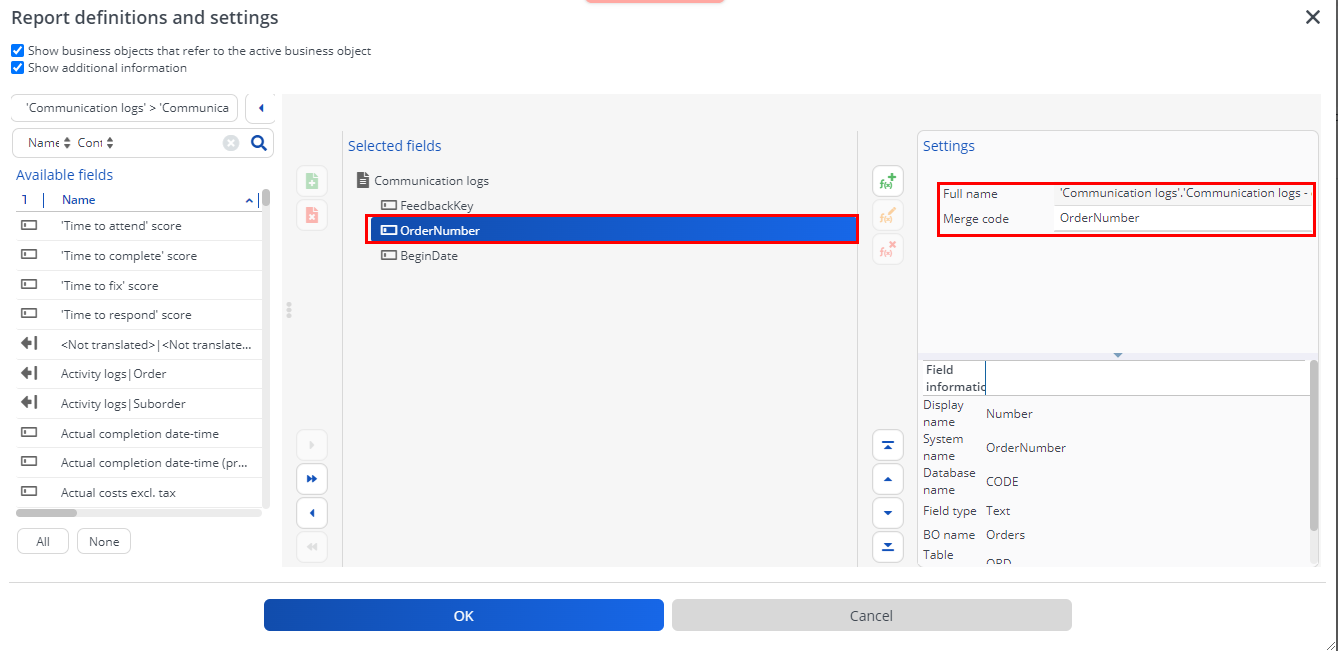
When a notification will be sent, the values of the ‘FeedbackKey’, ‘OrderNumber’ and ‘Language code’ fields will be parsed into the html template (see next paragraph).
Html template
The html template created here is used to decide the format of the email for feedback.
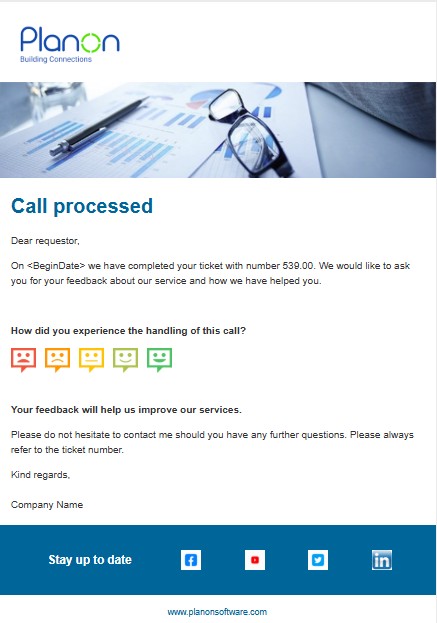
Below is the attached example template emailTemplate.html
Note: this html template will be used as the basis for the notification that will be send to the requestor.
The template has to be modified to make it as per the environment where it is used.
The template contains five links each one for a smiley. Each link has the following format:
<a href="<BASE_URL>/services/sdk/platform/webpages/planonsoftware/apps/feedbacktool/feedbacktool/feedback? accesskey=<ACCESSKEY>&ord=<OrderNumber>&key=<FeedbackKey>&feedback=1&language=<language locale code>"><img border=“0” alt=“Positive” src="images/smiley_5.png" width=“40” height=“40”></a>
In each link the <BASE_URL> tag needs to be replaced with the customers’ Planon URL. Make sure to include the ‘https://’ protocol as well.
In each link the
tag needs to be replaced with a valid access key generated in previous steps. The OrderNumber and FeedbackKey tags match the Systemnames of the fields defined in the report. In this way the values of the corresponding order will be parsed into the template.
The first part of Display of regional settings field (see languages TSI) matches the language to use in the feedback page. If not provided the user language will be used.
The value 1 needs to match the code of the feedback picklist.
The images/smiley_5.png tag in the example refers to the specific image that will be shown as the link. The image should match the picklist option.
Note: The smileys used in the template can be downloaded from smileys.zip
Example of what the template can look like
Logo customization
For changing and configuring the logo displayed on the feedback page follow the given steps below.
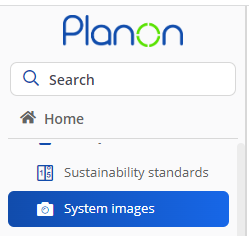
Navigate to the following TSI – System images:
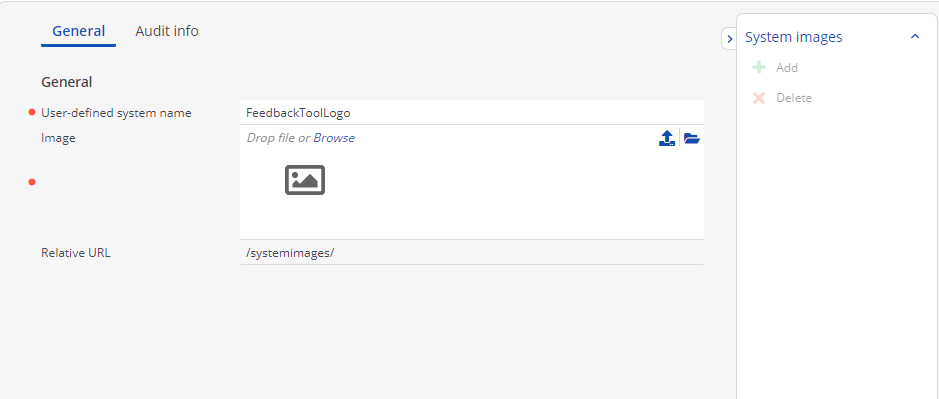
Add a system image item with the following code FeedbackToolLogo
Select a desired Image and save your changes. This should have the following output:
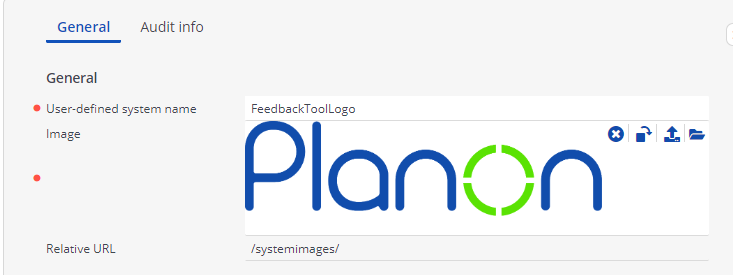
Your custom logo is now set and will be shown on the FeedbackTool Page
Uploading the template
- Browse to the ‘Templates’ file location.
- Copy the HTML file created to this location.
- Browse to the subfolder ‘images’ or create this folder if it is non-existent.
- Copy any images used in the notification template.