Planon Extension - File Transfer Worker
Introduction
This document outlines the functionality of the Planon Extension - File Transfer Worker.
The worker can be used to transfer files from or to the Planon Enterprise Talk WebDAV. Protocols supported are FTP, SFTP, FTPS and WebDAV.
The app now also comes a new worker called PGP (Pretty Good Privacy) Worker which is used for encryption & decryption of files using PGP approach.
Prerequisites
Environment
This app is designed to work with Planon L109 and above.
Constraints
The worker can only upload or download files on the Enterprise Talk WebDAV
The encryption & decryption supported is only using PGP (Pretty Good Privacy)
PGP worker is configured only using Import Document
All the workers part of this app has their own setting for input source. Do not use Data Source on the Import or Export Document to configure the source location
Required (free)fields
N/A
Assumptions
N/A
Features
This chapter describes the features of the extension for kanban board app.
Transfer files to Planon
The worker planonsoftware.apps.filetransferworker.TransferFileToPlanon can be used to download files from a third-party system into Planon. Protocols that can be used for this are FTP, SFTP, FTPS or WebDAV.
Transfer files from Planon
The worker planonsoftware.apps.filetransferworker.TransferFileFromPlanon can be used to upload files from Planon to a third-party system. Protocols that can be used for this are FTP, SFTP, FTPS or WebDAV.
Transfer files within Planon
The worker planonsoftware.apps.filetransferworker.TransferFileWithinPlanon can be used to transfer files within Planon. For example within the Enterprise Talk WebDAV or from/to the Documents WebDAV.
PGP Encryption & Decryption
The worker planonsoftware.apps.filetransferworker.PGPWorker can be used encrypt or decrypt the files before transferring files from Planon or to Planon.
How does it work?
This chapter contains the functional and technical description of the features.
Deployment
Once the app is installed and activated, a Enterprise Talk interface must be configured through the Planon TSI ‘Enterprise Talk’ to be able to create and configure a worker instance that downloads / uploads a file.
Installation
This chapter describes the steps required to install this app on your Planon environment.
Installation Process
There are two ways to install the app:
- Using the Marketplace
- Manual installation
Install the app by using the marketplace
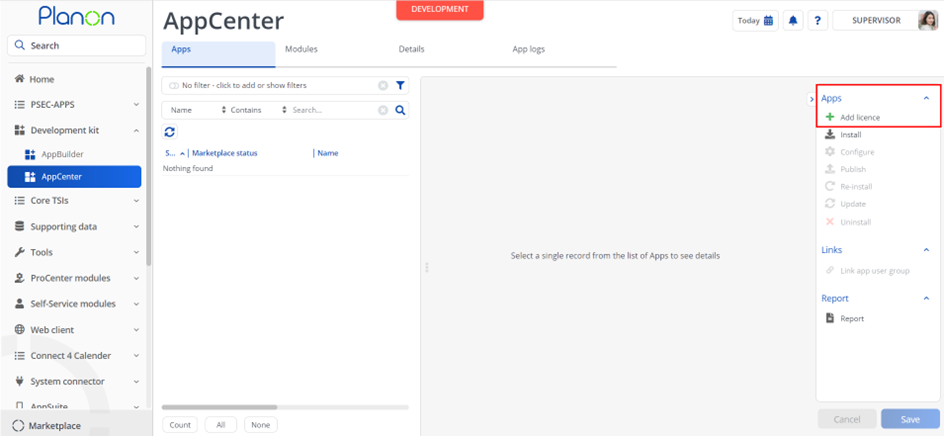
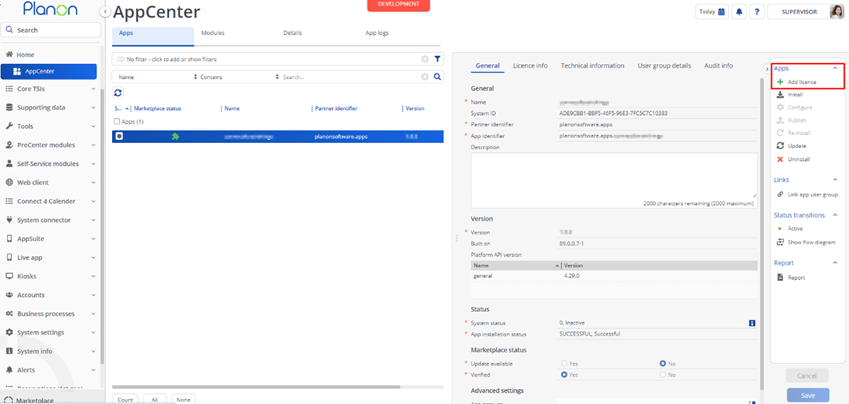
In case your environment is configured to use the Planon app store the only thing required to install the app is to add the app license in the AppCenter TSI. Planon will automatically download and install the app.
Manual installation
In case you want to perform a manual installation follow the steps below.
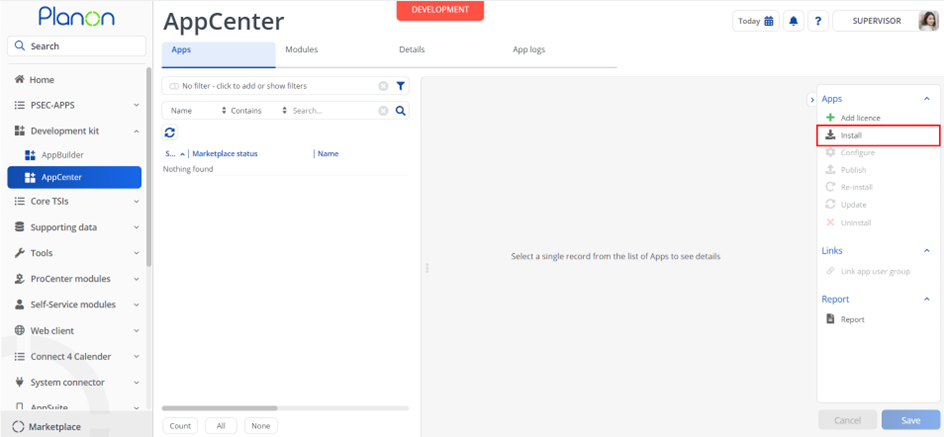
- Open AppCenter TSI from Planon webclient and click on install from action menu
- Browse to the .ppk file
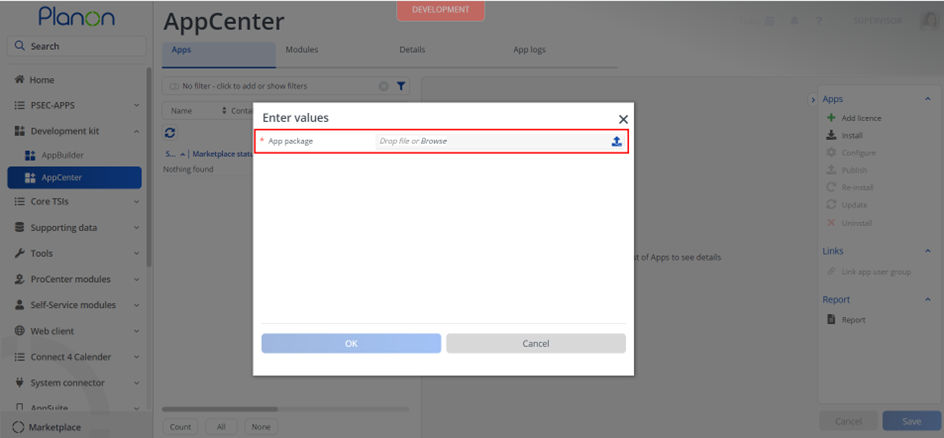
- Click OK to install the app and follow the installation process
- When the app is successfully installed, the app will appear in the AppCenter
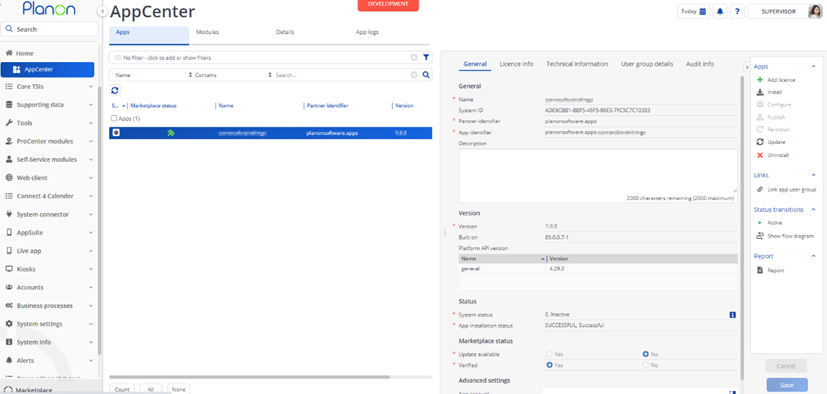
- Add the app license in Apps TSI
Activation
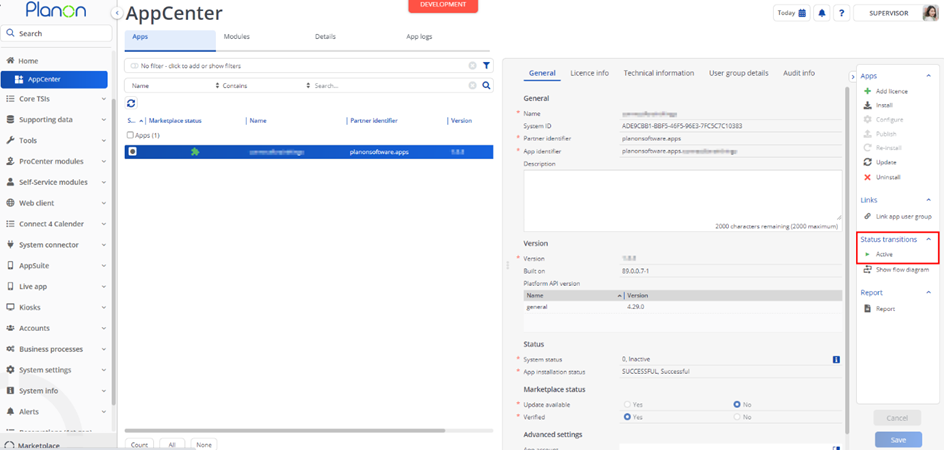
Once the app has been configured, you can activate the app by pressing the Active status transition from the action panel. Always make sure that the required User groups are linked correctly and the Configure action is executed before activating the App.
Configuration
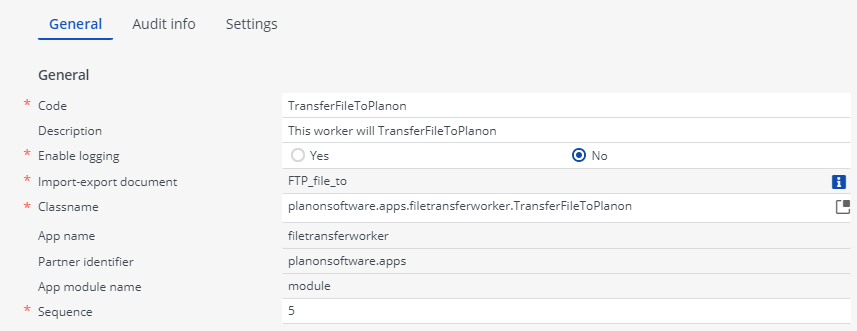
Now that the app is installed, we can add a worker instance in an import-export document. This is done in the TSI ‘Enterprise Talk’:
Select or create a definition, make sure ‘use platform workers’ is set to yes
Drilldown to ‘Documents’ and select or create a document
Drilldown to ‘Business Object Definitions’, ‘Import-export worker’
Click add in the action panel
You can now add a new worker instance of either the ‘TransferFileToPlanon’ or the ‘TransferFileFromPlanon’.
Third party system configuration
This app does not necessarily require any third party system configuration. It might be needed to whitelist (Planon cloud) IP ranges in order for the connection to be possible. This is outside the scope of this app / worker.
App settings
This chapter describes and explains the settings that are available for this app. The settings for the worker can be found in the ‘Settings’ tab.
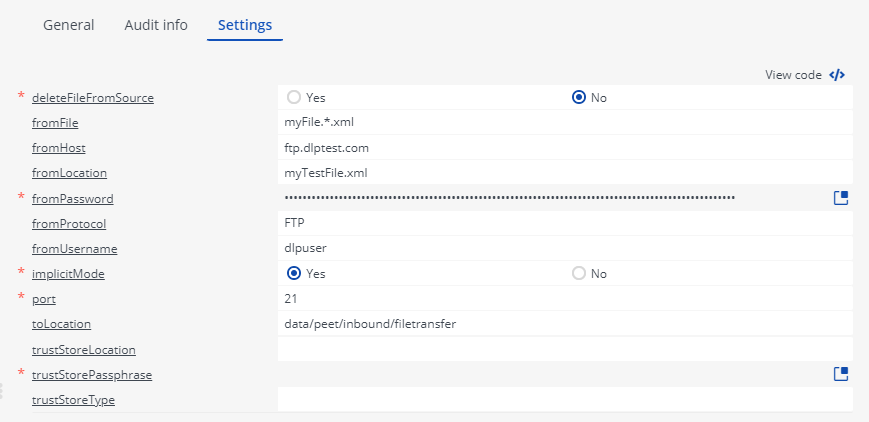
Description of TransferFileToPlanon settings
| Setting | Explanation |
|---|---|
| deleteFileFromSource | Set whether to delete the files from source after downloading to Planon. |
| sourceFile | The name (and extension) of the file to download. Can be a regular expression to move files matching a pattern. |
| sourceHost | The hostname where to download the file from. |
| sourceLocation | The location on the host where to move the file from. Leave empty to move from the root. Do not use Data Source on the Import or Export Document to configure the source location |
| sourcePassword | The password for the host. |
| sourceProtocol | The protocol to use for the connection. Can be FTP, SFTP, FTPS or WebDAV. |
| sourceUsername | The username for the host. |
| Implicitmode | Set whether to use implicit or explicit FTP mode. |
| port | The port for the connection. |
| targetLocation | The location in Planon to move the file(s) to. This is always a Enterprise Talk location. |
| trustStoreLocation | The location of the truststore. It is assumed this is stored on the Enterprise Talk WebDAV. |
| trustStorePassphrase | The password of the truststore. |
| trustStoreType | The type of the trusttore, for example jks or pkcs12. |
| privateKeyLocation | The location and name of the private key that should be used for public/private key authentication. Only encrypted keys are accepted. Example: data/peet/keys/privatekey.ppk. |
| privateKeyPassphrase | The passphrase used for the private key. |
| datetimeFileMask | Use this setting to add a datetime mask to transferred files. Example: ddmmyyyy uses the following date format: 31122025 |
Description of TransferFileFromPlanon settings
| Setting | Explanation |
|---|---|
| deleteFileFromSource | Set whether to delete the files from source after uploading to third party system. |
| implicitMode | Set whether to use implicit or explicit FTP mode. |
| port | The port for the connection. |
| sourceFile | The name (and extension) of the file to upload. Can be a regular expression to move files matching a pattern. Do not use Data Source on the Import or Export Document to configure the source location |
| sourceLocation | The location of the file to upload. This must be an Enterprise Talk location. |
| targetHost | The host where the file should be uploaded to. Leave empty to upload in the root. |
| targetLocation | The folder in which the file should be uploaded. Leave empty to upload in root. |
| targetPassword | The password of the toHost. |
| targetProtocol | The protocol to use for the connection. Can be FTP, SFTP, FTPS or WebDAV. |
| targetUsername | The username of the toHost. |
| trustStoreLocation | The location of the truststore. It is assumed this is stored on the Enterprise Talk WebDAV. |
| trustStorePassphrase | The password of the truststore. |
| trustStoreType | The type of the trusttore, for example jks or pkcs12. |
| privateKeyLocation | The location and name of the private key that should be used for public/private key authentication. Only encrypted keys are accepted. Example: data/peet/keys/privatekey.ppk. |
| privateKeyPassphrase | The passphrase used for the private key. |
| datetimeFileMask | Use this setting to add a datetime mask to transferred files. Example: ddmmyyyy uses the following date format: 31122025 |
Description of TransferFileWithinPlanon settings.
| Setting | Explanation |
|---|---|
| deleteFileFromSource | Set whether to delete the files from source after transferring files to toLocation. |
| sourceFile | The name (and extension) of the file to transfer. Can be a regular expression to move files matching a pattern. |
| sourceLocation | The location of the file to transfer. Do not use Data Source on the Import or Export Document to configure the source location |
| sourceLocationType | Can be either ENTERPRISETALK or WEBDAV |
| targetLocationType | Can be either ENTERPRISETALK or WEBDAV |
| targetLocation | The folder in which the file should be transferred. Leave empty to upload in root. |
| datetimeFileMask | Use this setting to add a datetime mask to transferred files. Example: ddmmyyyy uses the following date format: 31122025 |
Description of PGPWorker settings.
| Setting | Explanation |
|---|---|
| isEncryption | Determines if the files from source location needs to be encryption or decryption. When set to Yes, files are encryption. Else files are decrypted. |
| sourceLocation | The location of the files to encrypt or decrypt based on the setting isEncryption. Do not use Data Source on the Import or Export Document to configure the source location |
| sourceFileName | The name of the source file to encrypt or decrypt. Multiple files are supported by providing regular expression |
| targetLocation | The folder in which the files are transferred after encryption or decryption. |
| publicKeyLocation | The location including the filename of the public key needed for encryption |
| privateKeyLocation | The location including the filename of the private key needed for decryption |
| secretKey | The secret key needed to decrypt the files |
| extensionForOutputFile | Extension for the output file |
| extensionMode | This determines the extension of the output files. Supported values are KEEP – Retains the current extension ADD – Adds the new extension to the current extension REPLACE – Replaces the current extension with the new extension provided for the setting extensionForOutputFile REMOVE – Removes the extension |
| outputFileNameSuffixDateFormat | Date format to be added as the suffix to the output file |
The worker also supports the Post process policy on the Import or Export Document after the encryption or decryption of the source files.
All the successfully processed files handled as per Post Process Policy for Sucess where as failed files are handled as per Post Process Policy on Failure.
Troubleshooting
This chapter describes common things and known issues to check in case the app is not working as expected.
Error handling
For all components the errors will be written in the server logs. For this app this will be in the WildFly logging. Additionally errors might be found in the Enterprise Talk TSI.