Planon Extension - Google Maps functionality
Introduction
This document outlines the specification of the Google Maps App (TSI Action). This solution allows to show properties stored in Planon in a Google Maps window within and provides means for filtering and calculating distance between locations.
This document also describes the installation and configuration of the App. It comprises the technical installation of the software component(s) and the configuration in Planon.
Prerequisites
Environment
This app works for Planon L71 and higher.
Constraints
- This solution will not work without a Google API key
Required (free) fields
For the required fields please refer to chapter.
Assumptions
The default language of the messages shown to the user is English.
The properties are shown on the map based on their geo codes within Planon.
The Google Maps integration is performed client side; the client browser has to comply with the Planon web client standard.
In order for this app to work you need a Google API key, this is not provided with this app
Features
The purpose of this app is to give the end user graphical insight of the Property locations and their characteristics.
Feature 1: Show property locations in graphical map
In order the give the end user insight in the Property locations a new button is introduced within the user interface. This button gives the user the ability to open a map, based on Google Maps, representing all or the selected properties.
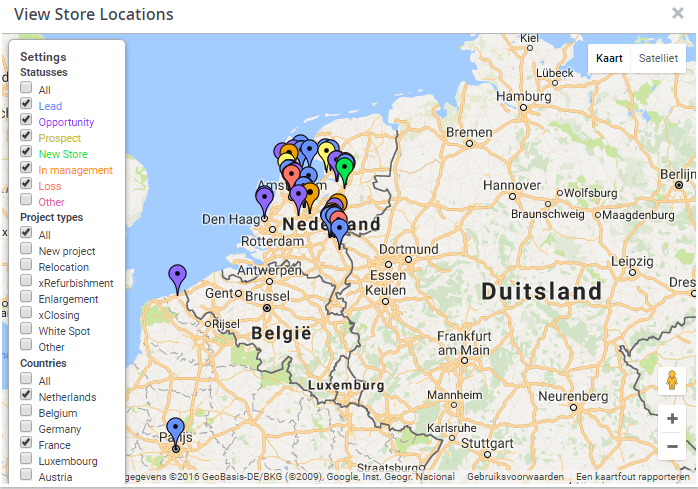
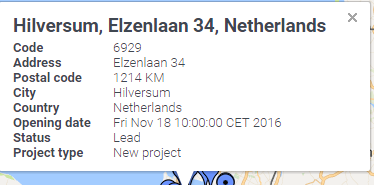
Whenever the user moves the mouse over a property location on the map a detail window is represented showing details about the property.
Feature 2: Filter properties
The user has the ability to enable one or multiple selection boxes indicating which properties to show on the map. The user can filter on property statuses and/or the country of the properties. The user can configure in the settings which statuses or countries should be added as a filtering option in the filter menu. The user can also choose to hide the filter menu, by not configuring any statuses or countries in the app settings.
Feature 3: Calculate routes and directions
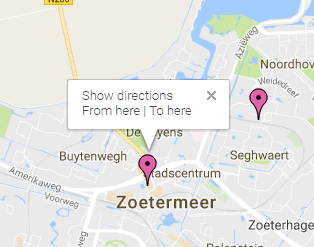
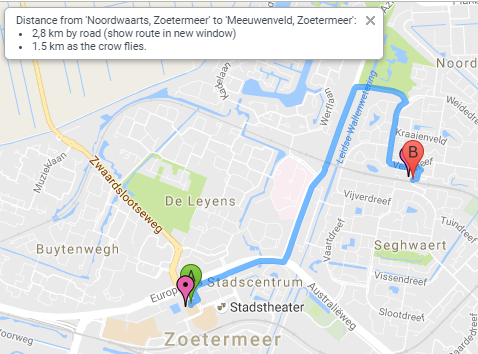
The user can calculate the route, distance and directions between two properties shown in the map. It is possible to calculate the distance between two properties via the road and as the crow flies. A route between properties can be opened in a new Google Maps window to use the full functionality of Google Maps, out of the Planon environment.
Solution Approach
This chapter contains the description of the solution proposed.
The app contains a TSI Action which is responsible for generating a graphical map representing all property locations stored in Planon. The graphical map is based on Google Maps and contains Google Maps markers for each property location. A detailed information window is shown as the user moves the mouse pointer over a certain property marker.
Within Planon; the user has the ability to make a selection of properties to show in the map. If no selection is made, all available properties are shown.
Within the UI of Google Maps; a menu with checkboxes is presented allowing the user to enable / disable showing certain property statuses within the map.
The TSI Action can be registered on the Planon business objects (BO):
Properties [Property]
- Any other UDBO as part of Property
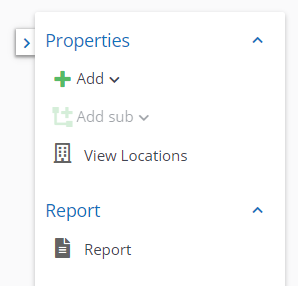
The TSI Action is represented as a new button within the action menu. The name of the button can be configured when adding the button to a layout. An example of the button (‘View Locations’) is shown in the screenshot.
The user has the ability to select one or more properties within Planon. If no selection is made, all properties are shown within the Google Maps interface.
A property is shown on the map if longitude and latitude values are present. If this field is not present, the property is not shown on the map.
Field mapping
The table below describes the field mapping of the geographical fields within the Planon Building [UsrBuilding] BO.
| Field name [systemname] | Planon field type |
|---|---|
GPS coordinates [Location] | GPS |
The table below describes the field mapping between the detail above described above and the Planon Building [UsrBuilding] field.
| Detail Window Field | Property Field [systemname] |
|---|---|
| Code | Code [Code] |
| Address | Address [Address] |
| Postal Code | Postal code [PostalCode] |
| City | City [City] |
| Country | Country or Country2 if setting useCountry2 is true |
| Date ownership | Date ownership [PurchaseDate] |
| Status | Status [RefBOStateUserDefined -> Name] |
Installation
This chapter describes the steps required to install this app on your Planon environment.
Installation Process
There are two ways to install the app:
- Using the Marketplace
- Manual installation
Install the app by using the marketplace
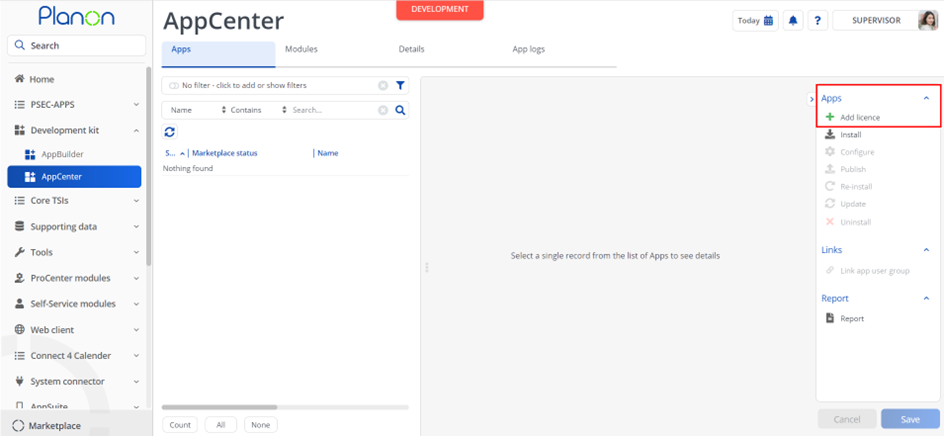
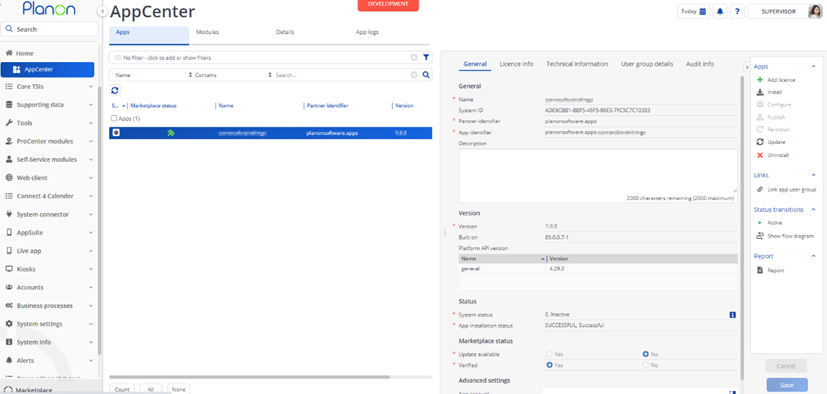
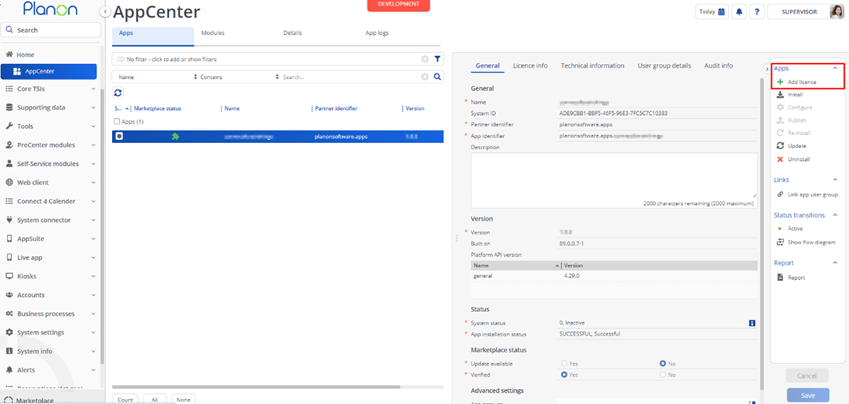
In case your environment is configured to use the Planon app store the only thing required to install the app is to add the app license in the AppCenter TSI. Planon will automatically download and install the app.
Manual installation
In case you want to perform a manual installation follow the steps below.
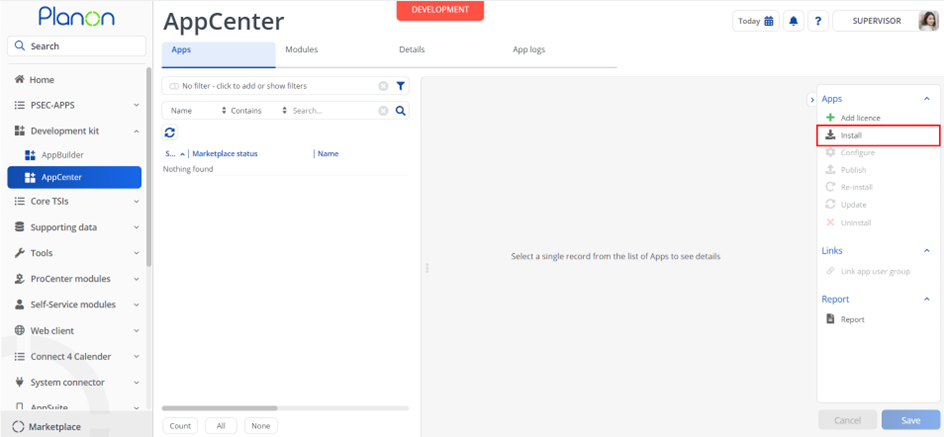
- Open AppCenter TSI from Planon webclient and click on install from action menu
- Browse to the .ppk file
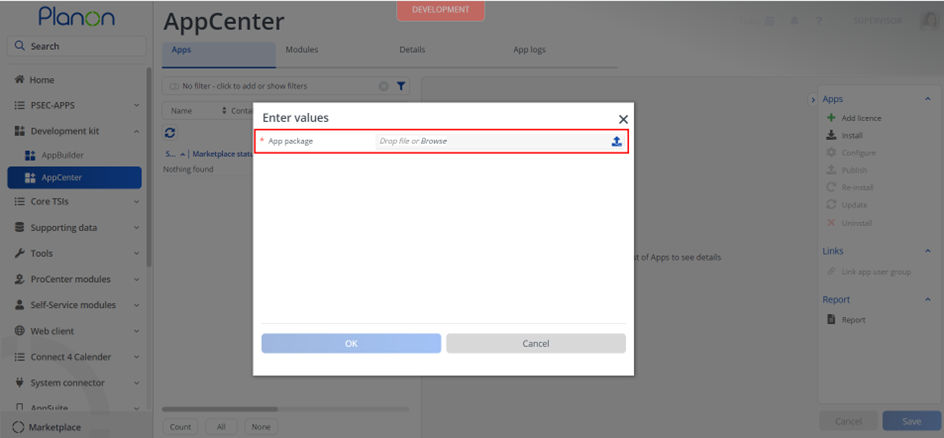
- Click OK to install the app and follow the installation process
- When the app is successfully installed, the app will appear in the AppCenter
- Add the app license in Apps TSI
App Configuration
Configure the app settings, called ‘Module settings’, by following the steps below.
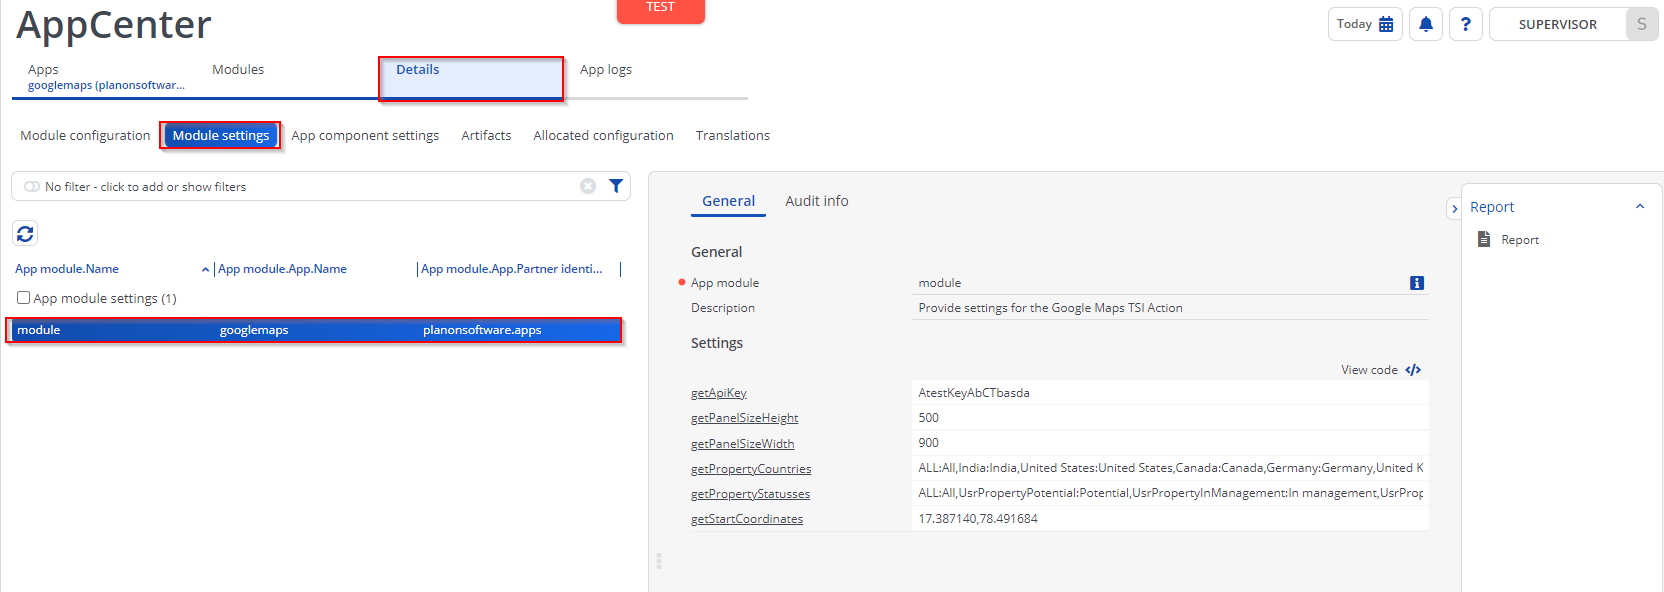
In the TSI ‘AppCenter’, select the app and drill down to the selection step Details.
Select ‘Module settings’ in the sub menu and select the app settings.
On the right you can view and edit the app settings.
Planon also offers an option to see the settings in code, this can be done by selecting the following button: View code
Description of settings
The app gives you the option to configure the following settings for the app:
apiKey - Google Cloud API Key (mandatory) You have to set the Google Cloud API Key here. The Google Maps JavaScript API and Google Maps Directions API should be activated on this key.
getPanelSizeHeight - Panel size height The height of the Google Maps window. When this setting is empty, the default height of 300px will be used.
getPanelSizeWidth - Panel size width The width of the Google Maps window. When this setting is empty, the default width of 600px will be used.
getPropertyCountries- Country filters Countries to filter on, separated by commas. Include ‘ALL’ to have to possibility to show all properties. Possibility to enter custom label name after semicolon, example: ‘ALL:All countries,United States:USA,…
getPropertyStatusses - Property status filters Property statuses to filter on, separated by commas. Enter systemfieldname and a label like this: ‘UsrPropertyDisposed:Disposed’. Include ‘ALL:All’ to have to possibility to show all properties. For example: ‘ALL:All,UsrPropertyPotential:Potential,UsrPropertyInManagement:In management,…’
getStartCoordinates - Map start coordinates The latitude and longitude of what should be the centre of the Google Maps window when it’s opened, separated by a comma. For example: -34.397,150.644
geoCodeAddresses Enable this setting to geocode addresses that do not have coordinates in Planon in order to show them on the map. Be aware that this requires geocoding API to be enabled in your Google account. For proper geocoding the fields Address, HouseNumber, PostalCode, City and Country should be added to the ‘displayPropertyData’ setting.
markerIconMapping Use this setting to map the color of the markers displayed on the map based on the Property status. It is mandatory to at least provide the ‘default’ mapping.
dateFormat The date fields on the legend are shown in the format configured
dateTimeFormat The date time fields on the legend are shown in the format configured
Activation
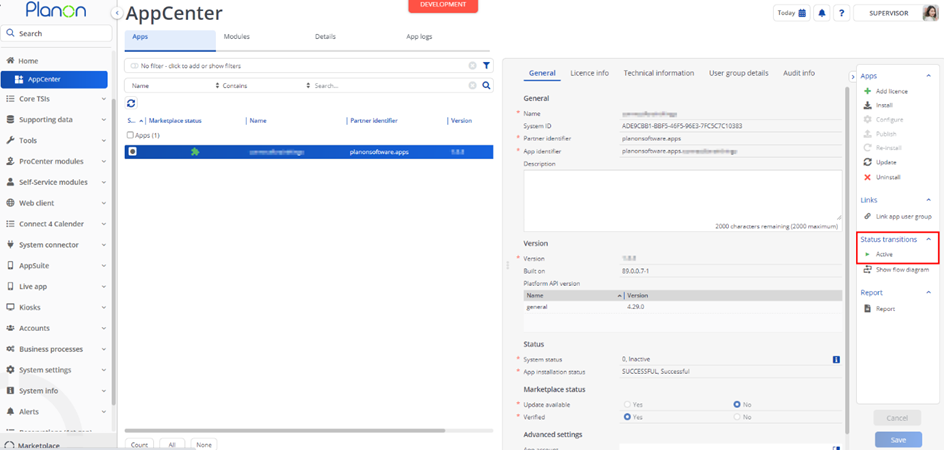
Once the app has been configured, you can activate the app by pressing the Active status transition from the action panel. Always make sure that the required User groups are linked correctly and the Configure action is executed before activating the App.
Google Maps configuration / requirements
Google requires applications to use an API key to connect for many of their services and since June 22th, 2016 also for Google Maps.
A key can be created and configured on https://console.developers.google.com. The usage of the API key is free, but you need to have billing enabled on your Google Cloud account to enable all features.
The key must have the following API’s activate
Google Maps Directions API
Google Maps JavaScript API
Google Maps GeoCoding API (if enabled in settings)
The key must be provided via the settings configuration
Planon Configuration
Field definer
Log in to Planon ProCenter using the supervisor account (or any account with sufficient rights to ‘UI Configuration’).
Open the Field definer.
Configure Property BO
Find the business object with system name ‘Properties’.
- Set the status of the Business Object to ‘Under construction’ via the action menu.
Apply the following steps:
Go to the selection level ‘Details’ and select the selection step ‘Extended Actions’.
Click on ‘Add’ in the action menu and create the action with the following details.
| Property | Value |
|---|---|
| Web2Client class name | planonsoftware.apps.GoogleMapsTsiAction |
| System name | GoogleMapsTsiAction |
Go back to the selection level ‘Business objects’.
Set the status of the Business Object with system name ‘Properties’ to ‘Completed’ via the action menu.
Repeat above steps for any user-defined business object under Properties where you want to use the Google Maps feature.
Add TSI Action button to layout
Navigate to the TSI ‘Layouts’.
Select the business object ‘Properties’ and go the ‘Layouts’ selection step.
Choose the layout in which you want to add the button and set it under construction by clicking on the lock icon.
Click on ‘Actions’ in the layout and add the ‘Google Maps’ action by dragging it in to the Actions section.
Save the layout and set the layout as completed by clicking on the open lock.
Repeat above steps for any user-defined business object under Properties where you want to use the Google Maps feature.
Troubleshooting
Error handling
- Errors are recorded in the server logs:
- Tomcat log for web components
- Webpages
- PSS modules
- Stepview
- TSI Action
- JAX-RS webservices
- Wildfly log for server-side components
- Business rules
- Scheduled tasks
- Workers
- Event Connector
- Tomcat log for web components
- UI components (TSI Actions) also display errors in the interface